

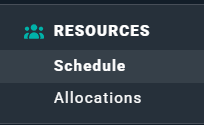
Figure 1 - The Resources Navigation Option, with Schedule and Allocations Sub-Items
- Members
- Projects
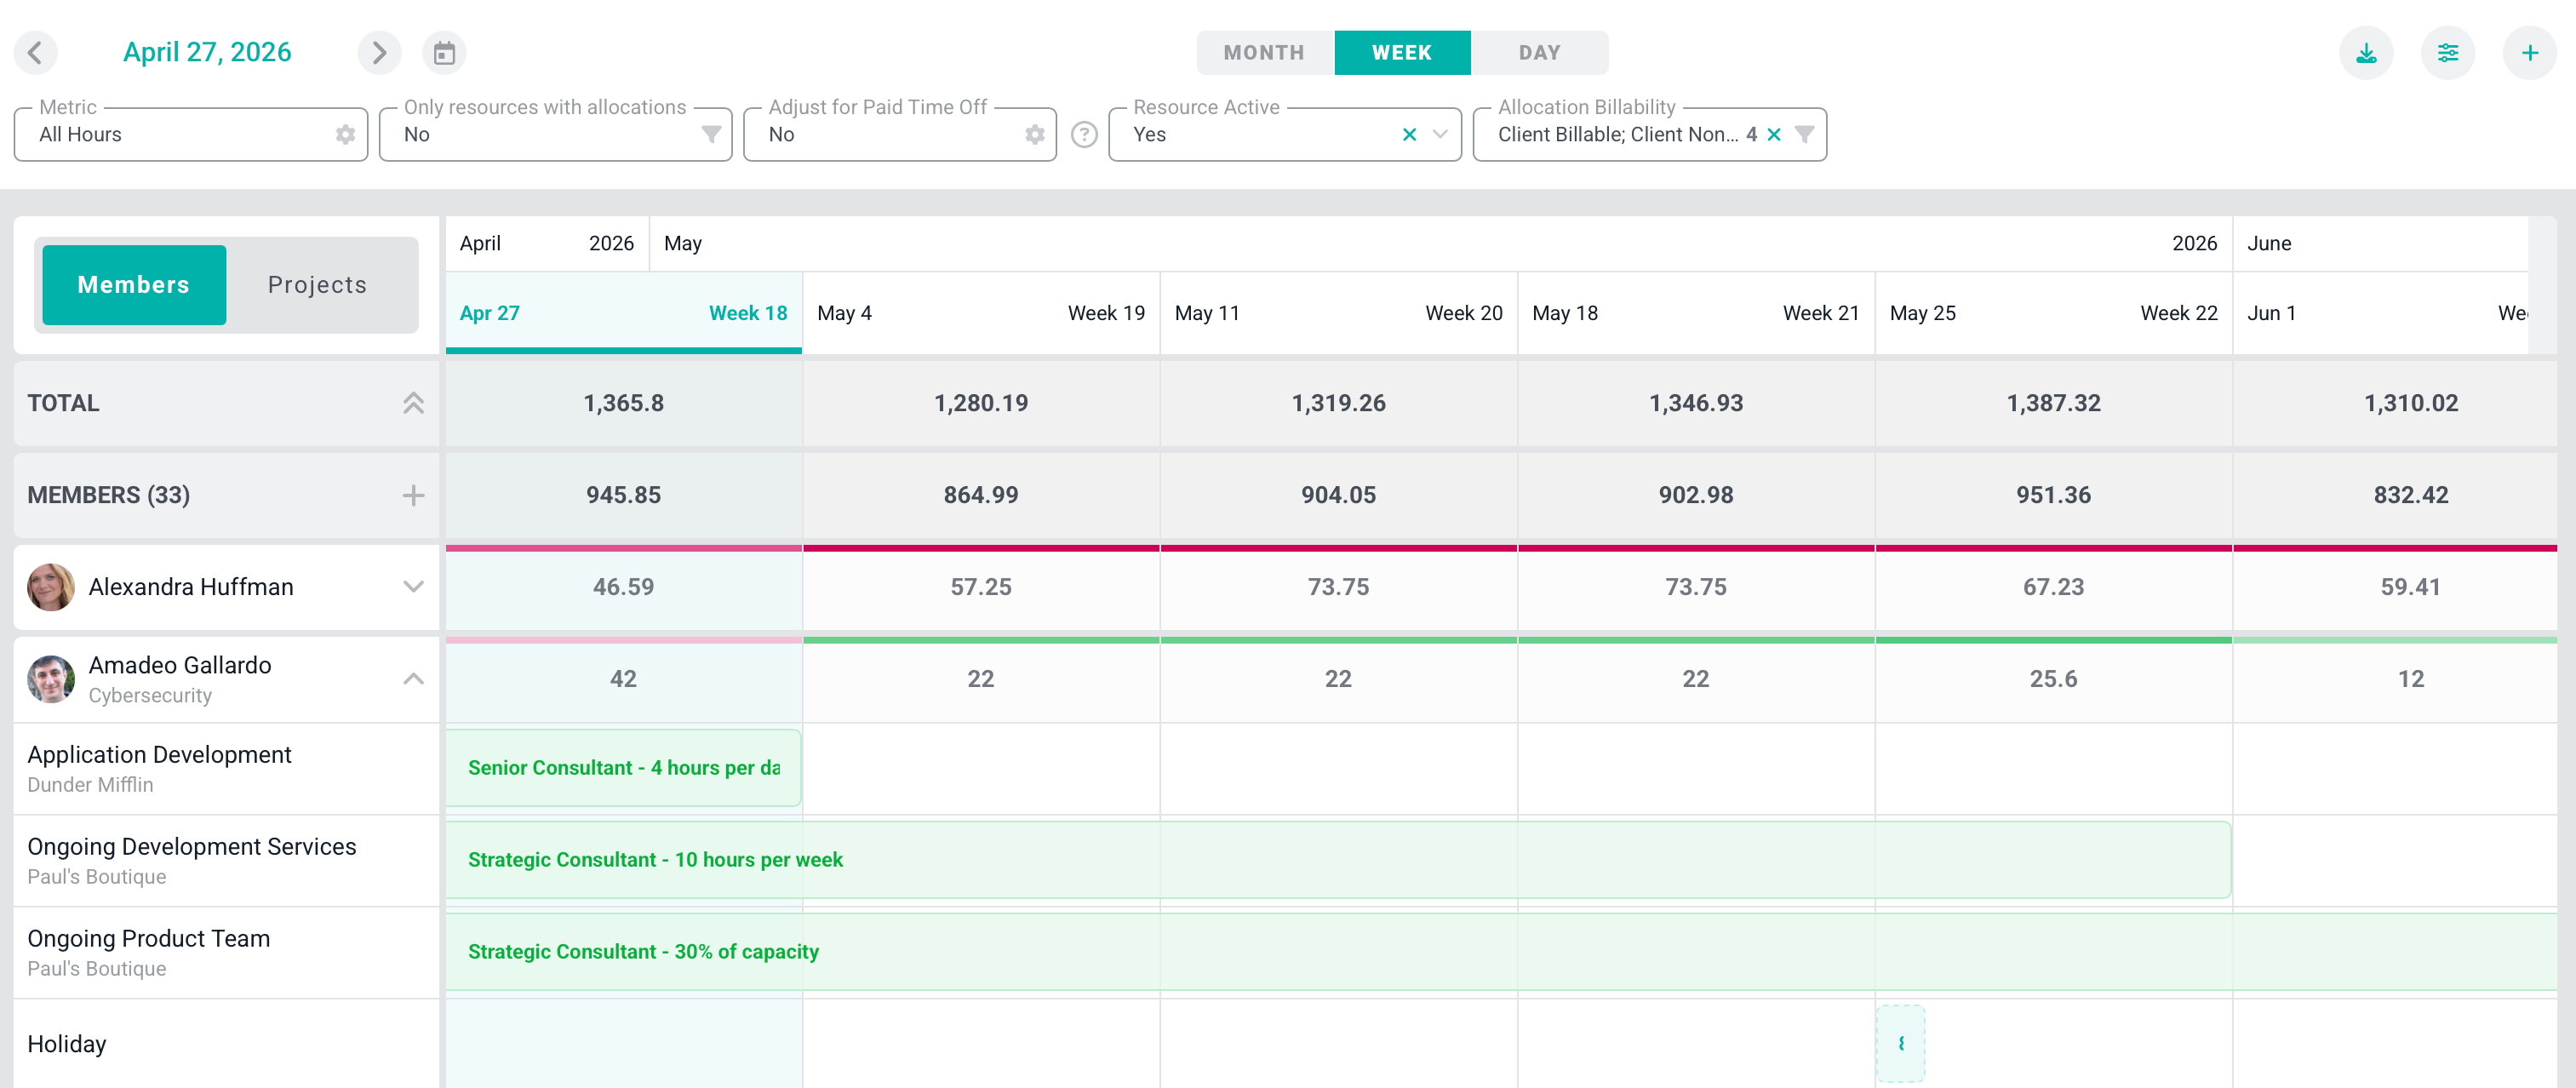
Figure 2 - The Schedule
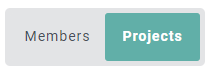
Figure 3 - Switch the Allocations View to Projects
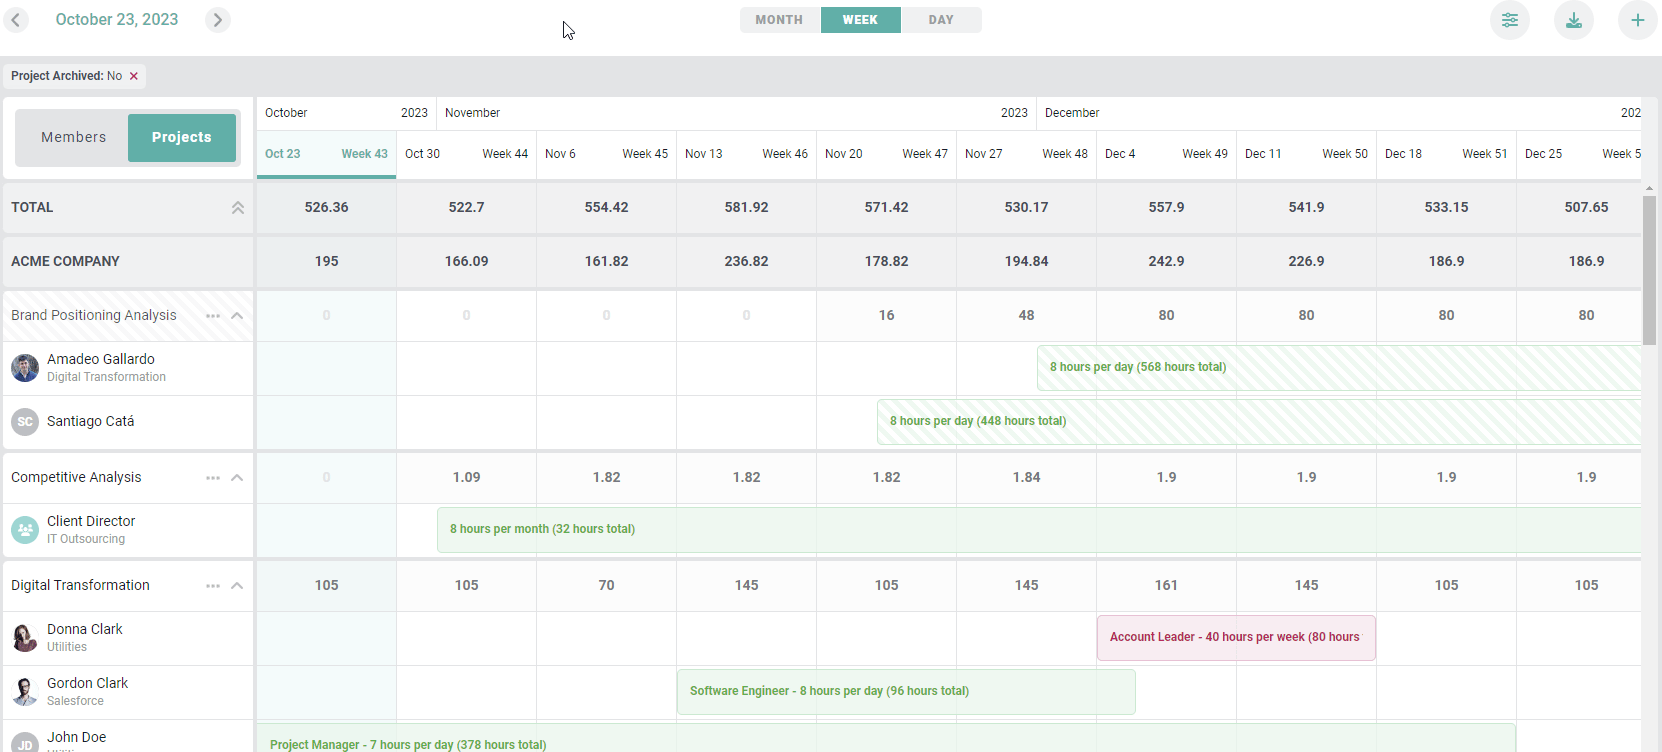
Figure 4 - Projects View of Allocations
Color-coded Resource Allocations
Resource allocations are color-coded (Figure 5) to provide visual cues as to the type of time that is being planned for a resource. The following colors correspond to the type of time being allocated:- Green: Client Billable
- Red: Client Non-billable
- Yellow: Internal
- Blue: Time Off
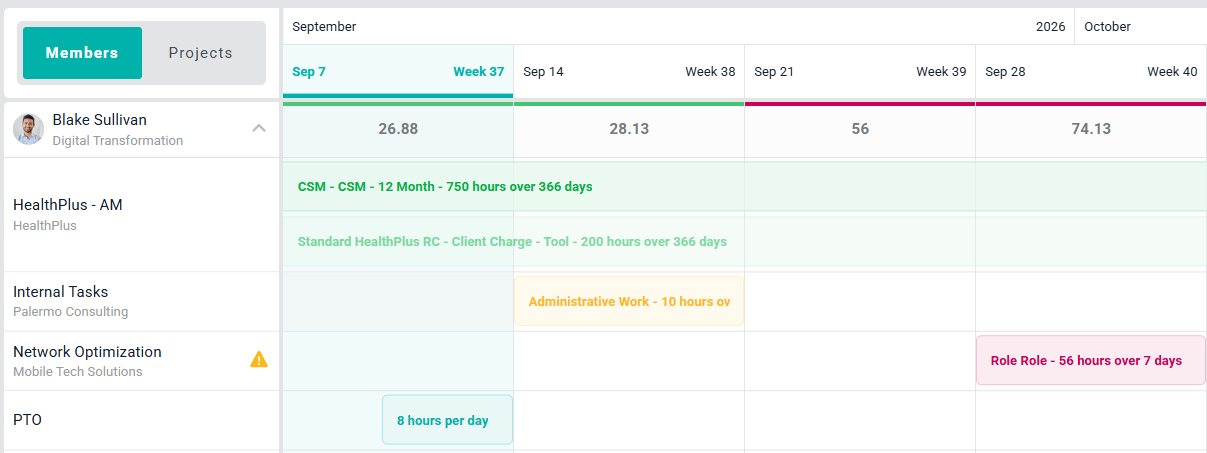
Figure 5 - Allocations in Ruddr are Color-Coded to Distinguish the Type of Time being Planned

Figure 6 - Alert for Members Allocated but Not Added to the Project
Tentative Allocations
Allocations that are made to a Tentative project (a project with a “Tentative” project status) are shown with a striped treatment (Figure 7).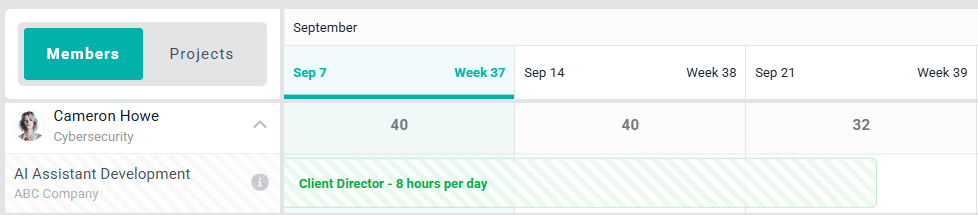
Figure 7 - Tentative Allocations are Shown with a Diagonal Striping
Soft Bookings
Allocations with a Soft booking type are shown faded (at reduced opacity), as in the Standard HealthPlus RC allocation in Figure 5, so you can distinguish provisional staffing from confirmed bookings at a glance. Hovering over an allocation displays its booking type.Customizing the View
Time Unit Selector
The resource allocations grid can be set to a day, week, or month view. This allows you to “zoom out” to evaluate resourcing over a long period of time or “zoom in” to evaluate resourcing for the coming days and weeks. To change this zoom level, simply select the desired setting from the time unit selector (Figure 8) at the top-center of the resource allocations grid (Figure 4).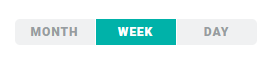
Figure 8 - The Time Unit Selector Allows You to Change Views of the Allocations Grid
Start Date Selector
At the top-left of the allocations grid (Figure 4) is the start date selector (Figure 9). This allows you to pick the starting date for the allocations grid. Depending on the setting of the time unit selector, you can pick a specific day, week, or month.
Figure 9 - The Start Date Selector Sets the Beginning Date for the Allocations Grid
Placeholders
When the allocations grid is grouped by member, you will notice a placeholders section (Figure 10) after the workspace members. Placeholders are virtual resources that can be used for allocations when you aren’t sure which actual workspace member will be assigned to the work. Using these types of allocations can help inform the internal recruiting team as to the types of skills that are needed in the future. Additionally, placeholders can be assigned an Average Bill Rate and an Average Labor Cost. With this data provided, Ruddr can forecast services revenue and services labor cost, respectively, for any placeholders with allocations. Placeholder information can be viewed by hovering over the placeholder avatar (Figure 11).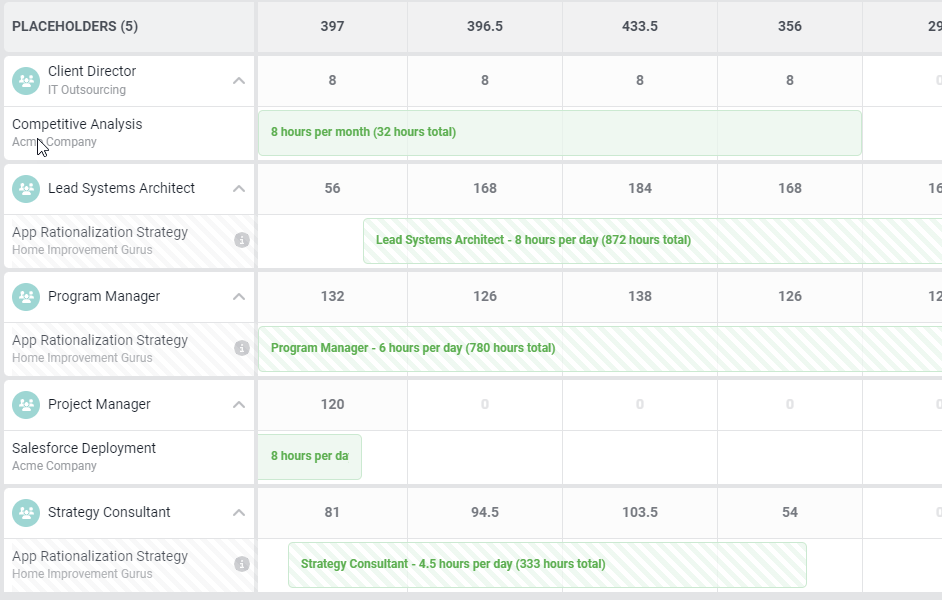
Figure 10 - Placeholders in Resource Allocations
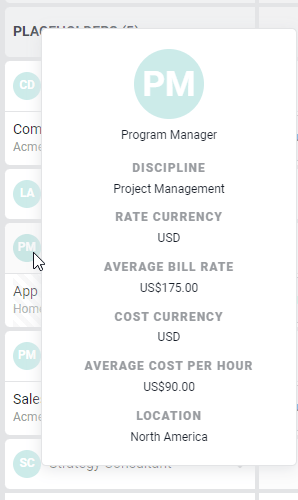
Figure 11 - Hovering Over a Placeholder Avatar Presents the Placeholder Information Card
Filtering the Resource Grid
The filters button (Figure 12) at the top-right of the screen (Figure 4) brings up a Filters drawer (Figure 12) where you can adjust filter settings. The available filters depend on whether the allocations view is grouped by members or by projects.
Figure 12 - The Filters Button Opens the Allocations Filter Drawer
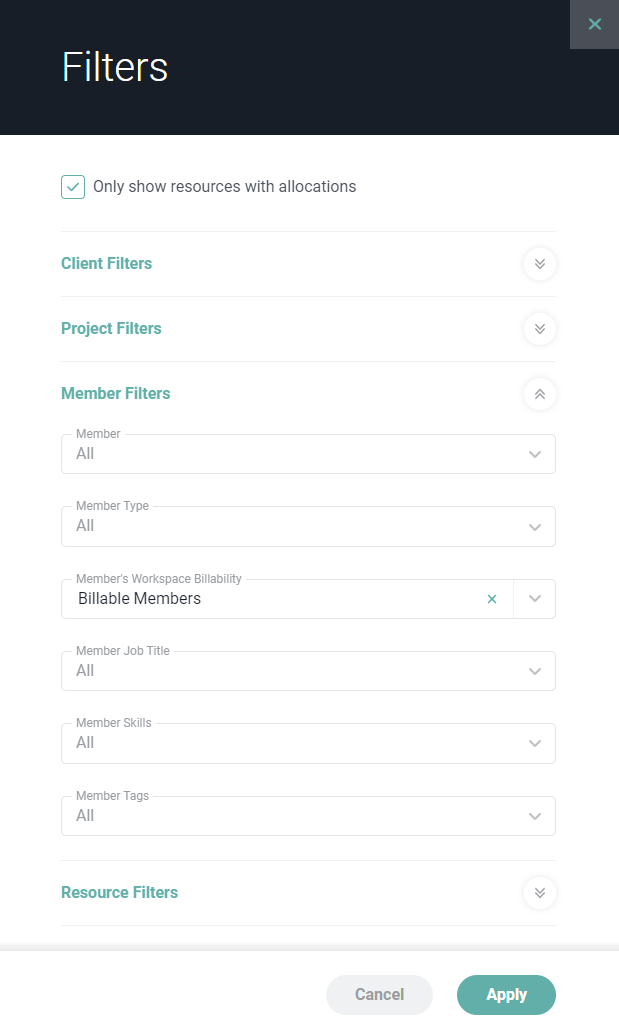
Figure 13 - The Allocations Filter Drawer
Adjusting the Summary Row Metrics
On the Members view of the resource allocations, you will have a Metric drop-down (Figure 14) at the top-left of the screen that allows you to select the metric displayed in the summary rows of the allocations grid. This metric defaults to All Hours.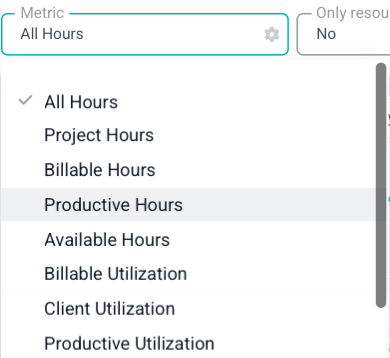
Figure 14 - Change the Metric Displayed for Each Member in the Allocations Grid

Figure 14 - Change the Metric Displayed for Each Member in the Allocations Grid
- All Hours - The number of hours that have been allocated to each workspace member.
- Project Hours - All project hours allocated to each member. This will not include time off.
- Billable Hours - All client billable hours allocated to each member. Non-billable client hours, internal hours, or time off will not be presented when this metric is selected.
- Productive Hours - All client billable, client non-billable, and internal productive hours will be displayed.
- Available Hours - The number of hours that are available to be allocated to each workspace member. This is based on each member’s capacity, which is set by a Workspace Admin.
- Billable Utilization - The planned billable utilization rate for each member based on the allocations. Note that the calculated utilization rate is based on each member’s capacity.
- Client Utilization - All client hours, billable and non-billable divided by the member’s capacity.
- Productive Utilization - The planned productive utilization rate for each member based on allocations for client billable, client non-billable, and internal productive hours.
- Total Utilization - The total planned hours, billable and non-billable divided by the member’s capacity.
- Target Attainment - The percentage of each member’s billable utilization target that will be attained based on the allocations. Note that each member can have a distinct billable utilization target set by a Workspace Admin.
- Available Hours (month view)
- Available Hours (week view)
- Available Hours (day view)
- Billable Utilization (all views)
- Target Attainment (all views)
My Allocations
Within the default Home area of Ruddr, there is a My Allocations section, accessible from the nav bar (Figure 15).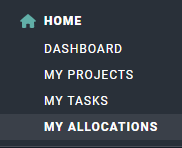
Figure 15 - Access My Allocations via the Home Area
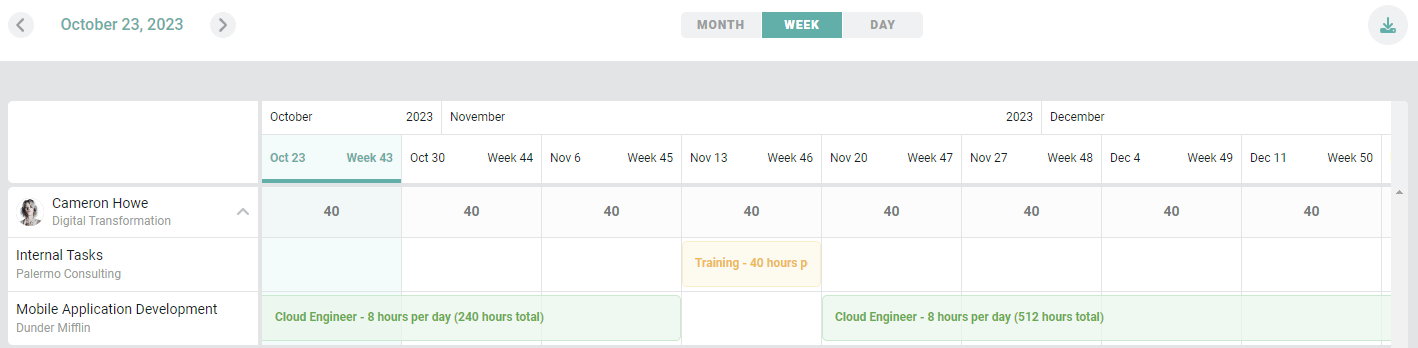
Figure 16 - A View of My Allocations