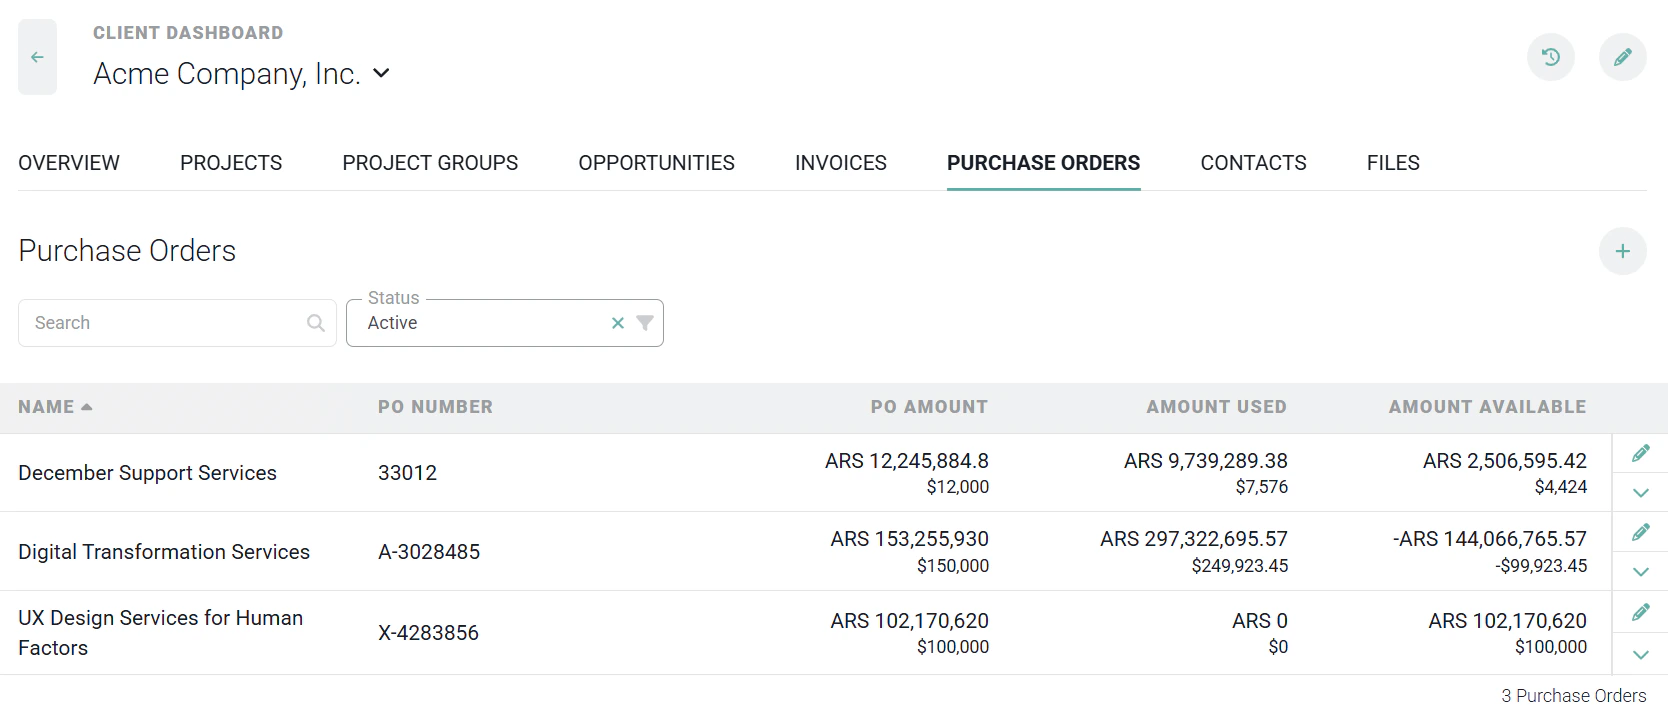
- PO Number
- PO Amount
- Amount Used
- Amount Available
Create a Purchase Order
To create a new purchase order, click on the Create a Purchase Order button on the Purchase Orders tab (Figure 1). This will open the New Purchase Order drawer (Figure 3). Within the drawer, you can specify the name of the purchase order and the PO Number associated with the record. In addition, you can provide ancillary details such as the Start / End Date of the PO, the client contact associated with the PO, whether or not the PO includes tax, and any supporting notes. When “PO amount includes tax” is checked, the total value of this Purchase Order is inclusive of taxes. Any taxes associated with invoice line items will be charged against this Purchase Order and reduce the remaining available amount. Once you have provided the details of the purchase order, click the Save & Close button to save the purchase order and return to the Purchase Orders tab.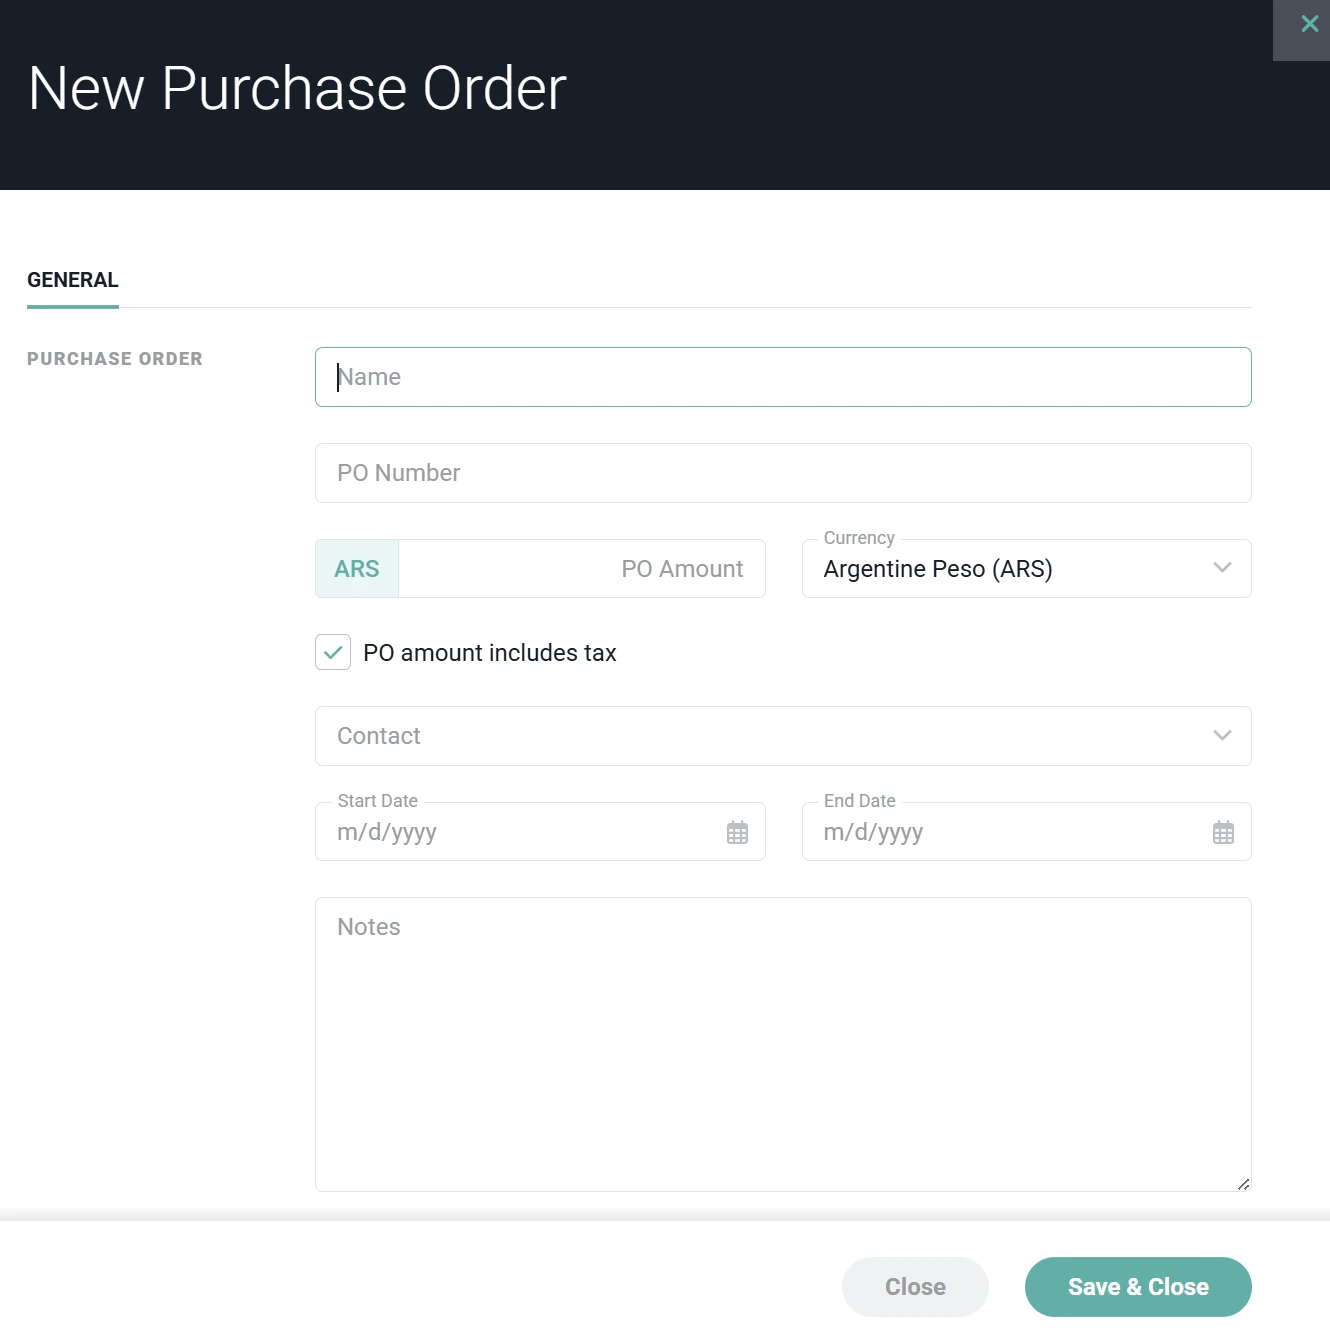
Manage a Purchase Order
Edit a Purchase Order
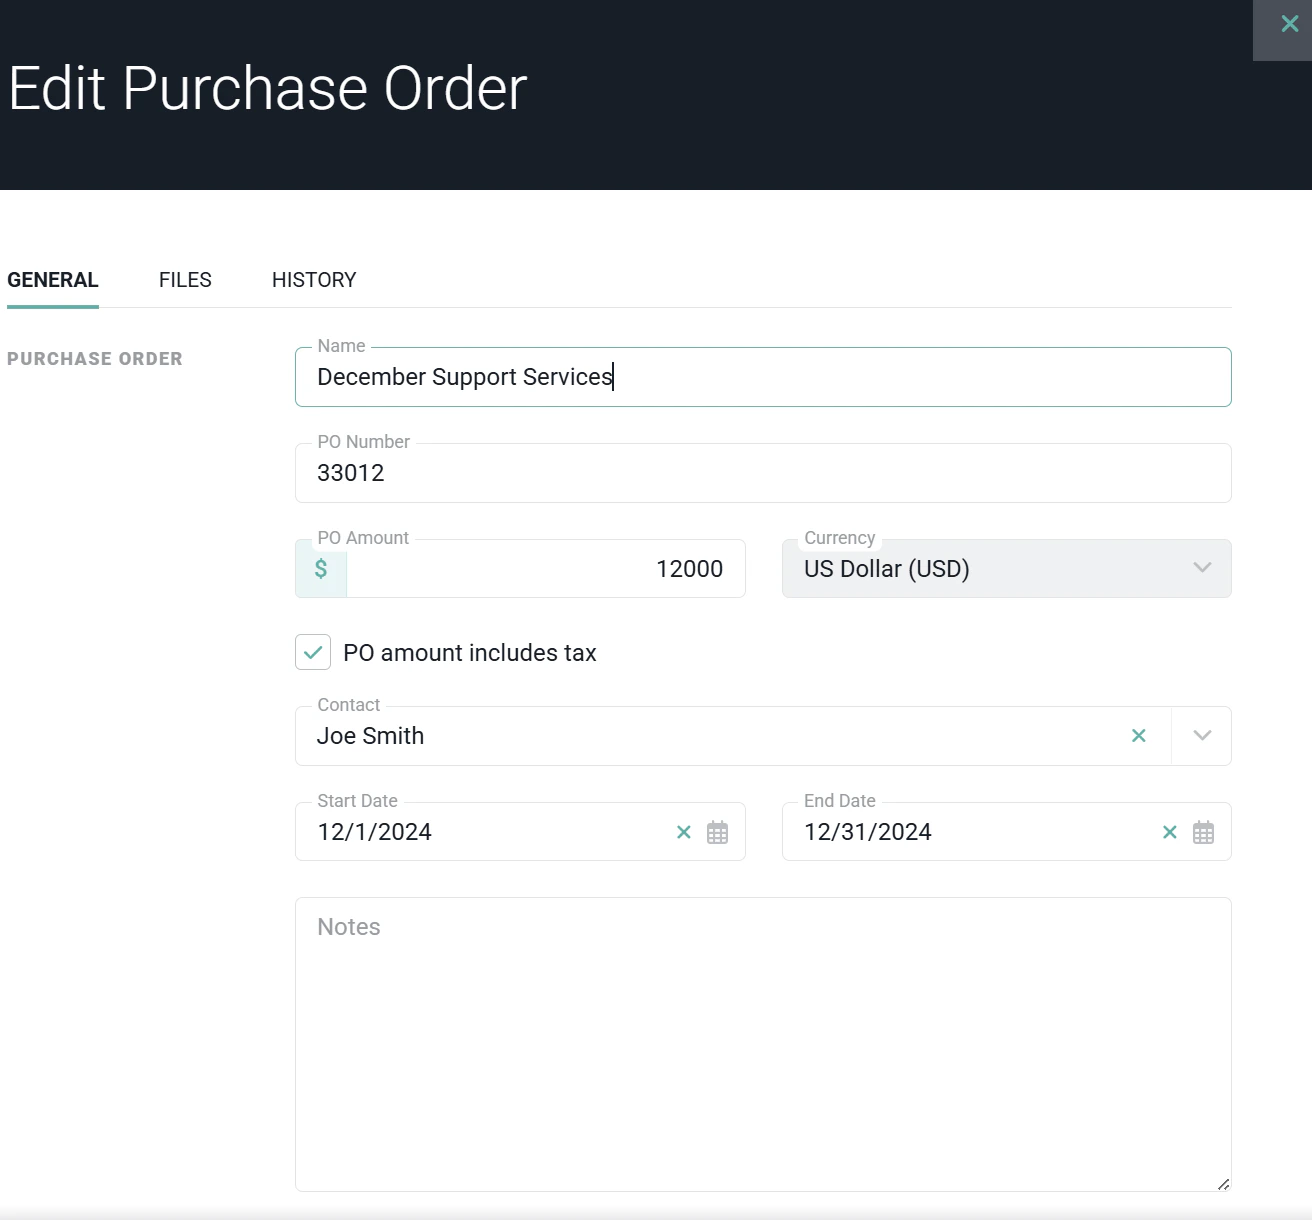
Those members with Edit Client permissions for the current client can edit any existing purchase orders by either clicking on the purchase order listed on the Purchase Orders tab (Figure 1), clicking the pencil icon on the purchase order row, or by selecting the Edit menu item (Figure 4) from the action menu on the purchase order row. This will open the Edit Purchase Order drawer (Figure 2), allowing the member to update details of the purchase order.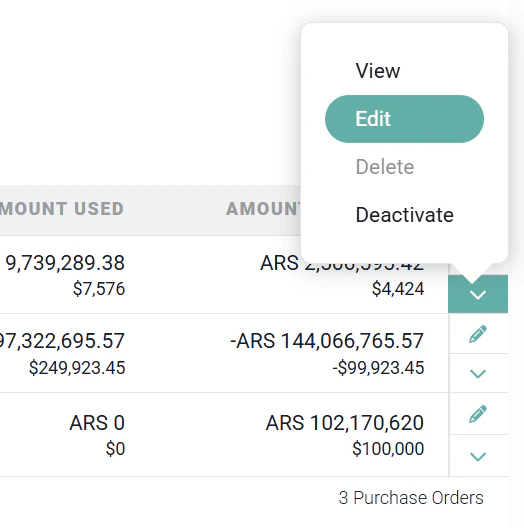
Delete / Deactivate a Purchase Order
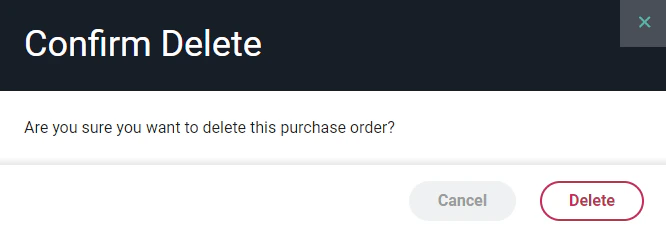
When you need for a Purchase Order to no longer available, you can either delete the PO or deactivate it. Any purchase orders that have yet to be associated with a project can be deleted. Those POs that have been specified on a project(s) can be deactivated but not deleted. Deactivating a Purchase Order will prevent that purchase order from being associated with any additional projects. If there are any projects currently aligned with that purchase order, any future invoices generated for those projects will continue to reduce the balance of the purchase order. If you no longer wish to apply invoiced monies to the purchase order, you will need to remove the purchase order from any associated projects by editing the projects and deleting the purchase order there. Members with Edit Client permissions for the client can delete or deactivate a purchase order by selecting either of the Delete or Deactivate options (Figure 4) from the purchase order row on the Purchase Orders tab. If you choose to delete the purchase order, you will be prompted to confirm (Figure 5) the deletion. On the confirmation window, click the Delete button to proceed with deleting the purchase order.