Credit notes (often referred to as credit memos) allow you to make changes to invoices after they have been published / issued. By issuing a credit note, you are reducing the amount of an invoice(s) to account for changes in the invoiced amount or the expected amount to be received via payment. Credit notes can also be used to offset the entire amount of an invoice. All of these scenarios allow you to make changes to the invoice without the need to delete and re-create an invoice once it has been issued or some payment has been received. When you publish a credit note, you can also choose to reduce the earned revenue of the credited projects by the amount of the credit note. See Publish a Credit Note for details. In Ruddr, there are three actions related to credit notes: Generally speaking, credit notes are very similar to Invoices in Ruddr. They have the following sections, as do invoices:
  • Credit Note Header
  • Credit Note Line Items
  • Credit Note Footer

Create a Credit Note

You can issue a credit note in Ruddr for a specific invoice from within the invoice itself or via the invoices list. You can also create an ad-hoc credit note from within the Credit Notes section (Figure 1) in the Billing area of Ruddr. Issuing a credit note for a specific invoice, will allow you to credit individual line items or individual transactions (time entries, expenses, products, additional services, other items, billing milestones) associated with that invoice. Issuing an ad-hoc credit note will allow you to associate the credit note with one or more projects and to apply a credit one or more invoices without the need to associate the credit note with transactions from a specific invoice.
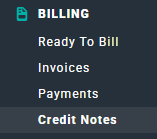
Billing menu with Credit Notes selected

Figure 1 - Select Credit Notes to View and Issue Credit Notes

Creating a Credit Note for an Invoice

To create a credit note from within the invoice, simply click on the credit note menu (Figure 2) and select the Issue Credit Note option.
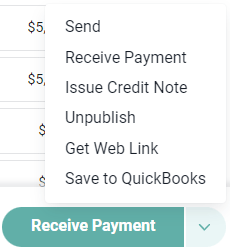
When Viewing an Invoice you can Issue a Credit Note by Accessing the Invoice Action Menu

Figure 2 - When Viewing an Invoice you can Issue a Credit Note by Accessing the Invoice Action Menu
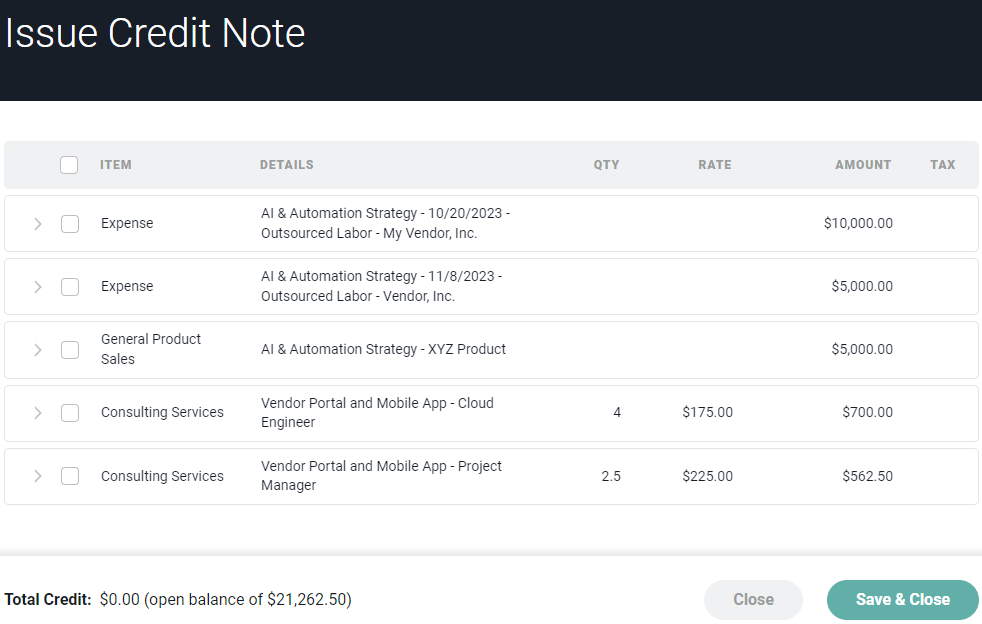
This will bring up the Issue Credit Note drawer (Figure 3). From this drawer, you can select the invoice’s associated items that you wish to credit.
Issue a Credit Note for a Specific Invoice and Specify the Items to be Credited
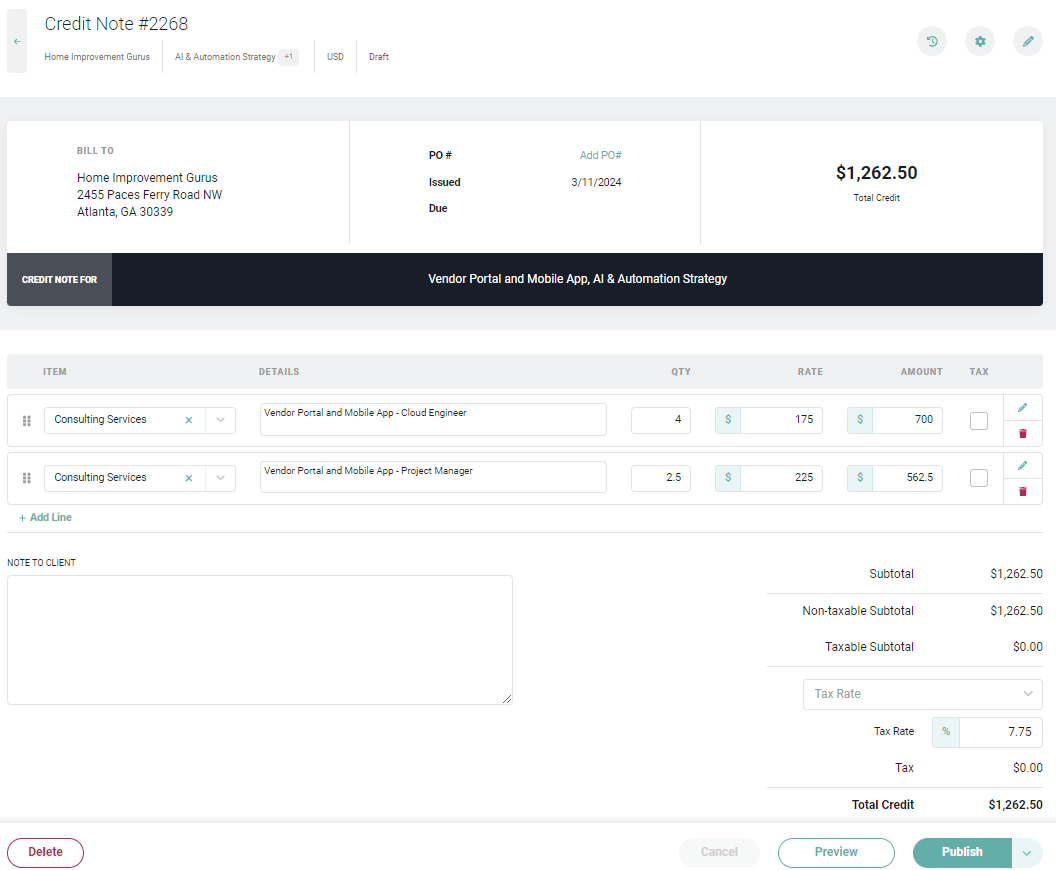
Figure 3 - Issue a Credit Note for a Specific Invoice and Specify the Items to be Credited

In the Issue Credit Note drawer, you will see a list of invoice line items. You can credit entire line items, or expand the line items to select individual time entries, expenses, products, additional services, other items, or fixed fee billing milestones to credit. Items that were already credited on a previous credit note are disabled in the drawer so that they cannot be credited twice. Hovering over a disabled item shows which credit note already credited it, and if every item on a line has already been credited, that entire line is disabled. Ruddr also prevents an item from being credited on more than one credit note, even if you try to add it another way. Once you have chosen the items, click the Save & Close button at the bottom of the drawer. You will be prompted to confirm that you want to issue the credit note for the selected amount. Click Issue to create the credit note. The credited items remain associated with the invoice. To reduce the earned revenue of the affected projects, choose the earned revenue adjustment option when you publish the credit note. Upon issuing the credit note, you will be taken to the draft credit note (Figure 4).
A Draft Credit Note Contains Items and the Amount to be Credited

Figure 4 - A Draft Credit Note Contains Items and the Amount to be Credited

Once the credit note has been created, you can preview the credit note, just as you can preview an invoice. Once you have configured the credit note, you can publish the credit note and apply the credit to the invoice.

Creating an Ad-hoc Credit Note

You do not have to create a credit note for items on a specific invoice - you can create an ad-hoc credit note, in which you specify a specific credit amount for a specific client, or specific projects for a client. With an ad-hoc credit note, you can apply any amount of credit across multiple invoices. To create an ad-hoc credit note, click the Create Credit Note button on the Credit Notes screen (Figure 5).
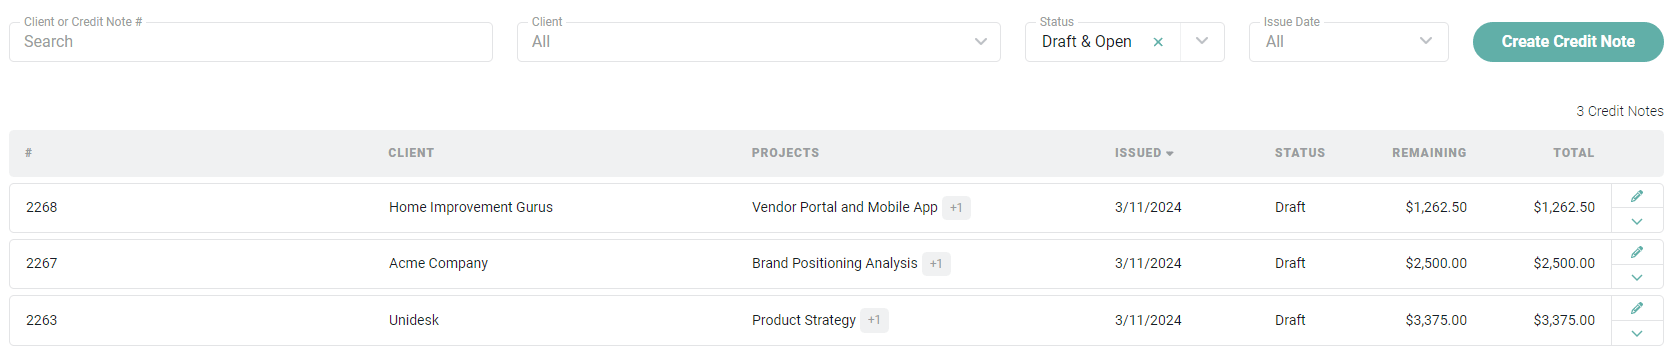
The Credit Notes Screen Displays a list of Credit Notes and you can Create an Ad-Hoc Credit Note

Figure 5 - The Credit Notes Screen Displays a list of Credit Notes and you can Create an Ad-Hoc Credit Note
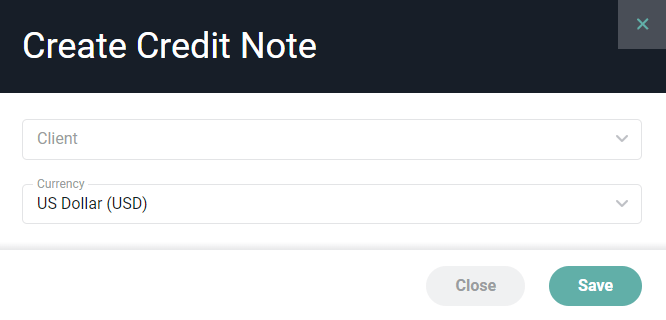
You will be prompted (Figure 6) to specify both the client for whom to create the credit note and the currency for the credit to be applied.
Select the Client and Currency for the new Credit Note
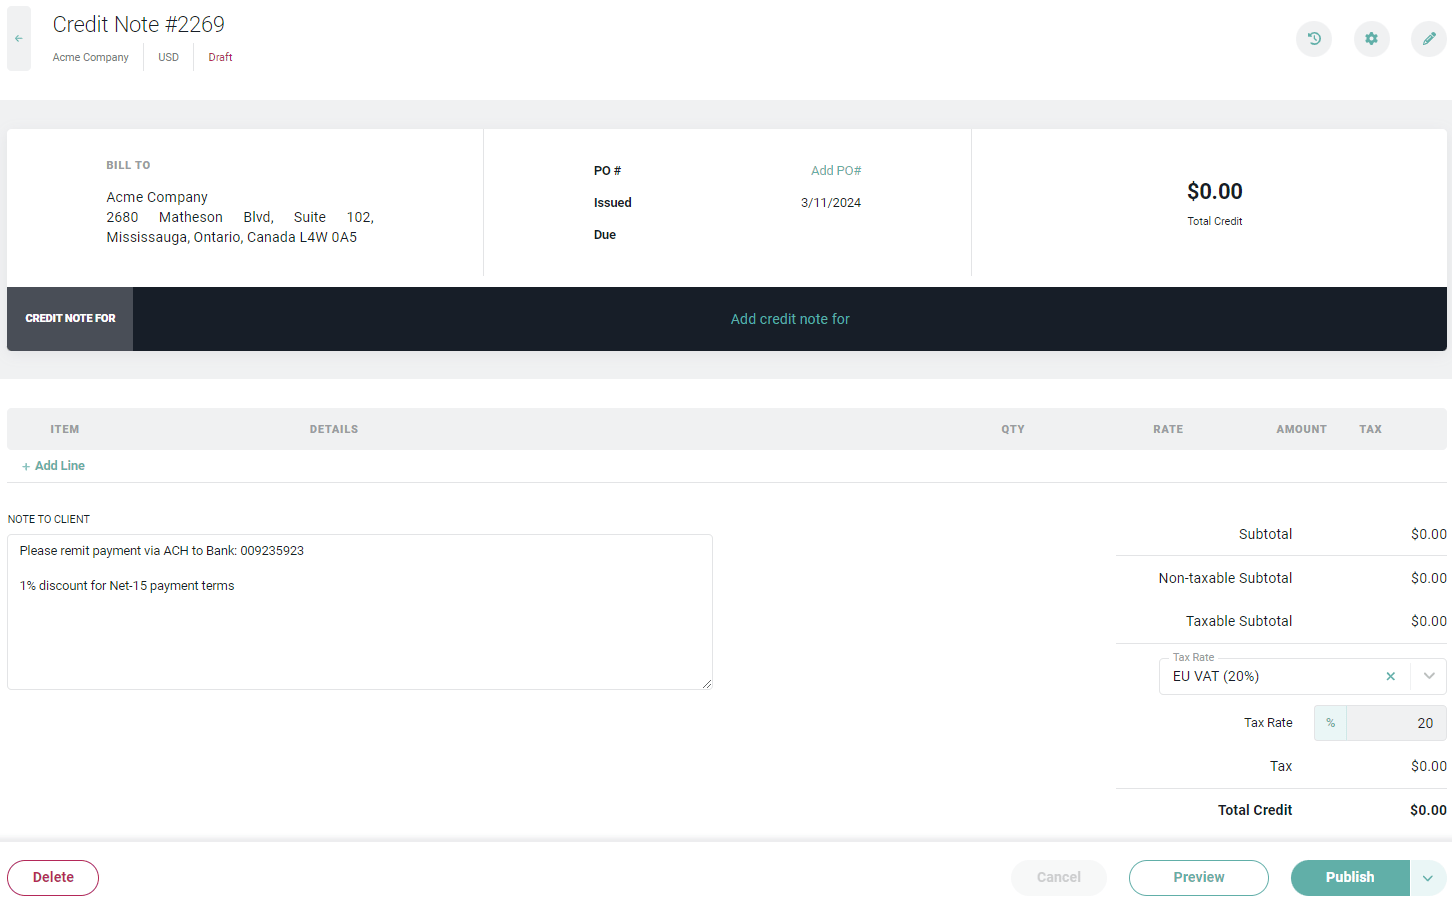
Figure 6 - Select the Client and Currency for the new Credit Note

Once a client and currency have been specified, you will be taken to a draft credit note (Figure 7). In the draft credit note, you can associate projects with the credit note by clicking the Settings gear button at the top of the credit note.
A Draft Ad-hoc Credit Note Requires the Addition of Ad-Hoc Line Items
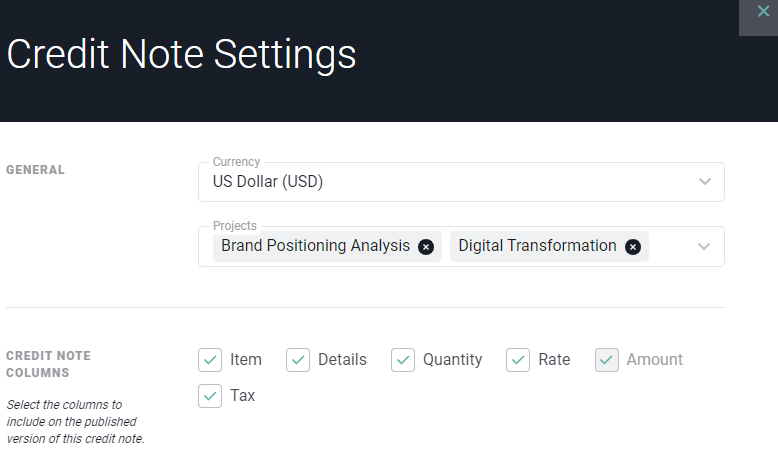
Figure 7 - A Draft Ad-hoc Credit Note Requires the Addition of Ad-Hoc Line Items

In the Credit Note Settings drawer (Figure 8), you can select one or more projects from the Projects dropdown. Doing so will make these projects available for association with individual, ad-hoc line items on the credit note.
In the Credit Note Settings you can Select the Projects with which to Associate the Credit Note

Figure 8 - In the Credit Note Settings you can Select the Projects with which to Associate the Credit Note
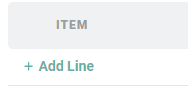
With projects selected, the next step will be to add ad-hoc line items to the credit note. The total of these line items should equate to the total amount of credit being issued. To add an ad-hoc line item to the credit note, click the + Add Line link (Figure 9) in the credit note line item area of the credit note.
Click + Add Line to Create a New Ad-Hoc Credit Note Line Item

Figure 9 - Click + Add Line to Create a New Ad-Hoc Credit Note Line Item

Once the ad-hoc line item has been added, you will need to supply any relevant information needed to signify the credit being issued:
  • Item (required)
  • Details
  • Quantity
  • Rate
  • Amount (required)
  • Taxable
Any credit note line items that are manually added to a credit note will not be correlated with underlying operational data. To associate operational data with a credit note, you will want to create a credit note for a specific invoice. The first column in the credit note line items list is the Item. Any credit note row that has a total amount must have an Item selected. The values available for selection are the Invoice Items that have been setup in the workspace. Each Ruddr workspace includes two built-in Invoice Items which are “Service” and “Expense”. Additional items can be created by a Workspace Admin using the Custom Data tab within the Settings area. For example, if your company sells products or different types of services, you can set up distinct Invoice Items for those. If you have associated projects with the credit note, as outlined above, you can associate a custom line item (or ad hoc line item) with a project and a revenue type by clicking the Edit (pencil) button on the ad-hoc credit note line item row to open the Credit Note Line Details drawer (Figure 10). In this drawer you can set:
  • Project - The project the line applies to.
  • Revenue Type - The type of revenue the line represents: Services, Expenses, Products, or Other Items.
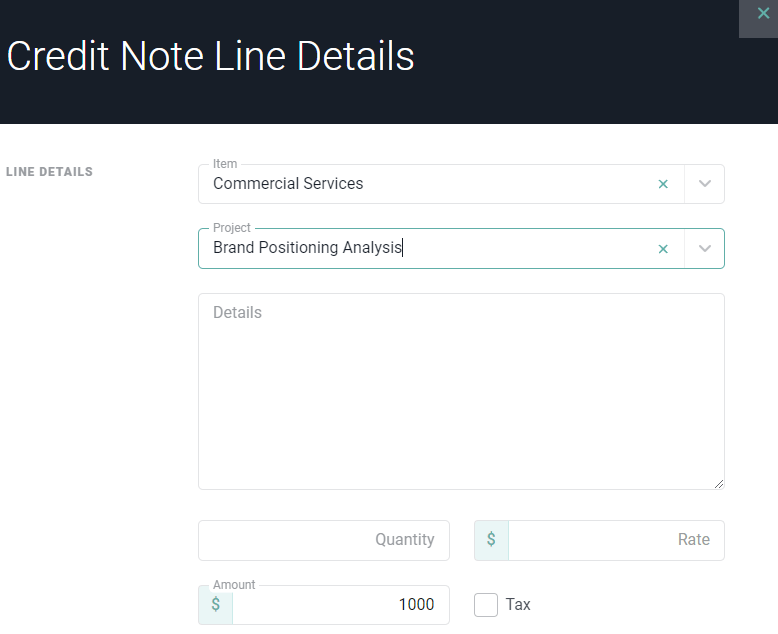
The Project and Revenue Type are what allow an ad-hoc line to be included in an earned revenue adjustment when the credit note is published. A line without both a project and a revenue type (or whose project is in a different currency than the credit note) cannot be adjusted - see Publish a Credit Note.
Associate a Project and Revenue Type with a Credit Note Line Item and Edit Other Details

Figure 10 - Associate a Project and Revenue Type with a Credit Note Line Item and Edit Other Details

Once you have added all of the line items to the credit note, save the credit note by clicking on the Save or Save & Preview button at the bottom of the draft credit note. Once the credit note has been created, you can preview the credit note, just as you can preview an invoice. Once you have configured the credit note, you can publish the credit note and apply the credit to the invoice(s). The credit note’s total is labeled Total Credit followed by its currency code, such as Total Credit (EUR). The same label appears on the credit note, its preview, and the PDF. As on invoices, line item amounts on the credit note PDF are shown without a currency symbol.

Publish a Credit Note

Once a credit note has been created and reviewed for accuracy, it is ready to be published. A credit note can be published from the Credit Notes screen or from within the draft credit note itself. In order to publish a credit note, you must have client-level or project-level Publish and send invoices, and record payments permissions on your security role. To publish a credit note from the Credit Notes screen, simply click the Publish option from the credit note action menu (Figure 11).

From the Credit Notes List, you can Publish a Credit Note from the Action Menu
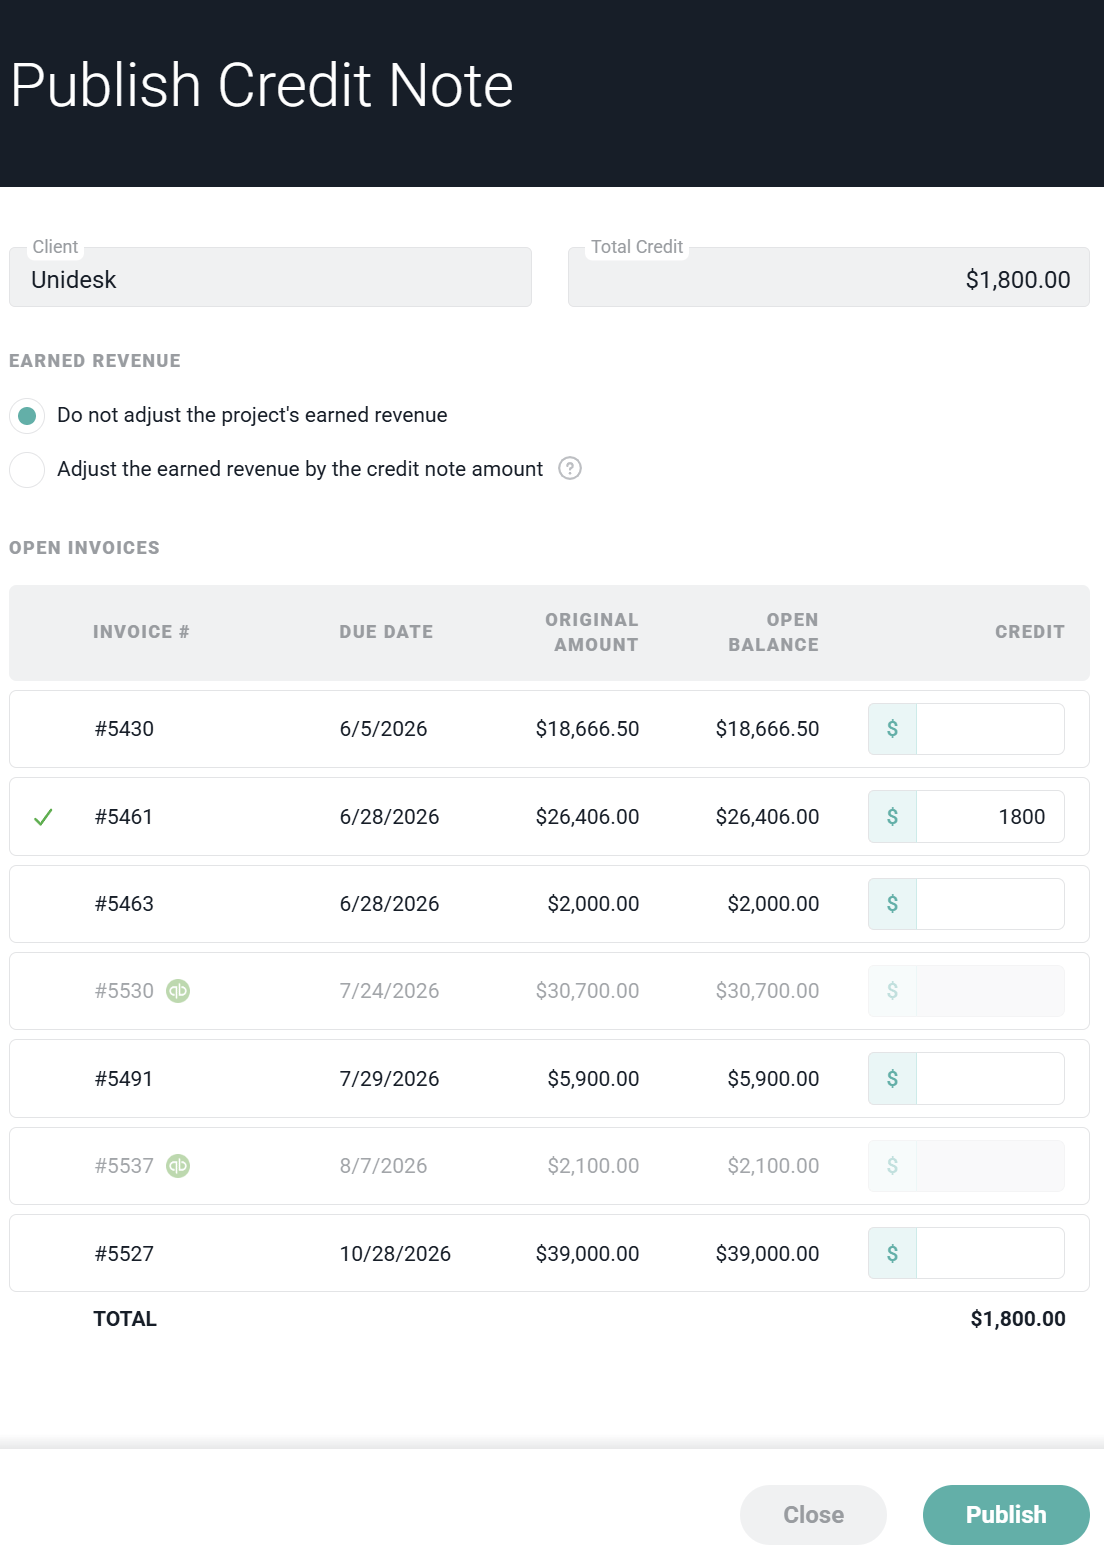
Figure 11 - From the Credit Notes List, you can Publish a Credit Note from the Action Menu

When publishing a credit note, the Publish Credit Note drawer (Figure 12) will be presented. From this drawer, you choose whether to adjust earned revenue and you apply the value of the credit note to one or more Open invoices.
Applying the Credit Note Value to Open Invoice(s) and Choosing How to Handle Earned Revenue

Figure 12 - Applying the Credit Note Value to Open Invoice(s) and Choosing How to Handle Earned Revenue

Adjusting Earned Revenue

In the Earned Revenue section of the Publish Credit Note drawer, you choose how publishing the credit note should affect the earned revenue of the credited projects:
  • Do not adjust the project’s earned revenue - Publishing the credit note applies the credit to invoices but leaves earned revenue unchanged.
  • Adjust the earned revenue by the credit note amount - Publishing the credit note creates a negative, pre-tax earned revenue adjustment as of the credit note’s issue date.
When you choose to adjust earned revenue, every line with an amount must have a project and a revenue type, and each line’s project must use the same currency as the credit note. For credit notes issued from an invoice, the project and revenue type are set automatically from the credited items. For ad-hoc credit notes, you set the project and revenue type on each line in the Credit Note Line Details drawer. If any lines are missing this information, Ruddr lists the lines that need to be updated and prevents you from publishing with the adjustment option until they are corrected. Each earned revenue adjustment created this way appears as a read-only entry in the affected project’s Earned Revenue Adjustment Ledger. Because the adjustment is managed by the credit note, it cannot be edited or deleted directly from the ledger. A published credit note that adjusted earned revenue is marked with an Earned Revenue Adjusted tag, and unpublishing or deleting the credit note removes the adjustment and restores the amount to the project’s earned revenue.

Applying the Credit to Invoices

Below the Earned Revenue section, you apply the value of the credit note to one or more Open invoices. Ruddr pre-fills a default allocation:
  • For a credit note issued from an invoice, the credit defaults to the source invoice first.
  • For an ad-hoc credit note, the credit defaults to the projects’ oldest open invoices, spilling to the next oldest as each invoice’s balance is used up.
You can adjust the allocation as needed before publishing. Once published, the invoices are credited as specified during the publishing process and their open balances are adjusted accordingly.

Publishing a Credit Note with the QuickBooks Online Integration

When you publish a credit note in a workspace that leverages the QuickBooks Online integration, you have the option to save the credit note to QuickBooks Online (QBO). This option will appear at the bottom of the Publish Credit Note drawer (Figure 12). Ruddr adopts the credit memo process from QBO - both a credit note and a payment are created and then saved to QBO. Saving the credit note to QBO will result in the following:
  • A credit memo is created in QBO
  • A payment is created in QBO to allocate the credit across any credited invoices
  • The payment created in QBO is replicated in Ruddr. That payment would be available in the Payments section of Ruddr
NOTE: in order to save a credit note to QBO, the credit must be applied to invoices that are synced with QBO. Any attempt to apply a credit to an invoice not in QBO will prevent the credit memo from being saved to QBO as part of the publishing process.

Publishing a Credit Note with the Xero Integration

When you publish a credit note in a workspace that leverages the Xero integration, you have the option to save the credit note to Xero. This option will appear at the bottom of the Publish Credit Note drawer (Figure 12). Saving the credit note to Xero will result in the following:
  • Xero will create a credit note
  • Credit is applied to invoices in Xero and in Ruddr
You would have a credit note in Ruddr and Xero and any number of credits applied to invoices would exist in both Ruddr and in Xero. NOTE: in order to save a credit note to Xero, the credit must be applied to invoices that are synced with Xero. Any attempt to apply a credit to an invoice not in Xero will prevent the credit memo from being saved to Xero as part of the publishing process.

Send a Credit Note

Once a credit note has been published, you can send it to your client. On the credit note, you will see a Send button. Clicking on that button will open the Send Credit Note via Email drawer (Figure 13). If you would like to attach any supporting documents or attach a PDF of the credit note , you can provide those on the Attachment tab on the drawer. Once you have validated the contact information, click the Send button on the drawer to send the credit note to the client.
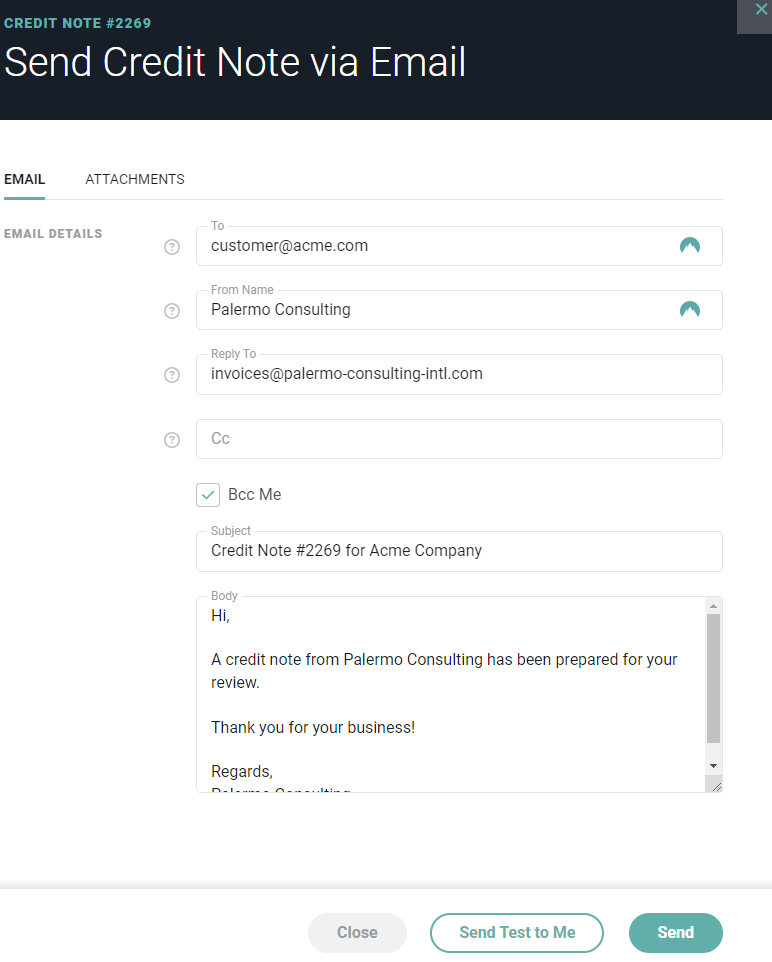
Send a Published Credit Note to your Client

Figure 13 - Send a Published Credit Note to your Client

Unpublish a Credit Note

You can unpublish a published credit note from the credit note itself. Unpublishing removes any credit that was applied to invoices, and if the credit note adjusted earned revenue, it also removes the earned revenue adjustments, restoring the adjusted amounts to the projects’ earned revenue.

Delete a Credit Note

To delete a credit note, either select the Delete action item from the Credit Notes action menu (Figure 11) or click the Delete button on the credit note itself. You will be prompted (Figure 14) by Ruddr to confirm this delete action
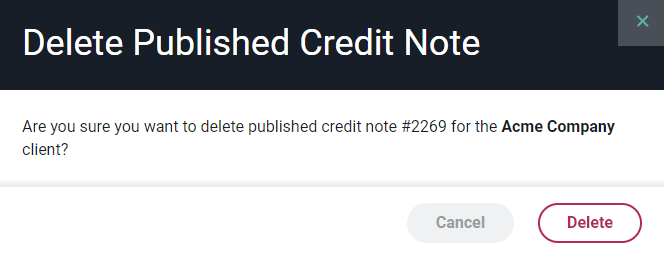
Confirm Deletion of Credit Note

Figure 14 - Confirm Deletion of Credit Note

Deleting the credit note in Ruddr will remove all credits that have been applied to invoices. If the credit note adjusted earned revenue, deleting it also removes those earned revenue adjustments, restoring the adjusted amounts to the projects’ earned revenue.

Deleting a Credit Note with the QuickBooks Online Integration

As denoted in publishing a credit note with the QuickBooks Online integration, QBO creates a credit memo and any number of payments needed to credit invoices when a credit note is saved to QBO via the integration. Those payments are replicated in Ruddr. When you delete a credit note in Ruddr, you will be prompted to also remove that credit note from QBO. If you choose to remove the credit note in QBO, it will delete the QBO credit memo, all QBO payments created in support of the credit memo, all payments created in Ruddr, and the credit note in Ruddr.

Deleting a Credit Note with the Xero Integration

As denoted in publishing a credit note with the Xero Online integration, Xero creates a credit note and applies the credit to any specified invoices when a Ruddr credit note is saved to Xero via the integration. When you delete a credit note in Ruddr, you will be prompted to also remove that credit note from Xero. If you choose to remove the credit note in Xero, that credit note in Xero will be deleted, all Xero applied credits to invoices will be deleted, and the Ruddr credit note will be deleted as well.