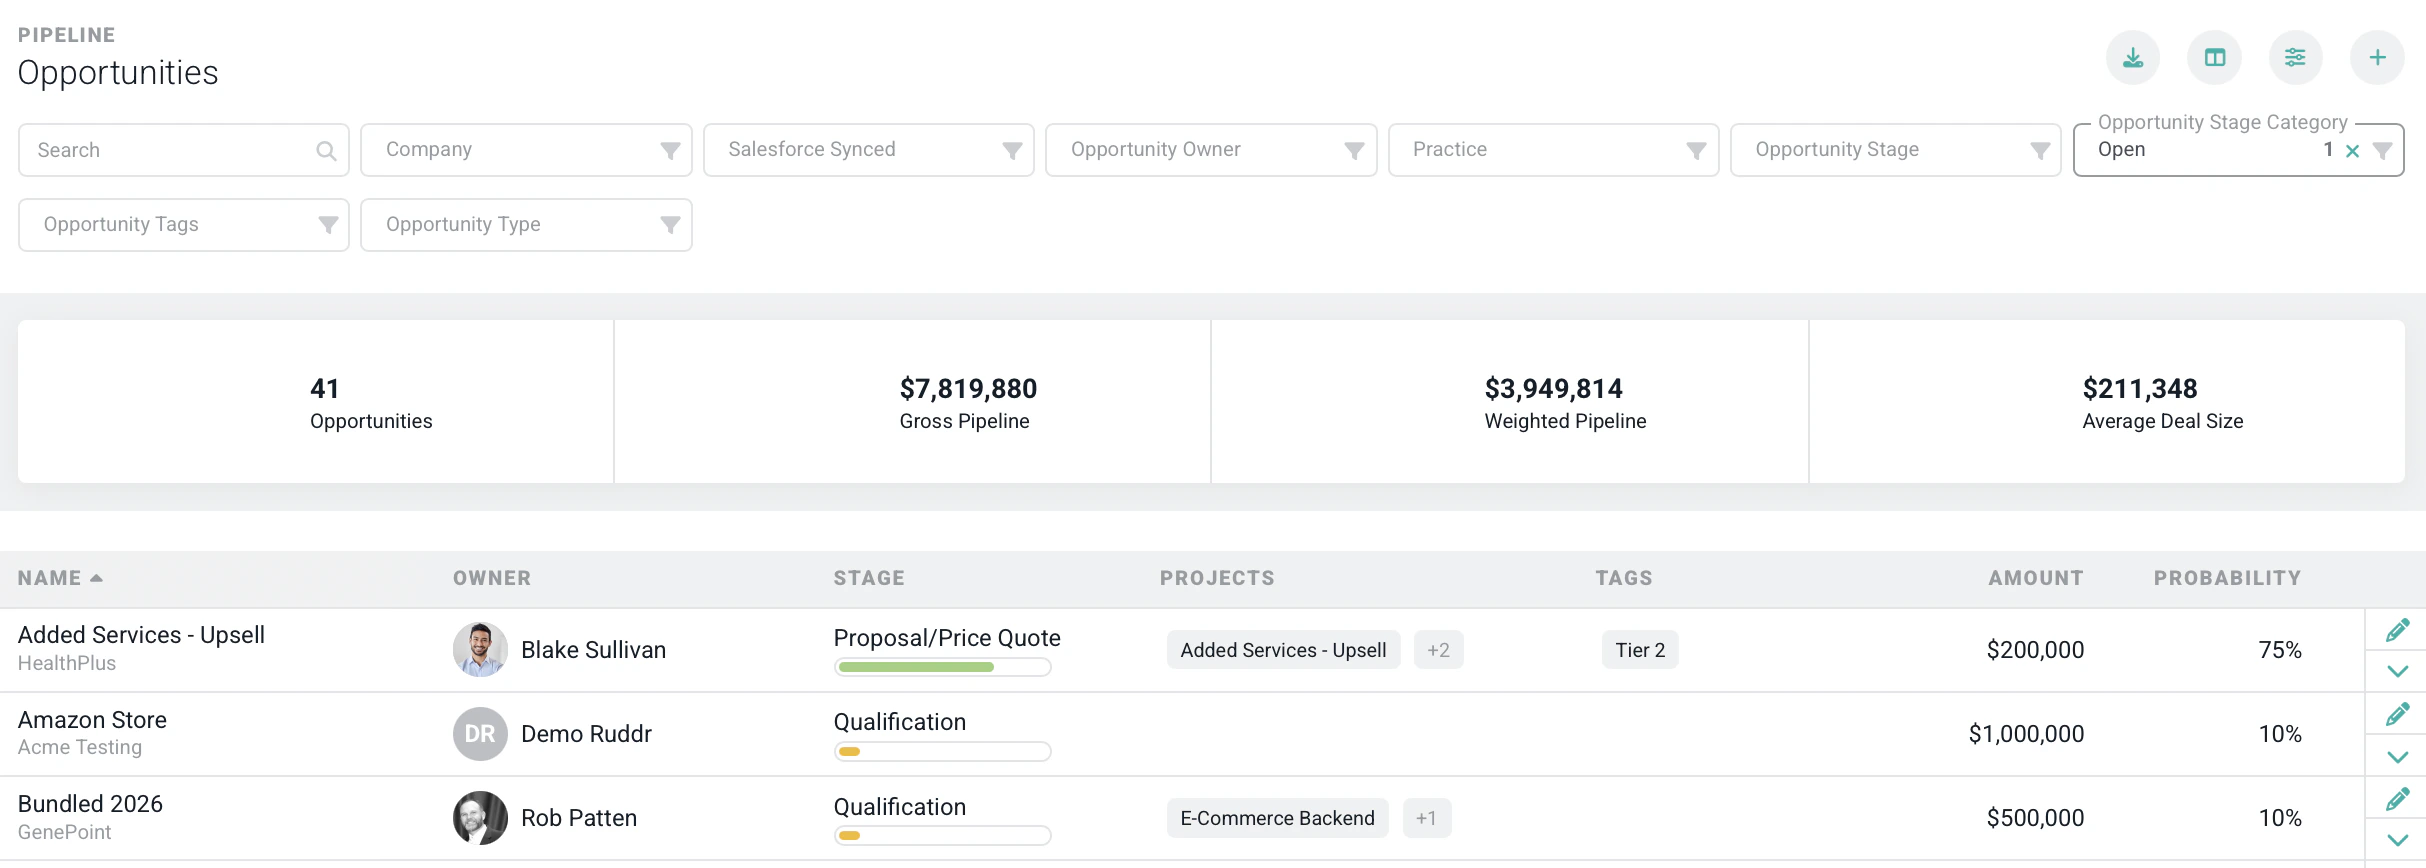

- # of Opportunities - the number of opportunities presented in the list
- Gross Pipeline - the total sum of the amount of the opportunities listed
- Weighted Pipeline - the total sum of the weighted amounts of the opportunities listed. The weighted amount of an opportunity is the total amount multiplied by the Probability to Close percentage.
- Average Deal Size - the average amount of the opportunities listed
- Search - You can type in a partial opportunity name to narrow the results.
- Company - Filter the list of opportunities by company.
- Opportunity Owner - View a list of opportunities that belong to a specific member.
- Practice - Specify the Practice for which you want to view a list of opportunities.
- Opportunity Stage - Select from a list of opportunity stages that are managed in Custom Data.
- Opportunity Stage Category - Narrow down the results to opportunities in a particular opportunity lifecycle stage category. The possible values are “Closed”, “Won”, or “Lost”
- Opportunity Tags - Used to track the various types of activities during the sales process.
- Opportunity Type - Select from a list of opportunity types that are managed in Custom Data.
Edit an Opportunity
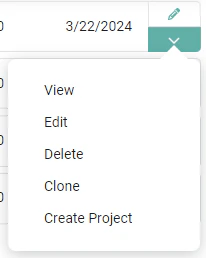
To edit an opportunity, you must have the Administer all companies, contacts and opportunities permission on your security role. Simply click on the Edit menu option on the row that you want to edit. This will open up the Edit Opportunity drawer (Figure 5). From here, you can make edits to the opportunity. For more on editing opportunities, please refer to the Opportunities - Create and Edit article.
Delete an Opportunity
To delete an opportunity, you must have the Administer all companies, contacts and opportunities permission. Simply click on the Delete menu option (Figure 4) on the row that you want to delete. This will bring up a confirmation window (Figure 6). Once you delete an opportunity, you cannot reverse this action and all associated opportunity, file, and activity data will be gone forever!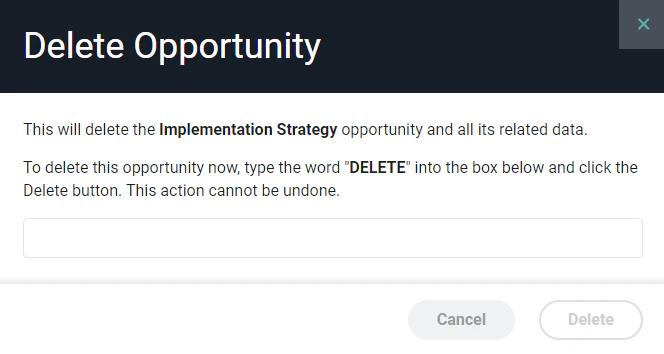
Clone an Opportunity
To clone an opportunity, you must have the Administer all companies, contacts and opportunities permission. Simply click on the Clone menu option (Figure 4) on the row that you want to clone. You will then be prompted (Figure 8) to provide a name for the new opportunity. Clicking the Save button will create the opportunity and take you to the new opportunity’s dashboard, where you can edit the new opportunity.
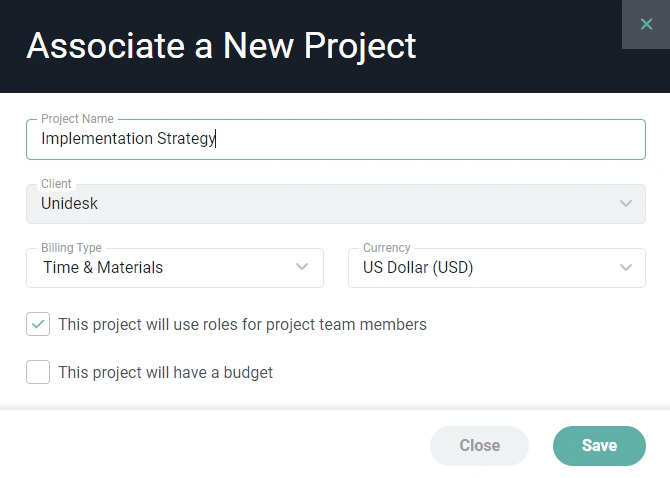
Create a Project
A project can be created from an opportunity, bringing over relevant opportunity data. When you create a project from an opportunity, an association between those two entities is created. The project will be set to a Tentative project status. You will then be able to set up the project, allocate resources, and forecast project metrics. To create a project, click on the Create a Project menu option (Figure 4) on the row for which you want to create a project. You will then be prompted by the Associate a New Project modal (Figure 8) to specify details for the new project. Clicking the Save button will create the project and take you to the project dashboard, where you can continue setting up the project.