Basic Information
The basic information section (Figure 3) of the overview tab includes high-level project information.
- Client - Select any client in the workspace. Note that depending on your permission setting, you may only have access to clients where you are on a project team for that client. For internal projects, select the default internal client associated with your workspace.
- Project name - The name of the project.
- Project URL ID - You can edit the reference to this project, such that the URL to access the project contains this text. Note that the Project URL ID must result in a unique URL within the same client. Two projects within the same client cannot have the same Project URL ID.
- Practice - The name of the practice that owns the project. Practices are optional in Ruddr.
- Business Unit - The name of the business unit that owns the project. Business Units are optional in Ruddr.
- Sales Representative - If a Sales Representative is supplied on the client, that sales representative will be defaulted for new projects. You can edit that as necessary.
- Project Status - The status of the project can be set to Tentative, Not Started, In Progress, Paused, Completed, or Cancelled. A separate Ruddr help article covers project status in more detail.
- Project Type - The type of project. A Workspace Admin can set up any number of project types for your workspace.
- Project Dates - The expected start and end date for the project.
- Project Code - Any internal project identifier that your team may use for the project.
- Project Tags - Custom tags for this project. A Workspace Admin can set up any number of project tags for your workspace.
- Project Group - if the Project Group feature is enabled, you can associate this project with other projects for this client by associating it with the appropriate project group.
- Notes - Any notes about the project that could be helpful to other project team members.
Settings
The Settings section (Figure 4) of the overview tab allows you to control the primary project configuration options. Internal projects will have a designated setting for productive utilization.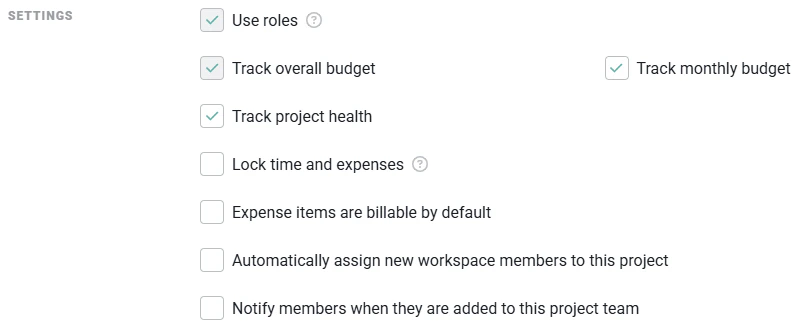
- Use roles - Projects can have bill rates assigned to roles or assigned directly to team members.
- Track overall budget - Enables you to track an overall budget for the project. Some project metrics are only available if a budget has been created. Also, budget hours must be provided for Fixed Fee projects in order for Ruddr to determine earned revenue to date on the project.
- Track project health - With this setting enabled, project health reports can be created / managed for the project. This setting is only present when the Project Health Reporting feature is enabled in the workspace.
- Track monthly budget - Some teams prefer to track both a monthly budget and an overall budget. For Fixed Monthly billing type projects, often the monthly budget is the only type used.
- Lock time and expenses - Turning this on keeps time or expense items from being created or edited. This can be useful if a project is put on hold or at times before or after a project has started / completed.
- Expense items are billable by default - Set this if you want the Bill to client setting on new expense items to be checked by default. This helps any team members that will be creating and submitting expenses for the project ensure that new expenses are billable as created.
- Automatically assign new workspace members to this project - In some cases, you may want to have new workspace members automatically added to a project. By enabling this setting, as new members are created in the workspace, they will be automatically assigned to this project.
- Notify members when they are added to this project team - With this setting enabled, any members that you add to the project team will receive a notification indicating that they have been added to the project.
Productive Utilization
Productive Utilization in Ruddr is the sum of client hours and productive, internal hours divided by a member’s capacity. Hours logged to internal projects (projects that are created under the workspace’s internal client) can be considered part of this calculation if the project’s Time is attributable to Productive Utilization setting (Figure 6) is checked. This setting will appear in the Settings section (Figure 4) if the project being edited is an internal project.
Time Tracking Rules
If you would like to apply rules that dictate how project team members can enter their time against the project, the Time Tracking Rules section (Figure 7) provides a number of options.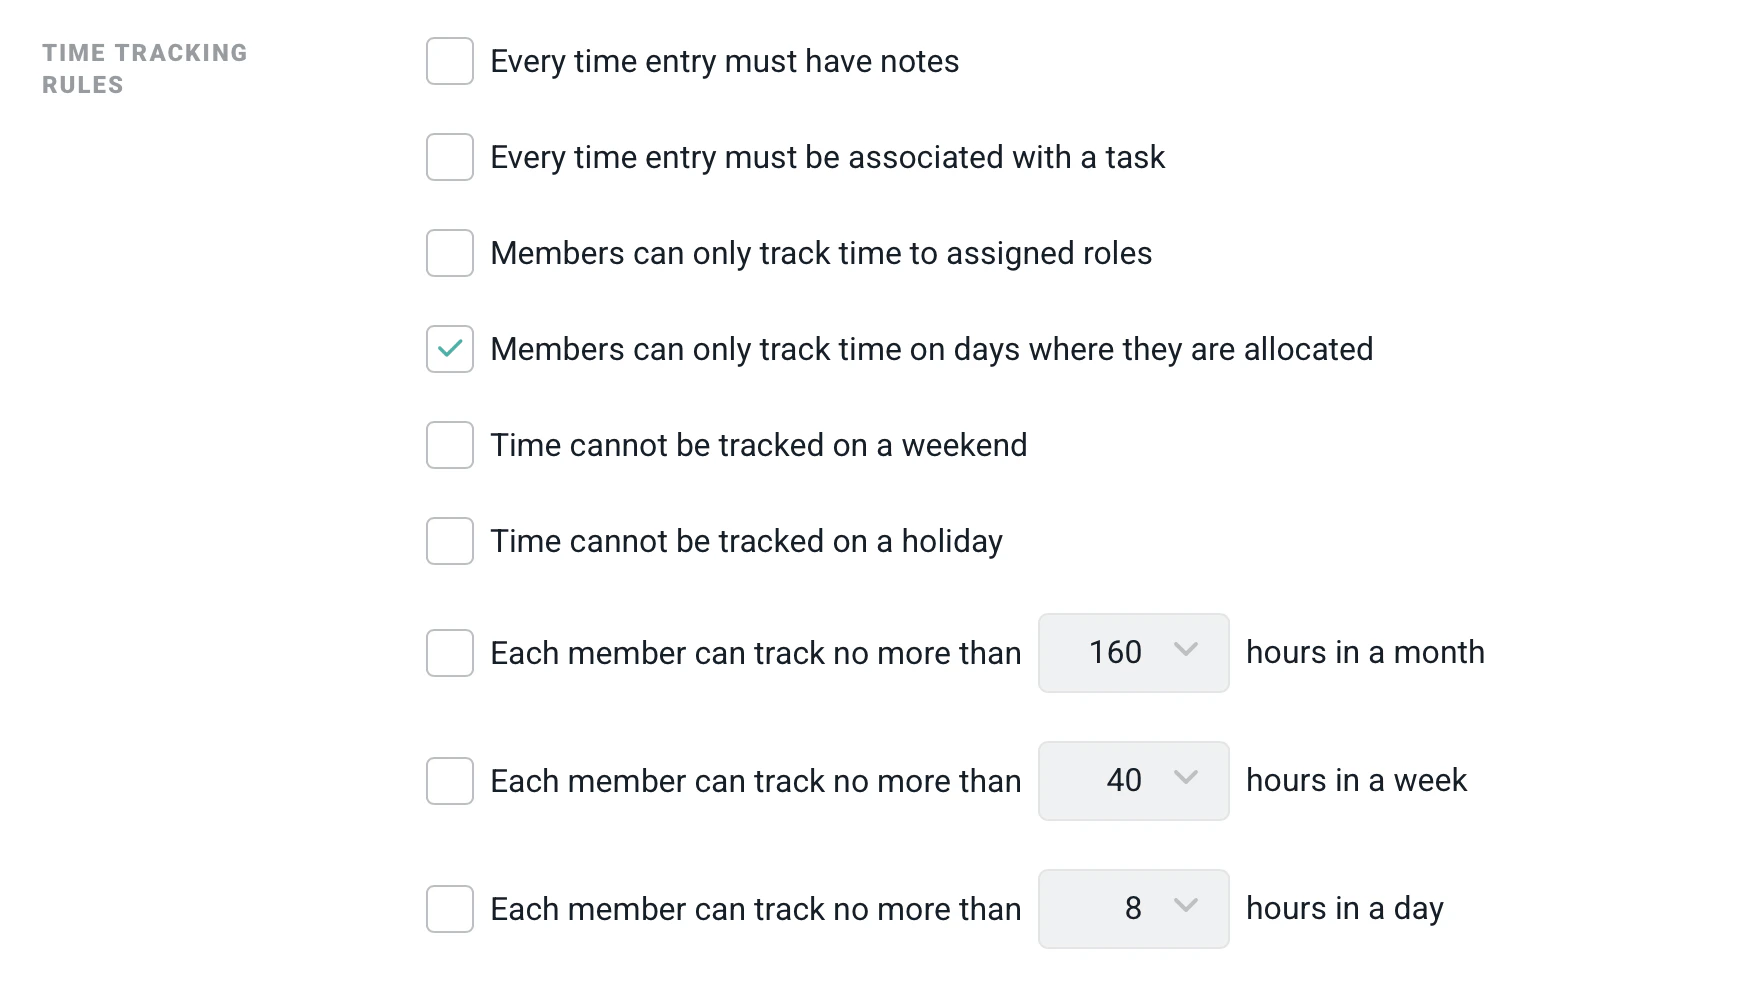
- Every time entry must have notes - With this option on, all time entries recorded against the project must include text in the Notes field.
- Every time entry must be associated with a task - If this option is selected, members will be required to specify a task for every time entry they create for this project.
- Time cannot be tracked on a weekend - Team members will be prohibited from entering time on the project for Saturday and / or Sunday.
- Time cannot be tracked on a holiday - Members of the project team will not be allowed to track time to the project on holidays as defined in the workspace.
- Members can only track time to assigned roles - Team members must have an active role assignment on the project to enter time against the project.
- Member can only track time on days where they are allocated - Restricts members to only be able to track time on the days that there is an allocation assigned to them.
- Members can track no more than X hours in a month - use this setting to restrict the number of hours that a team member can submit for the project in a given week.
- Members can track no more than X hours in a week - If you wish to restrict the number of hours that a team member can submit for the project in a given week, check the box for this field and select the maximum number of weekly hours allowed in the dropdown.
- Members can track no more than X house in a day - With this option selected, members can track up to a maximum of hours on any given day for the project. Select the maximum number of daily hours from the provided dropdown.
Approval Options
The Approval Options section (Figure 8) includes the internal and client approval configuration.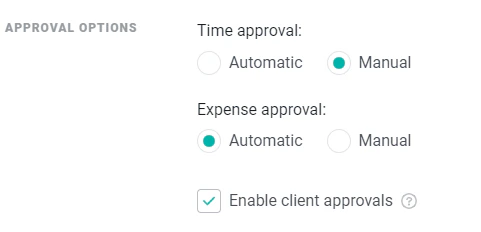
- Time approval - Time entries can require manual approval or they can be auto-approved upon submission.
- Expense approval - Expenses can require manual approval or they can be auto-approved upon submission.
- Enable client approvals - When this option is checked, a new tab on the Project Dashboard is shown called Client Approvals. This tab allows you to send a batch of time and expenses to the client for approval before an invoice is created. Note that once a client approval has been created, this option will be checked and disabled.
Billing
The Billing section (Figure 9) of the overview tab allows you to set the basic financial configuration of the project.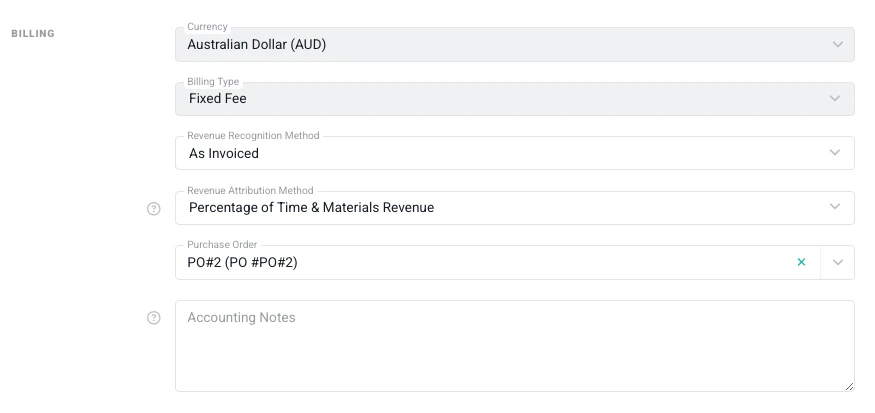
- Billing Type - Depending on the billing type selected, additional information may be required.
- For more, see the Billing types article.
- PO Number - If the client has assigned a purchase order number to the project, it should be entered here. The PO Number will automatically be shown on any invoices created for the project.
- Accounting Notes - The team can input internal account notes that will display at the top of the project Accounting tab and be accessible on both the Ready to Bill screen and draft invoices.
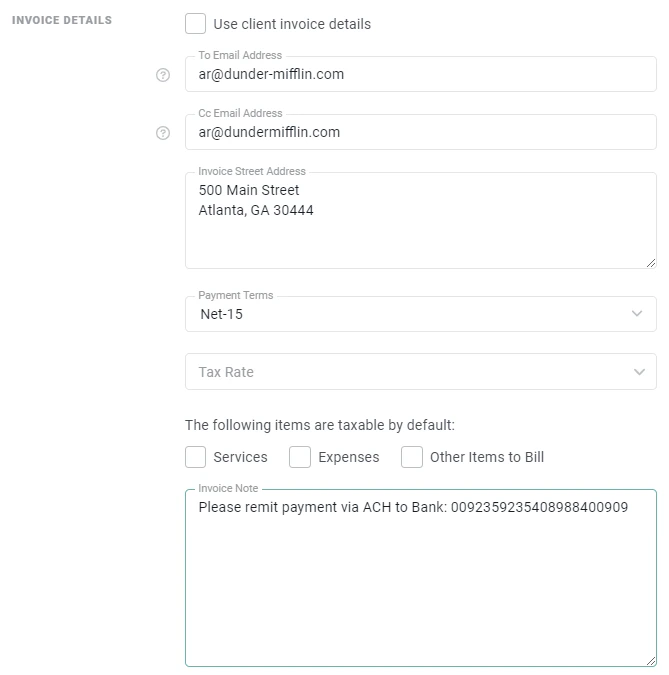
Invoice Details
By default, each project uses the invoice details as set on that project’s client, which can be provided on the Edit Client drawer. In this case (Figure 10), the Use client invoice details checkbox is checked and the invoice details are read-only.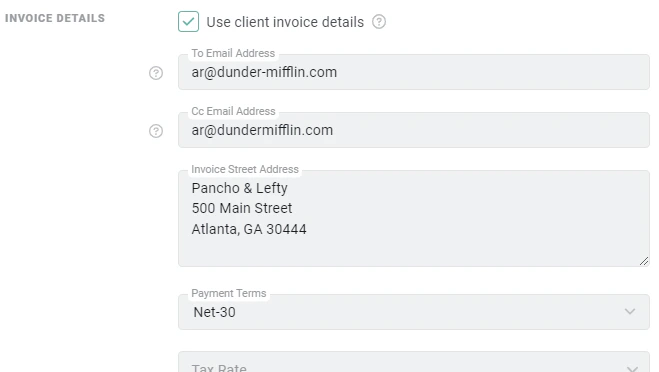
Integrations
Slack
If the Slack integration is configured in your workspace, this option (Figure 12) will appear. If you would like to map this project to a project Slack channel, you can select the respective project channel from the dropdown (Figure 12) on the right.
Cloud Storage
You can connect any Ruddr project to a cloud folder from any of the major cloud storage providers. Supported cloud storage providers include Google Drive, OneDrive, Microsoft Teams, SharePoint, Box, Dropbox, and more. These cloud storage platforms allow you to store, share, and collaborate on files and folders from any mobile device, tablet, or computer. To configure on a project, simply provide the URL to the cloud folder in the Cloud Folder URL textbox (Figure 13) on the Edit Project drawer. The link to this cloud storage location will appear on the information bar on the Project Dashboard, making it accessible to project team members.