

The Prepayments Ledger
To open the ledger, go to the project and click the Settings tab, then select Prepayments under Accounting (Figure 1).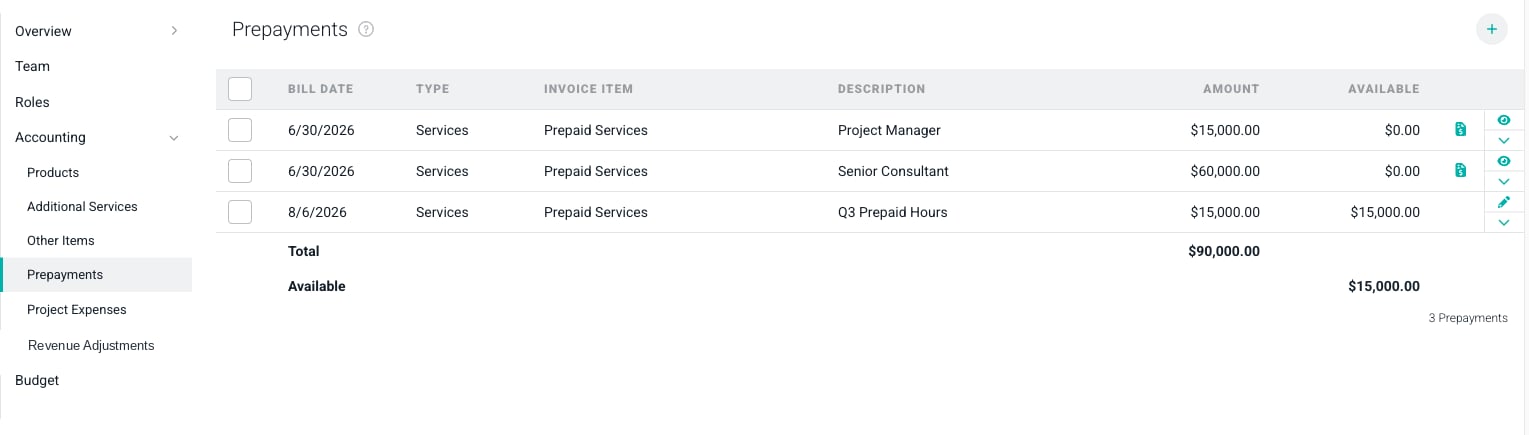
Figure 1 - The Prepayments Ledger on the Project Settings Tab
- Bill Date - The date the prepayment will be picked up on the Ready to Bill screen for invoicing.
- Type - The kind of revenue the prepaid funds can be applied to. The options are Services, Expenses, Products, and Other Items.
- Invoice Item - The invoice item used for the prepayment line on the invoice.
- Description - The text that will show on the invoice line item.
- Amount - The pre-tax amount being prepaid.
- Available - The portion of the prepayment that has not yet been used to offset fees on another invoice.
Add a Prepayment
Click the + button at the top right of the ledger to open the Add Prepayment drawer (Figure 2).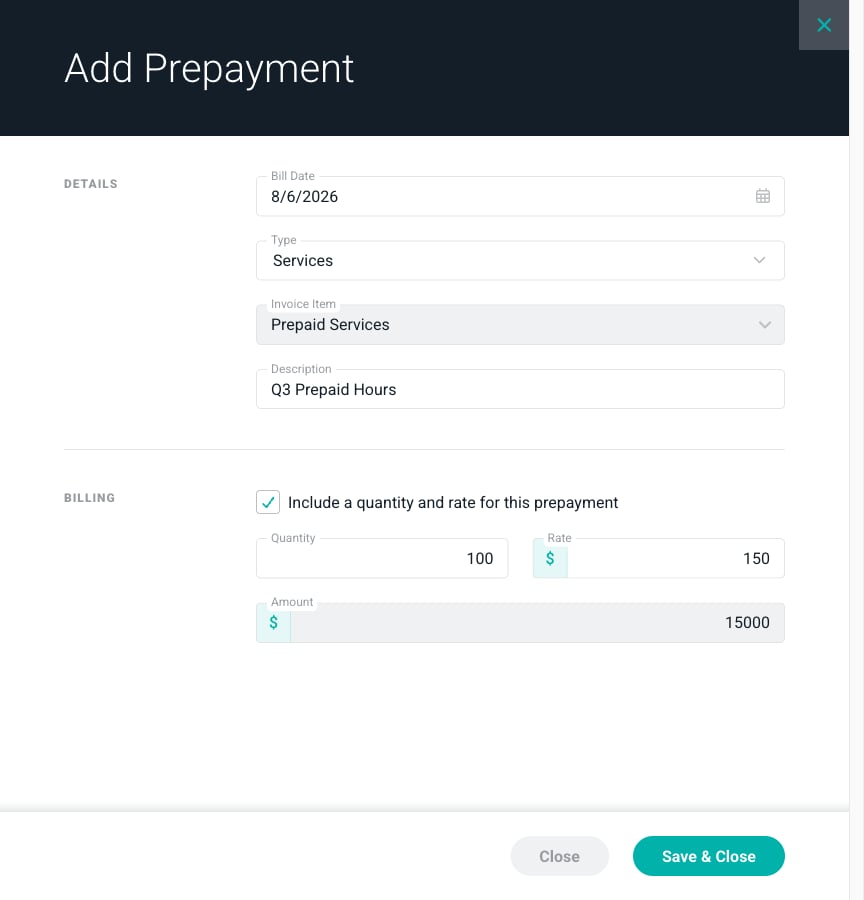
Figure 2 - The Add Prepayment Drawer
- Bill Date - The date the prepayment should appear on the Ready to Bill screen.
- Type - The revenue type the prepaid funds can be applied to. The type matters because it keeps prepaid funds where you intended them. A prepayment for services will never be used against billable expenses.
- Invoice Item - The invoice item to use on the invoice line. Your Workspace Admin can define as many invoice items as needed. Customers commonly create an invoice item such as “Prepaid Services” and map it, in the QuickBooks Online or Xero integration settings, to a product or service that posts to a liability account like Unearned Revenue. The prepayment then lands on the balance sheet rather than the income statement.
- Description - The text that will show on the invoice line item.
- Amount - The pre-tax amount you are charging the client.
- Quantity - The number of units being prepaid, such as 100 hours.
- Rate - The pre-tax fee per unit.
View a Prepayment That Has Been Invoiced
Once a prepayment is on an invoice, including a draft invoice, its fields can no longer be edited and it can’t be deleted. An invoice icon appears at the right of the row, and the edit pencil is replaced by an eye. Clicking the eye opens the View Prepayment drawer (Figure 3). The fields are read only, and an Applied to Invoices section at the bottom lists every invoice that has drawn down the prepayment, with the invoice number, issue date, and amount used. Both draft and published invoices are listed, and you can click an invoice number to open it.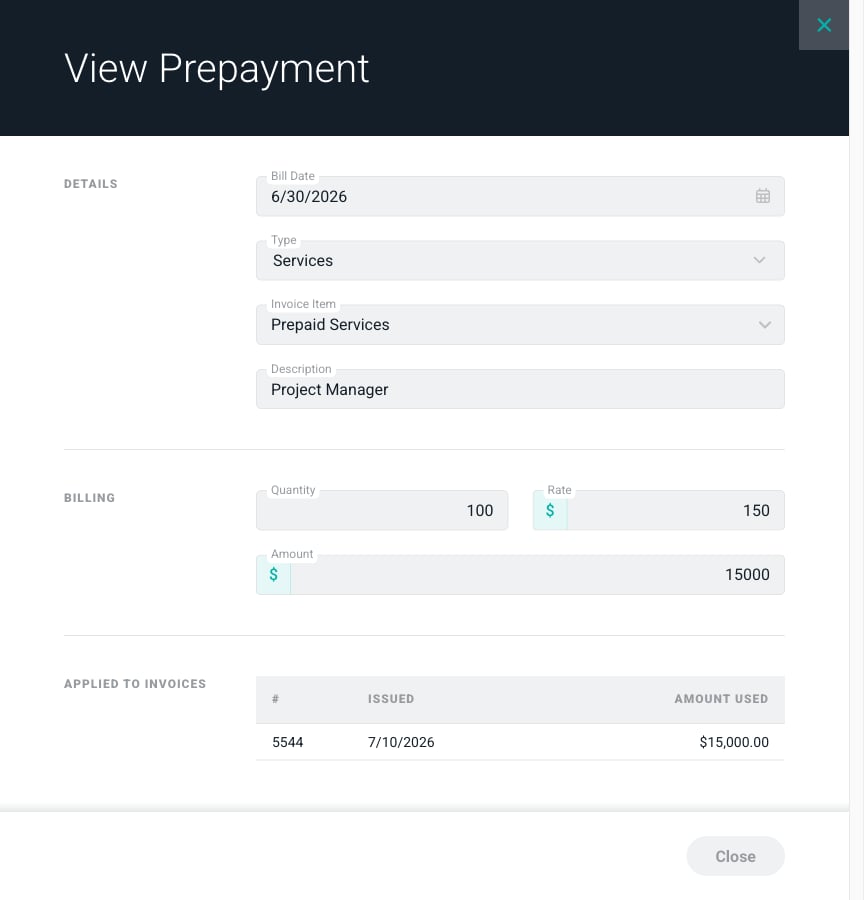
Figure 3 - The View Prepayment Drawer with the Applied to Invoices List
Invoicing a Prepayment
On the bill date, the prepayment appears on the Ready to Bill screen. Total Prepayments is shown in the summary bar alongside services, expenses, products, and other items (Figure 4).
Figure 4 - Total Prepayments in the Ready to Bill Summary Bar

Figure 5 - The Prepayments Column on the Ready to Bill List

Figure 6 - A Prepayment Line on a Draft Invoice
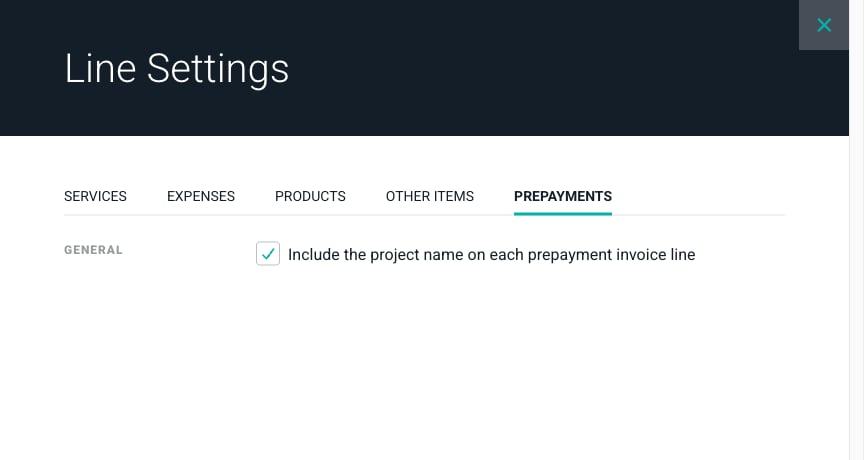
Figure 7 - The Prepayments Tab of the Line Settings Drawer
Offsetting Invoice Fees with a Prepayment
Once the invoice carrying a prepayment has been published, the prepaid funds become available to offset fees on future invoices. A prepayment on a draft invoice can’t be used this way yet. From then on, whenever an invoice is created for the project, Ruddr looks for available prepaid funds of the same type as the revenue on that invoice and adds a line at the bottom to offset those fees. The description reads “Services offset by prepayment”, or the equivalent for expenses, products, or other items, and the amount is negative (Figure 8).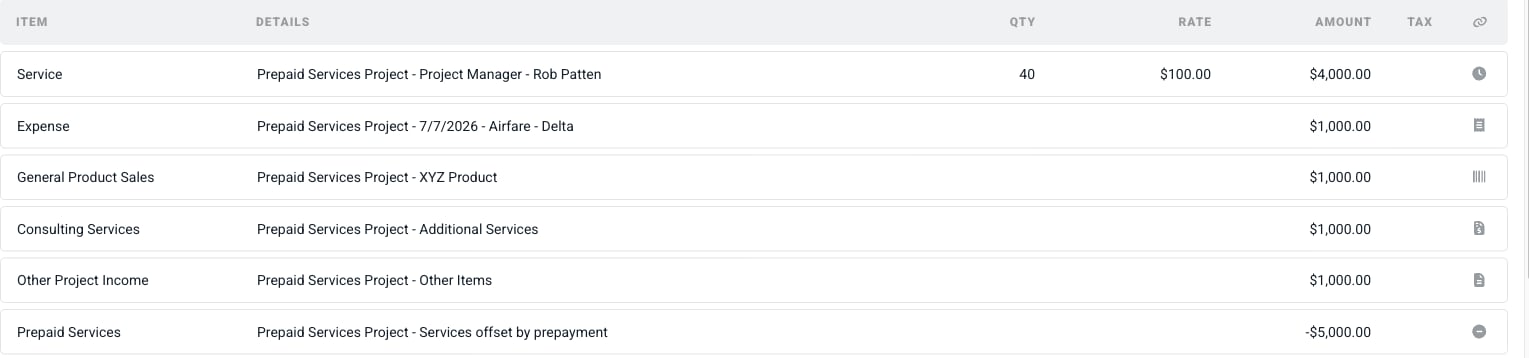
Figure 8 - An Invoice with Fees Offset by a Prepayment
- An invoice can have at most one offset line per prepayment type per project, so a maximum of four for a single project.
- Ruddr always draws down the oldest prepayment first. A newer prepayment is not touched until every older one of that type is fully used.
- Several prepayments can fund a single offset line. The Applied to Invoices list on each prepayment shows how the amount was split.
- The offset line defaults to the same invoice item as the prepayments of that type, and you can change it if you want.
Workspace Defaults for Prepayment Lines
Under Settings, on the Invoices screen, prepayments appear in the list of line types that can carry the project name (Figure 9). The setting controls whether new invoices include the project name on prepayment lines, and you can still override it per invoice from the Line Settings drawer.
Figure 9 - The Prepayments Option in the Workspace Invoice Defaults