Manual Expense Item Creation
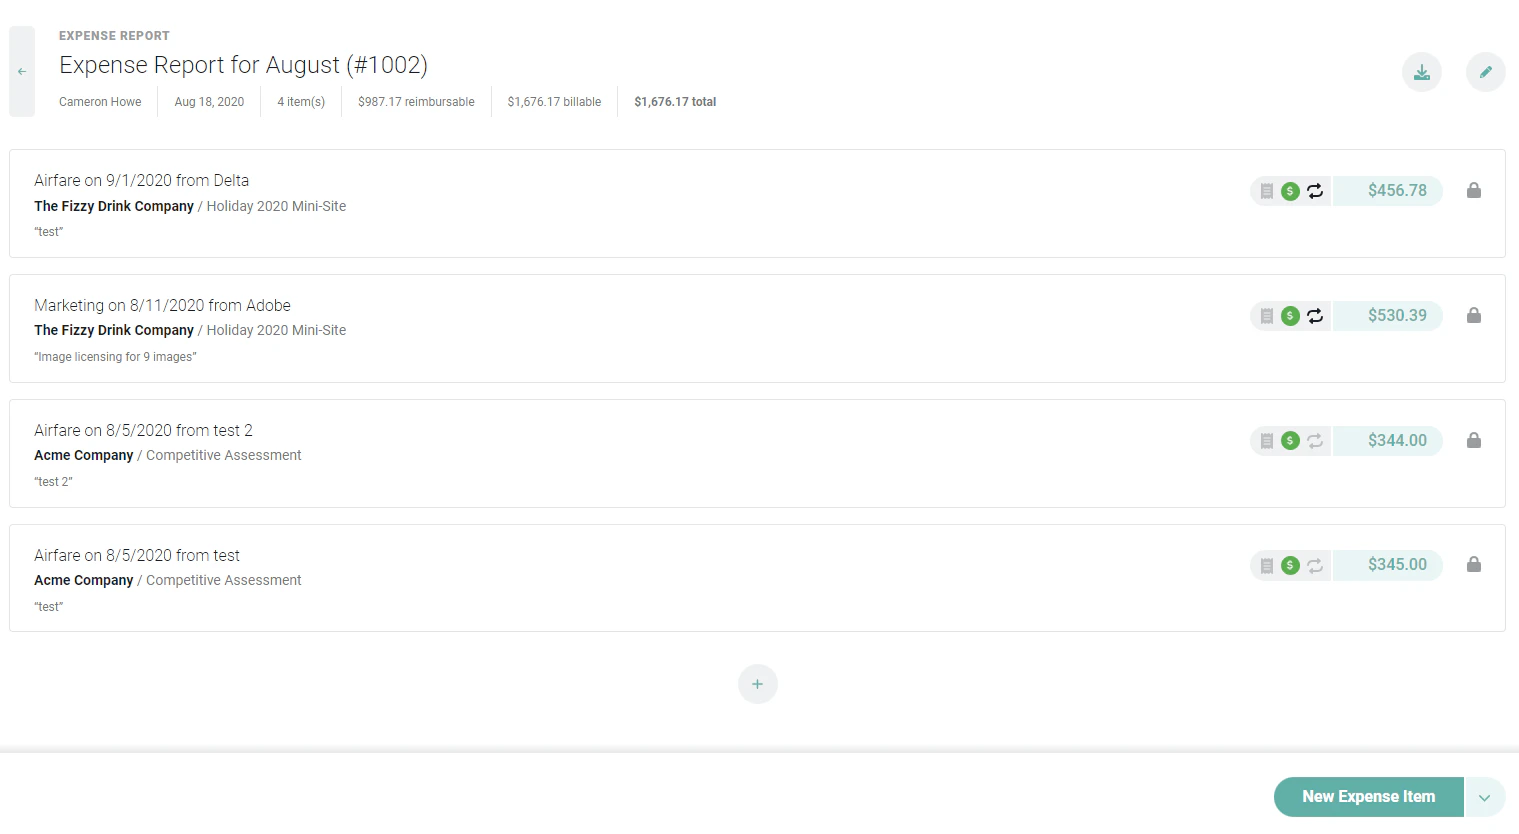
From the expense report screen (Figure 1), you can click on the New Expense Item button to add an expense item to the report.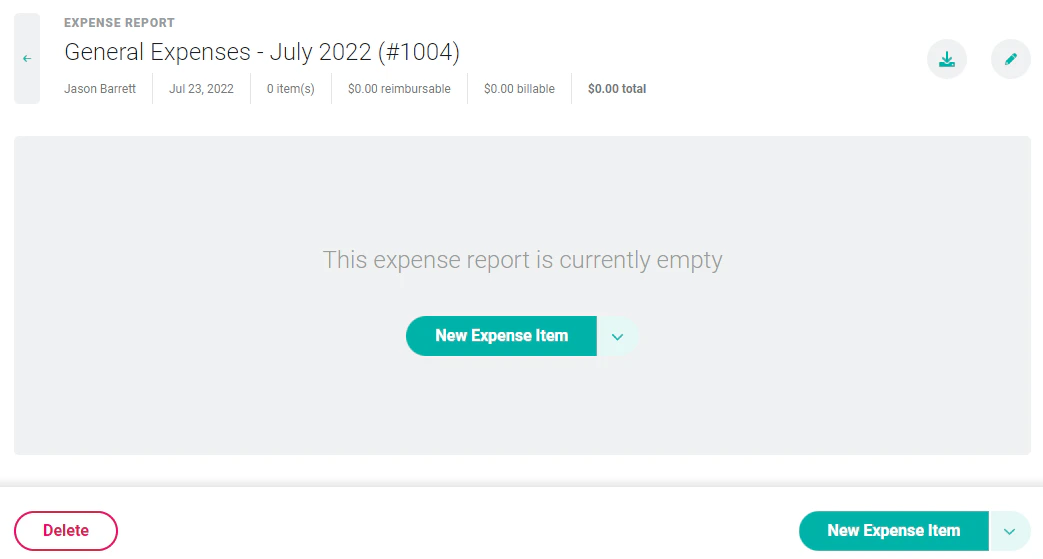
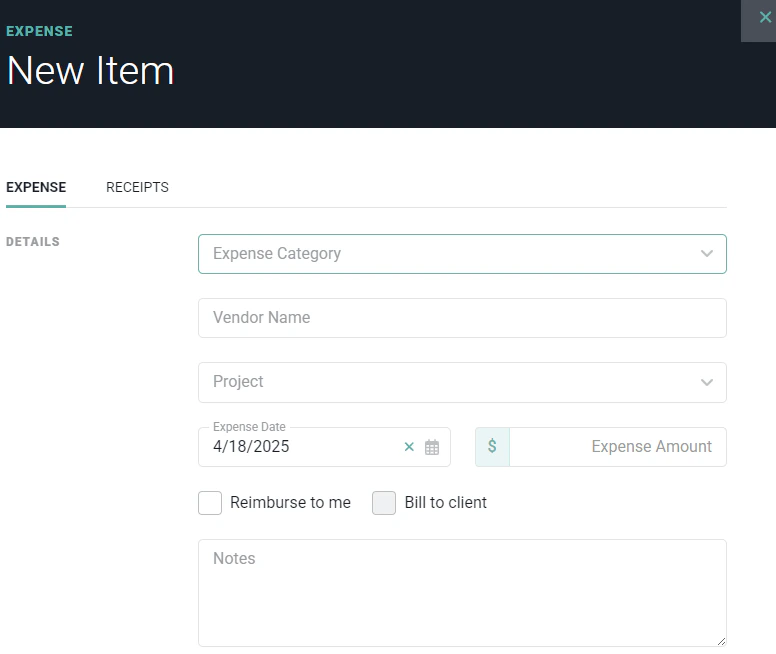
- Expense Category - Each new workspace comes with a default set of expense categories (such as Airfare, Mileage, etc.). A Workspace Admin can modify this set of categories to match your company standards.
- Vendor Name - The name of the vendor that provided the good or service. Note that some expense categories, such as mileage, will not need a vendor.
- Expense Date - The date the expense was incurred.
- Expense Amount - The amount of the expense.
- Project - The client and project associated with this expense. Even if an expense on a project is not billable, it is important to associate it with the project for budget tracking purposes. For internal expenses, this field can be left blank or it can be associated with an internal project.
- Reimburse to me - A checkbox that denotes whether or not you should be reimbursed for the expense. If you paid for the expense personally, this should likely be checked.
- Bill to client - A checkbox that denotes whether or not the client should be billed for the expense. If the billing type of the project is set to non-billable, then this checkbox will be disabled.
- Notes - Any details about the expense.
- Attendees - Certain types of expense categories may require you to list the names of the people in attendance. By default, the “Client/Prospect Entertainment” and “Client/Prospect Meal” categories require attendees. This setting can be configured for each expense category by a Workspace Admin.
- Number of Units - Expense categories can be set up as a “unit” expense category. These types of expenses will require a number of units and a cost per unit. For example, the “Mileage” expense category will require the number of miles to be provided as well as the cost per mile.
- Cost per Unit - As stated above, when an expense category is set up as a unit type, it will require a cost per unit. Each unit expense category can be set up with a default cost per unit by a Workspace Admin.
Cloning an Expense
Once you create an expense on your expense report, you can clone that expense and update with the new information. You can do this by selecting the arrow under the edit button. Select Clone in the drop down (Figure 3).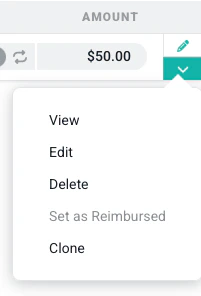
Expense Markup
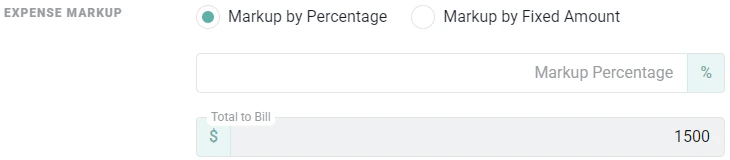
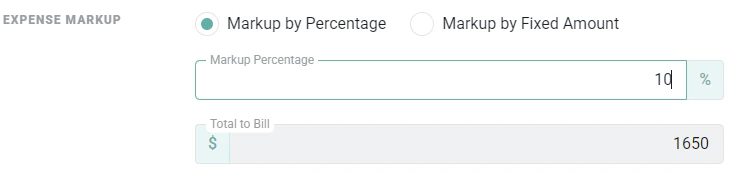
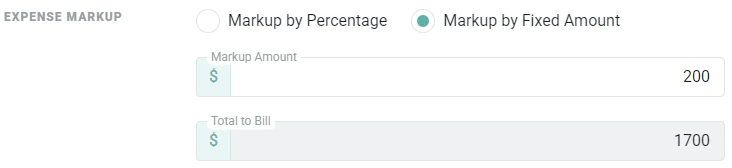
When marking up expenses in Ruddr, you will have an Expense Amount, which represents the cost outlay associated with purchasing the item(s). As such, the Expense Amount will be tracked as Expense Cost on a project. Additionally, Ruddr will calculate a Total to Bill, which represents the amount that you will bill the client when invoicing the expense. As such, the Total to Bill will be tracked as Expense Revenue on a project. When the Expense Markup feature is enabled, a Markup Expense field (Figure 5) will be available on the New Item drawer if the Bill to Client fields is selected and an Expense Amount has been specified.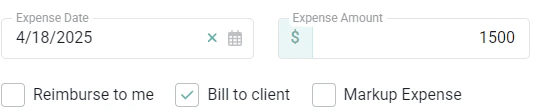
Importing Expense Items
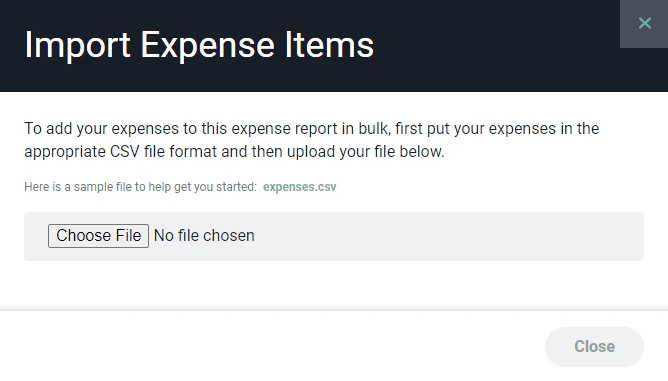
In addition to, or in lieu of, creating individual expense items, members can upload expense items to an expense report. On the expense report screen (Figure 1), members can access the New Expense Item action menu (Figure 9) and select Import Expenses.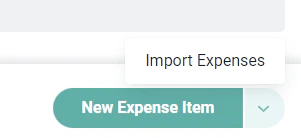
Uploading Receipts
As you create new expense items, or as you edit existing ones, you may want to attach receipts to the item. On the receipts tab of the expense item drawer (Figure 12), you can upload one or more receipts that correspond to this expense item. Simply drag expense images to the form or click on the upload box to select a file from your computer. Note that receipt images can be no larger than 10MB in size.