Create a new time entry
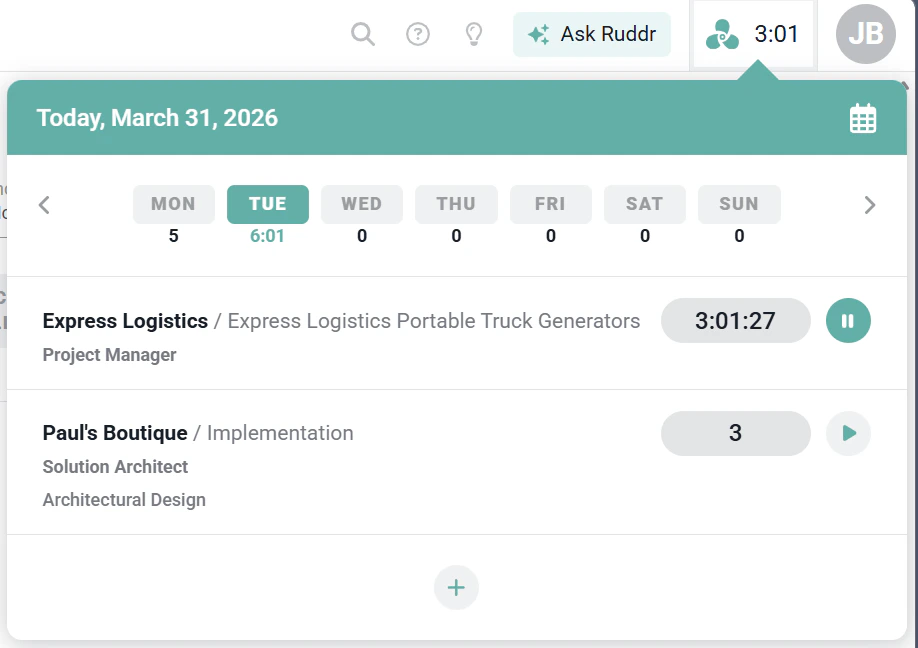
To create a new time entry for the selected day, click the plus icon at the bottom of the time entry list (Figure 2). This will bring up the same time entry drawer (Figure 4) that is used on the day view. For more information on using the time entry drawer, see the day view article.
Start and End Time for Time Entries
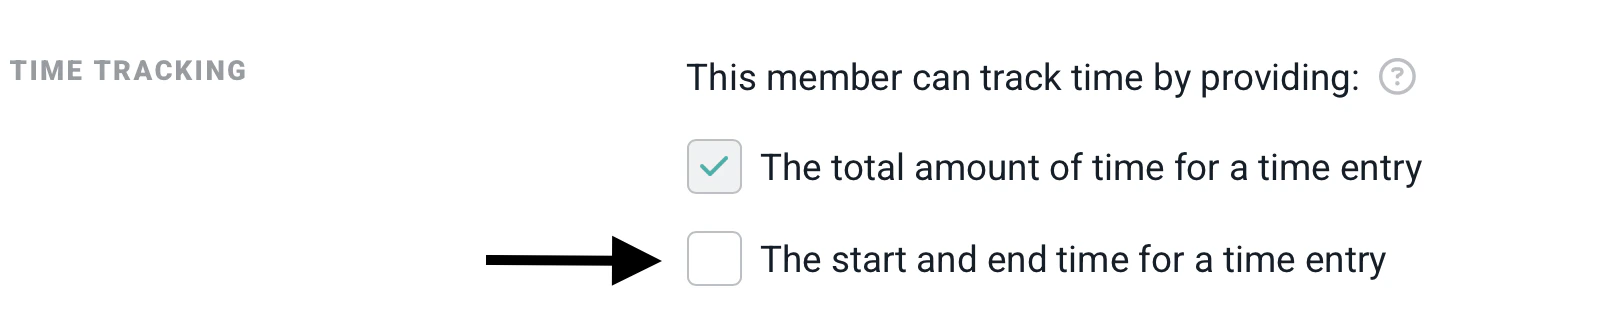
If you want Ruddr to track the start and end time on projects, you will need to enable in the workspace settings (Figure 5) and on each member profile.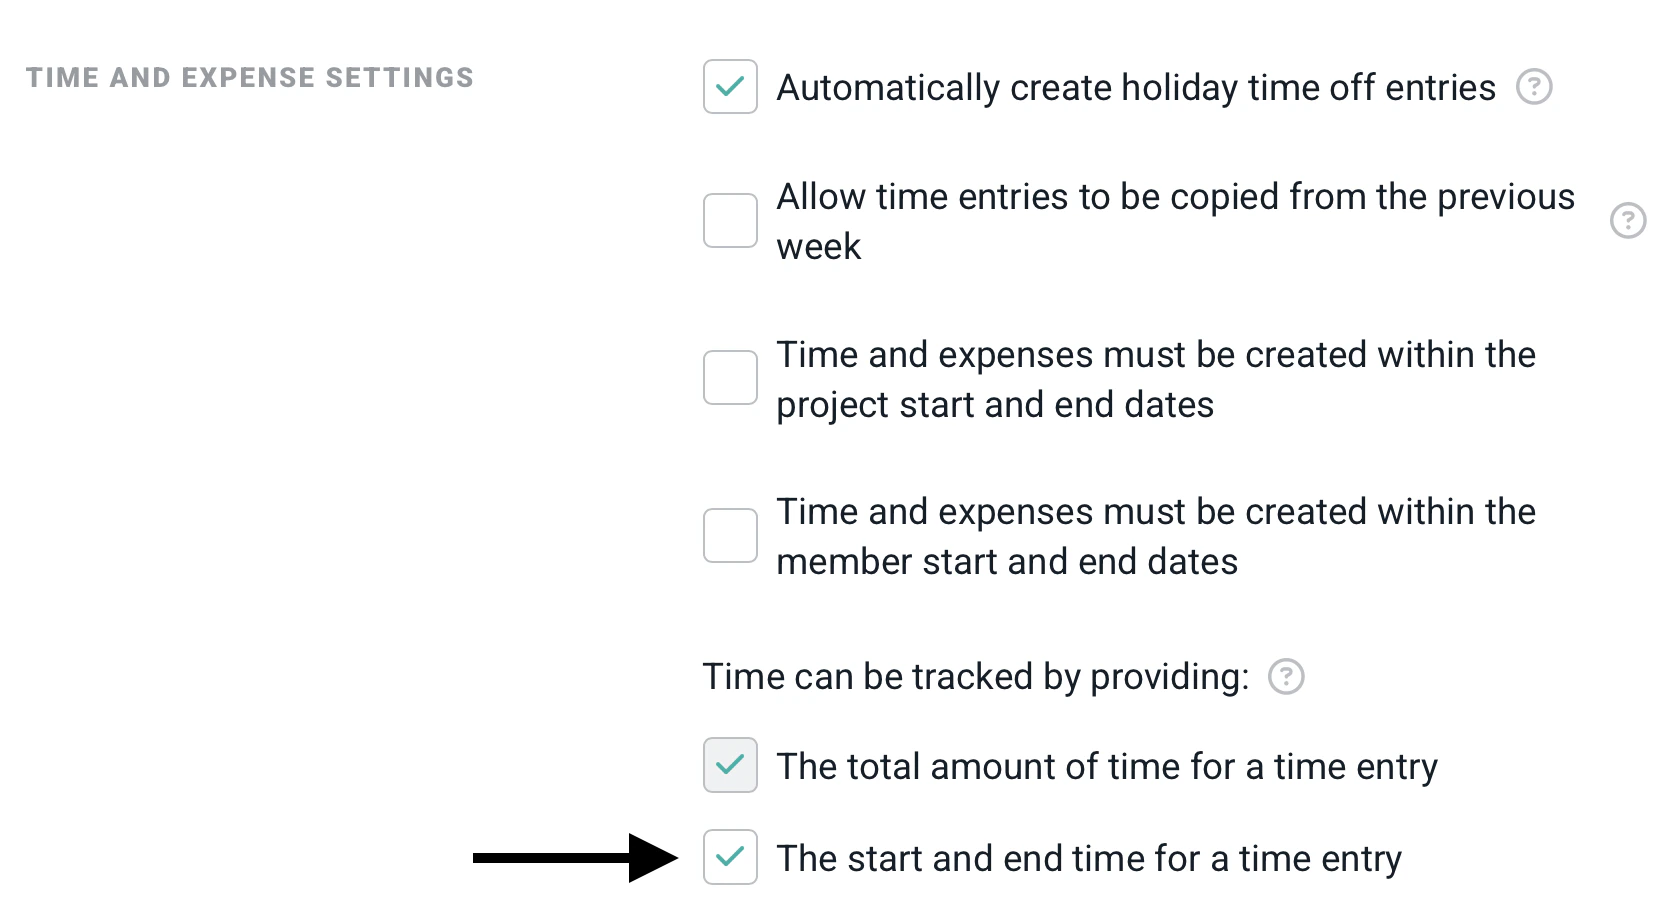
Start a Timer
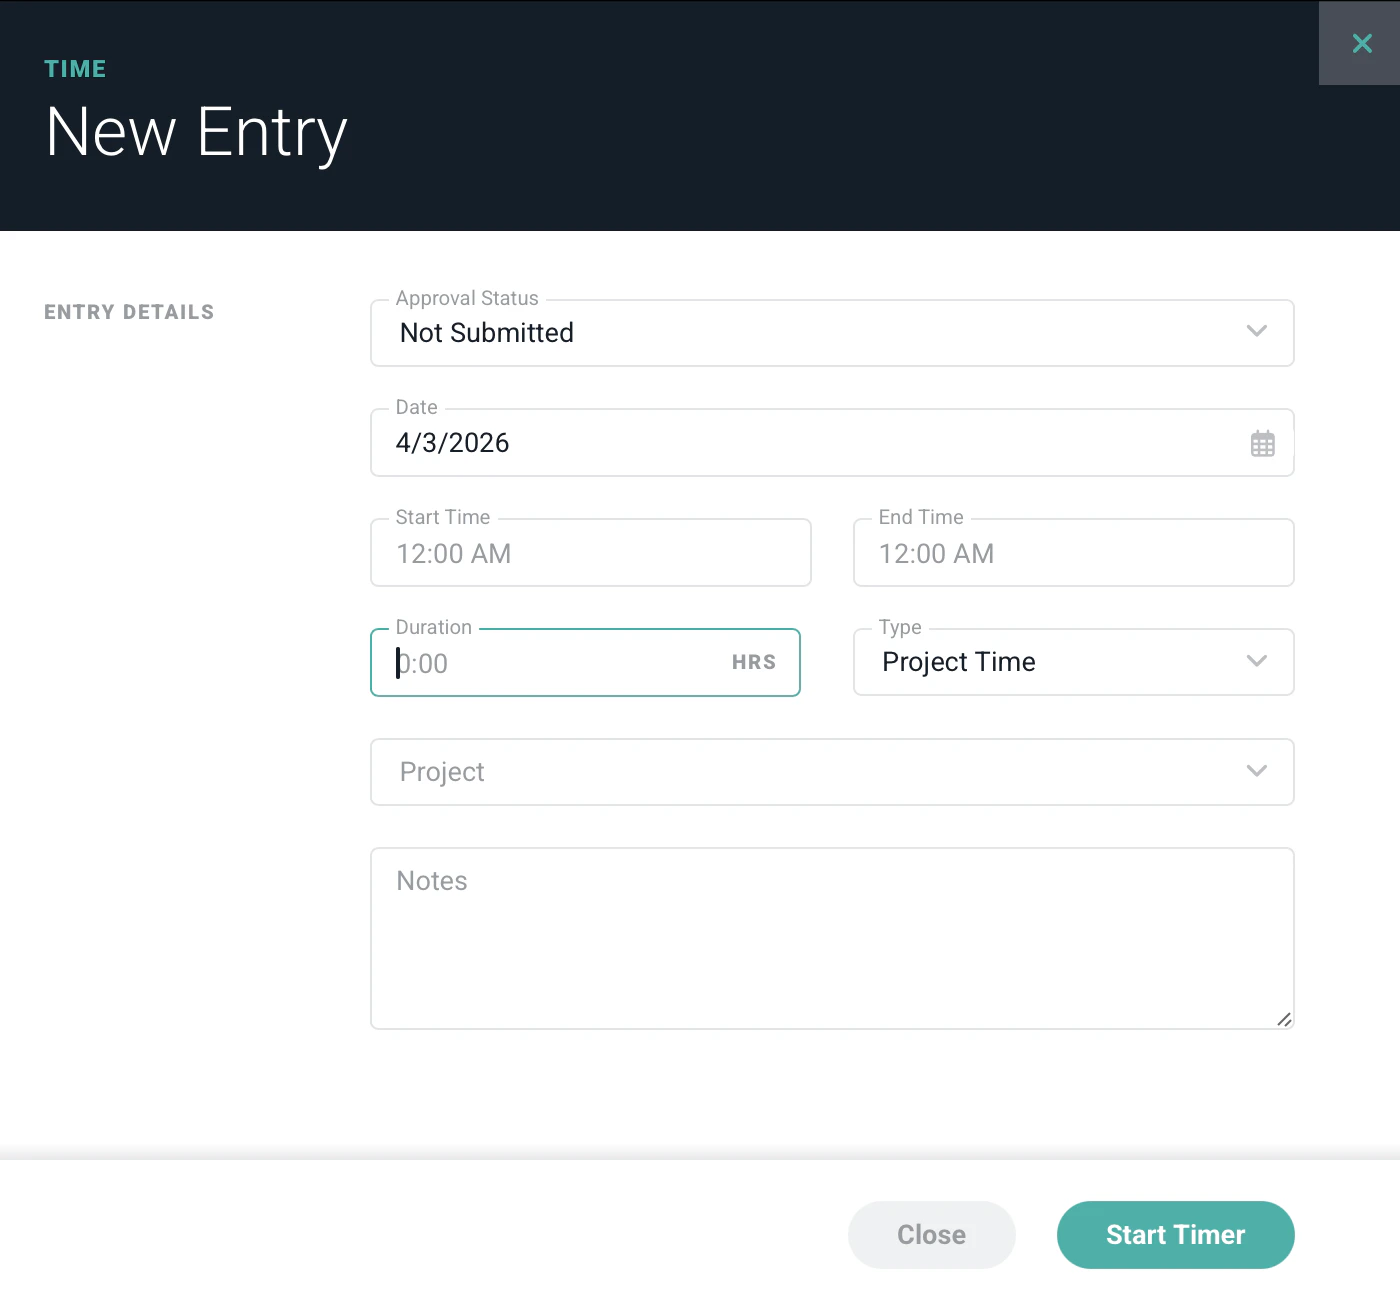
If you want Ruddr to start a timer for your work, simply leave the time field empty on the drawer. When the time field is blank, the button at the bottom of the drawer will be labeled “Start Timer”. Clicking that button (Figure 4) will save the information on the drawer, close the drawer, and begin a timer. When a timer is running for an entry on the time overlay screen (Figure 2), you will see its seconds counting up. Also, a pause button (Figure 8) will be shown to the right of the timer. At any point, you can pause the timer by clicking the pause button and later restart the timer by clicking the play button.