Edit the Project Team
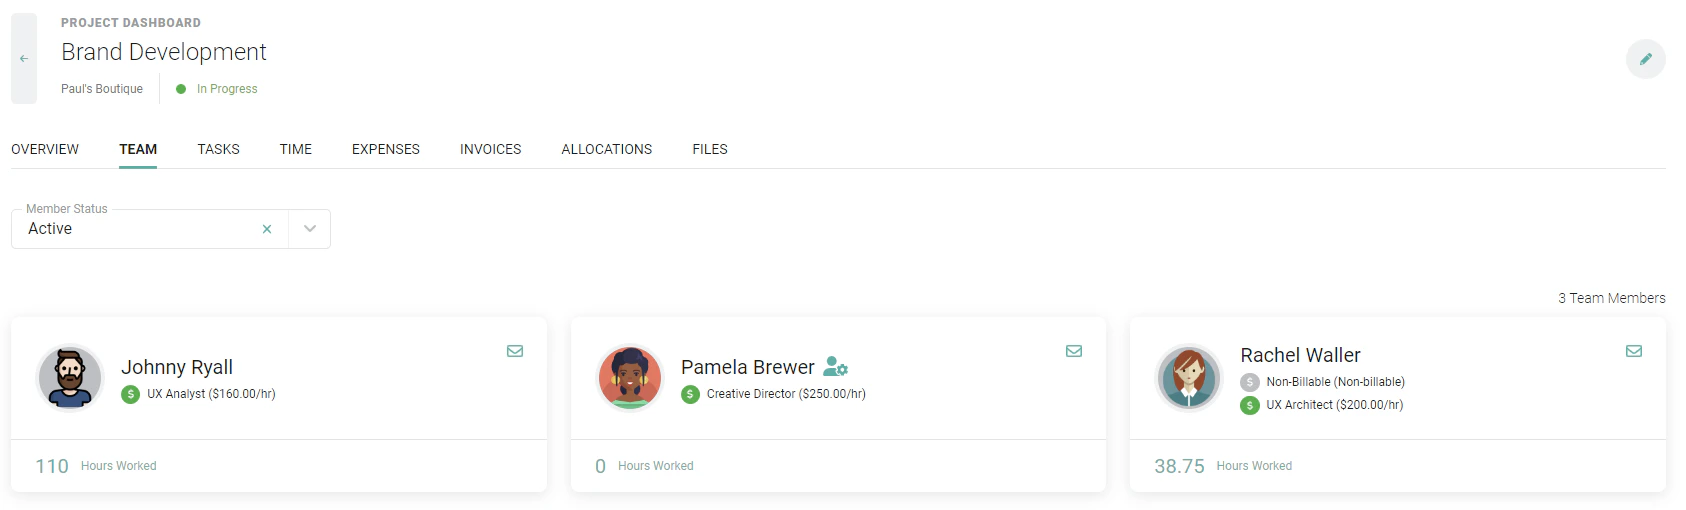
To edit the project team, click the edit button at the top-right of the project dashboard (Figure 1). In order to see this button, you must have the Edit project permission. This button will bring up the Edit Project drawer. Switch to the Team tab (Figure 2) of the project drawer to manage the project team members. On the Team tab, you can add team members, remove or deactivate a team member, set a member as Project Admin, specify whether a team member is billable and has a bill rate, and override a member’s cost rate for the project.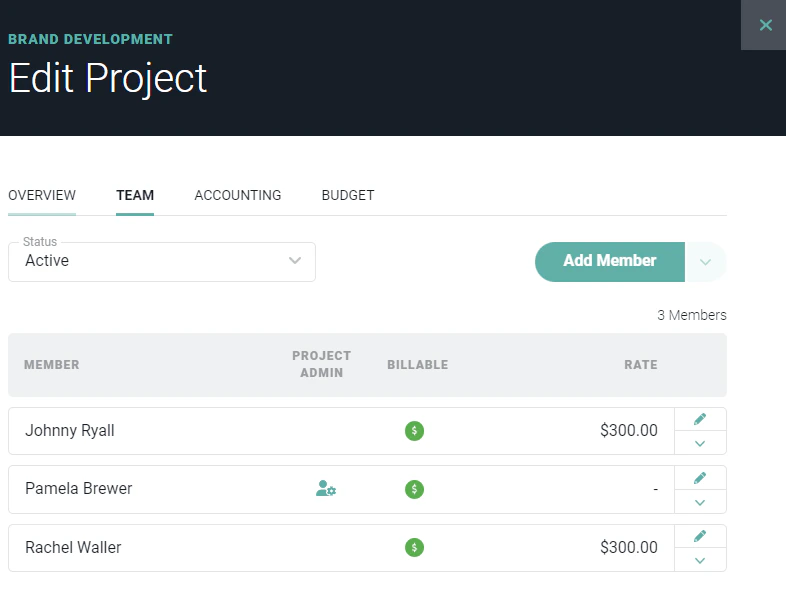
Add a Project Team Member
To add a team member to the project team, simply click the Add Members button on the Team tab (Figure 2) of the Edit Project drawer. This will show a modal (Figure 3) where you can search and select members to add to the project team. You will be shown matching results and can select the desired member to add to the team. Note that the member must already exist in the workspace in order to be added to a project team. If the member does not exist, ask your Workspace Admin to invite the new user into the workspace.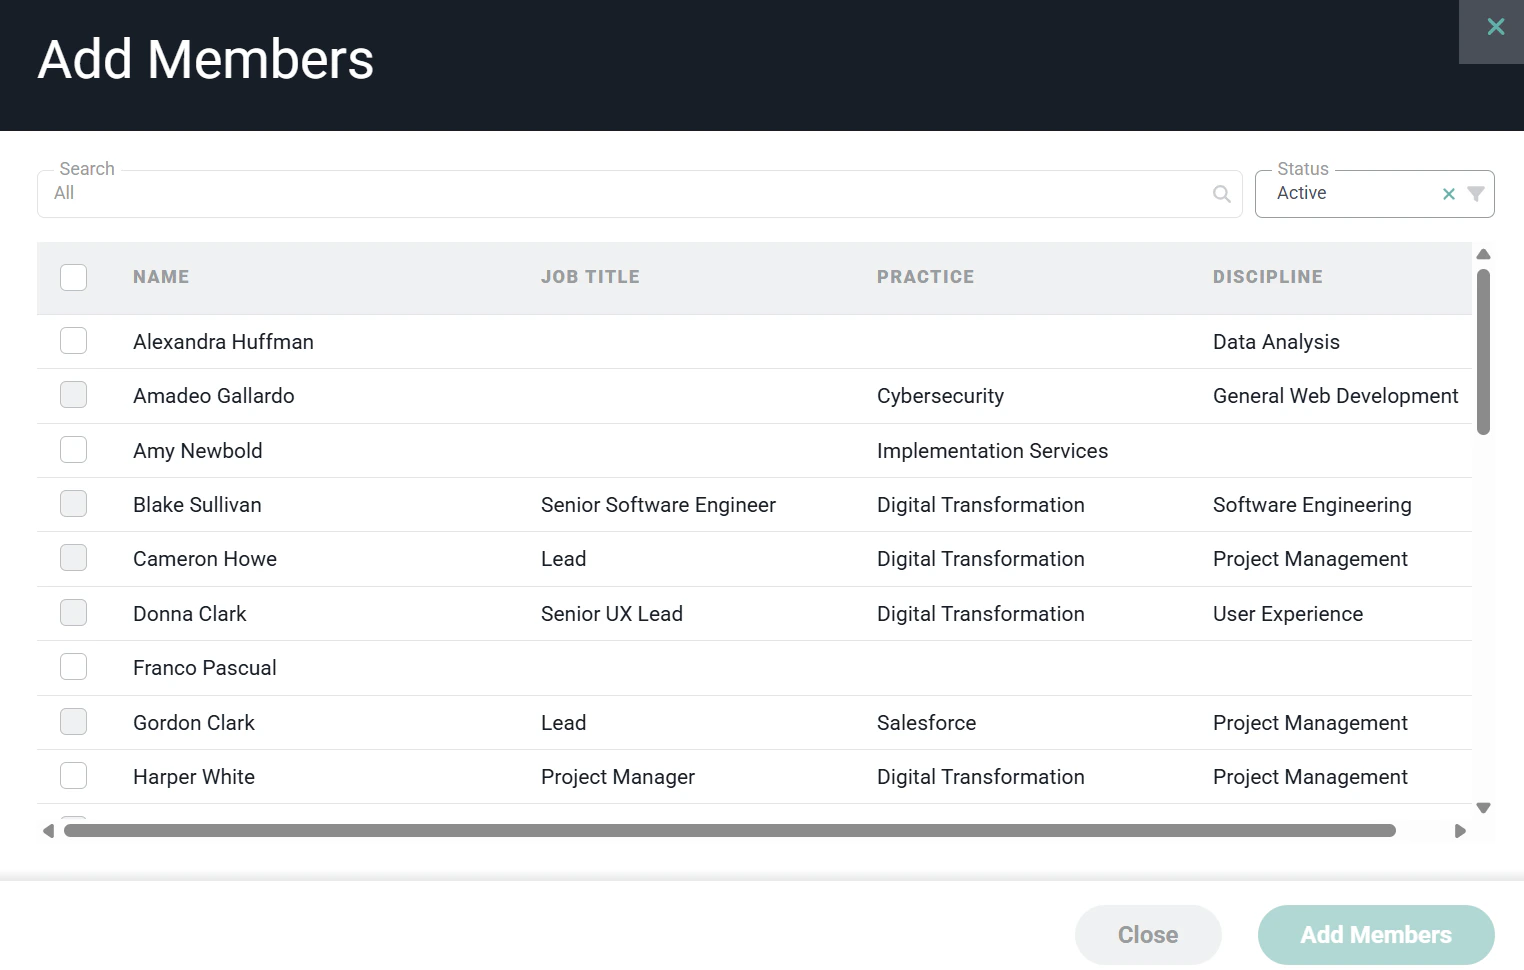
Remove a Project Team Member
To remove a team member from the project team, simply click the action menu at the right of the member row on the Team tab (Figure 2) of the Edit Project drawer. This will show a menu (Figure 4) that will include a Remove from Team option and a Deactivate from Team option.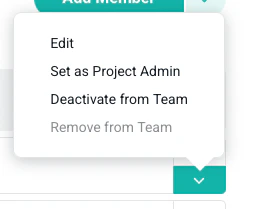
- The member has no time entries associated with the project
- The member has no expense items associated with the project
- The member is not assigned to any project roles
- The member is not assigned to any project tasks
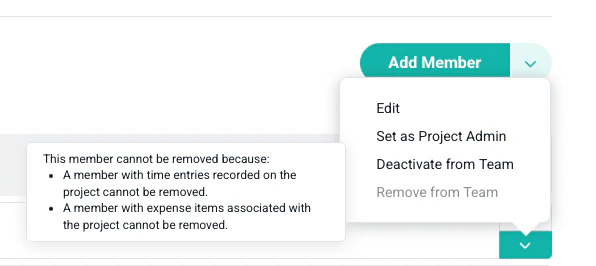
Figure 5 - Description on why the member can not be removed from the project
Deactivate a Project Team Member
If the criteria to remove a project team member cannot be met, you can deactivate the member instead. This will effectively remove the member from the project team and prohibit the member from creating or editing time or expenses for the project. But, the historical time and expense entries of that member will be preserved. To deactivate a team member, simply click on the action menu (Figure 4) at the right of the member row on the Team tab (Figure 2) of the Edit Project drawer and choose the Deactivate from Team menu option.Set a Member as Project Admin
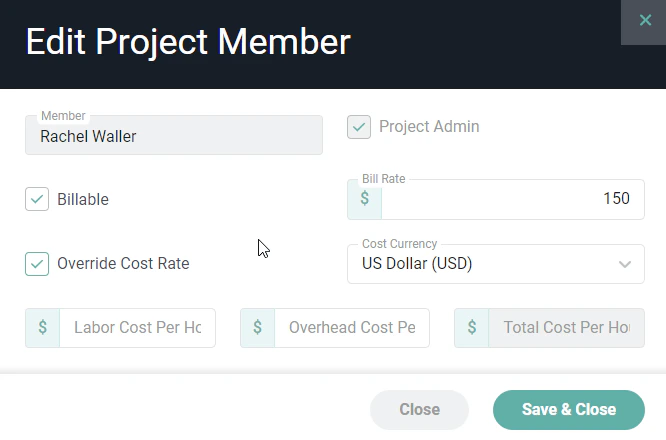
A Project Admin is required for each project in Ruddr and must be specified upon Project creation.. If you wish to change the Project Admin, access the action menu (Figure 4) at the end of the project team member row on the Team tab (Figure 2) and select the Set as Project Admin menu item. For more on this role, and on how to specify additional Project Admins on a project, please view The Project Admin in Ruddr Help Center. Additional Project Admins can be specified by editing a project member and selecting the Project Admin checkbox on the Edit Project Member dialog (Figure 5).Set a Member as a Billable Member and Provide a Bill Rate
In the case where Project Roles are not leveraged on a project, a project member can be added to that project as a billable project member or a non-billable project member. Additionally, a member can have a bill rate applied to them when Project Roles are not used. To specify that a member is billable / non-billable, access the action menu (Figure 4) at the end of the project team member row on the Team tab (Figure 2). On the Edit Project Member dialog (Figure 6), check the Billable checkbox to specify that the member is billable, or uncheck to set the project member as a non-billable member. Reminder that this option is only available when the project is not using Project Roles. On this same dialog (Figure 6), if the member is a billable project member, you can supply a Bill Rate for the member on the project by entering a monetary value into the Bill Rate text box on the form. Again, this option is only available when the project does not use Project Roles.Override a Member’s Cost Rate
There may be instances where a team member’s cost rate differs on a per project basis. Perhaps you leverage sub-contractors who bill you at a different hourly rate depending on the project they are working on. In those instances, you can override a team member’s cost rate for a particular project. To do this, access the action menu (Figure 4) at the end of the project team member row on the Team tab (Figure 2). Select the Edit menu item. This will open an Edit Project Member form (Figure 6).