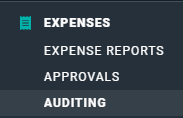
To audit expense items in Ruddr, simply click on the Auditing sub-menu item (Figure 1) within the Expenses area. Every member of the workspace can see his or her own expense items on the expense auditing screen (Figure 2). Depending on the member’s security role, the expenses of other members may also show on the auditing screen. If an expense item is locked, it will have a lock icon on the left of the row and will be read-only.
Select Auditing to Administer Expense Entries

Figure 1 - Select Auditing to Administer Expense Entries
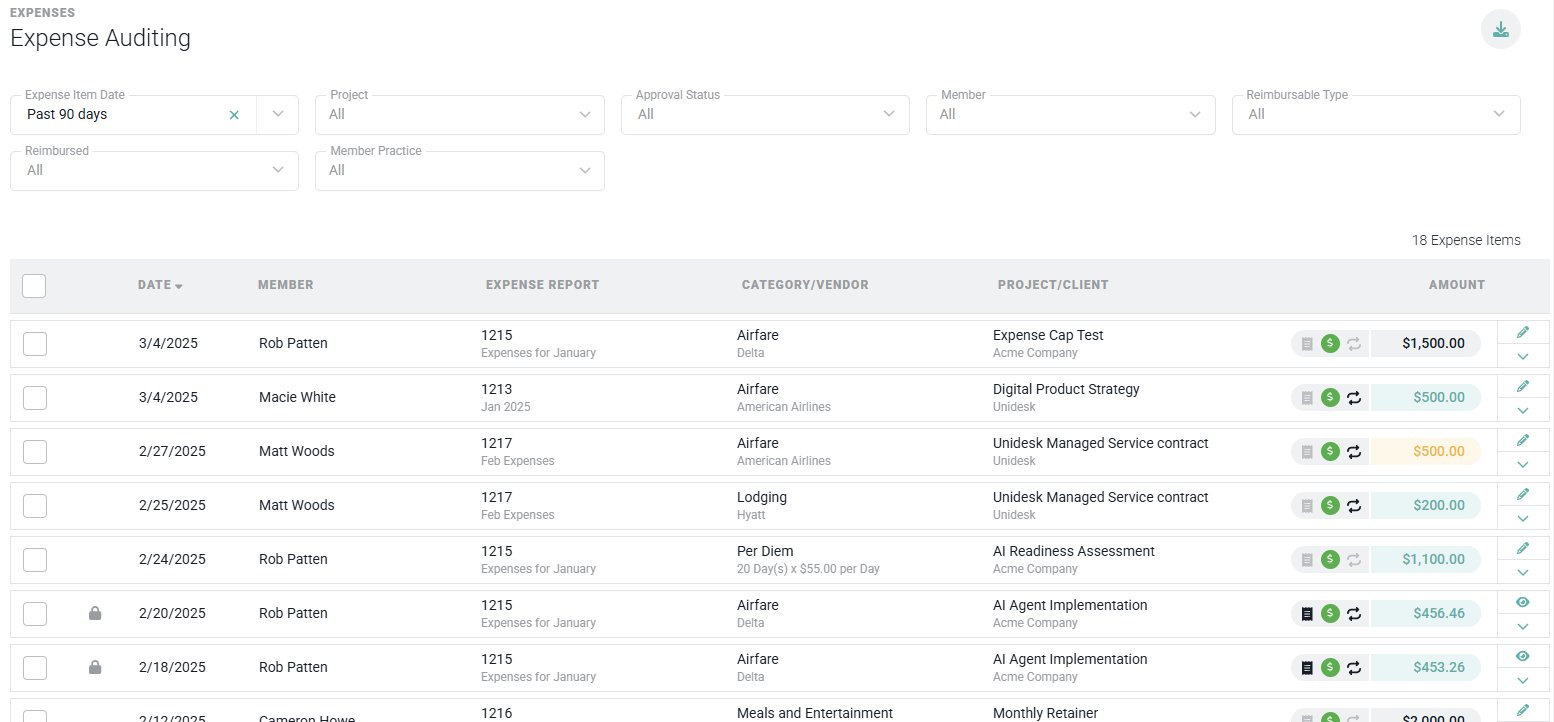
Administer Multiple Expense Entries from the Expense Auditing Screen
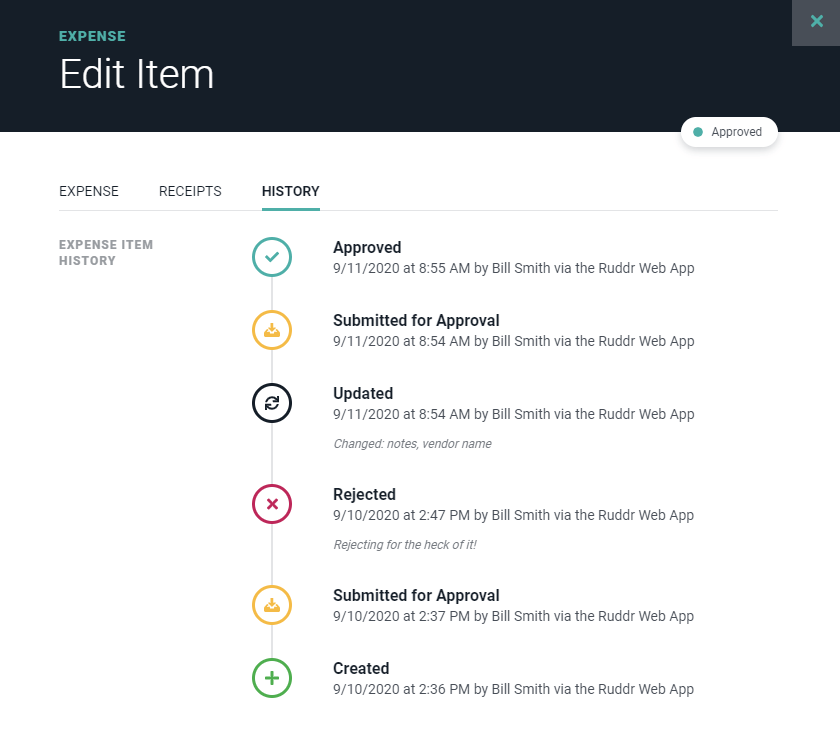
Figure 2 - Administer Multiple Expense Entries from the Expense Auditing Screen

If the member’s security role has the View time and expenses for member permission or the View time entries and expense items on these projects project permission, the member will be able to view all expense items within the workspace for which they have those permissions. If the member’s security role also has the Administer time and expenses for member permission or the Administer and approve time entries and expense items on these projects project permission, the member will be able to edit or delete any unlocked expense items within the workspace for which they have those permissions, unless those entries are on a published invoice in which case they will appear locked. For more information regarding View / Administer time and expense permissions, view the Security Roles article in the Ruddr Help Center. To view the detail of an expense item in the auditing list, simply click on the row to bring up the edit expense item drawer. If the expense item is unlocked and you have administration rights, you will be able to make edits to the information on the drawer and click the Save & Close button. Note that any changes made to an expense item will be reflected in the history of the item. This includes all field edits and receipt additions or removals. The History tab (Figure 3) of the expense item drawer will show the chronological history of all changes to the item.
History Tab shows the Chronological Changes made to an Expense Item

Figure 3 - History Tab shows the Chronological Changes made to an Expense Item

Bulk Updates

To update multiple expenses at the same time, you can utilize the bulk update actions in the auditing section of expenses. You will be able to select multiple expense entries (Figure 4) and utilize the Bulk Actions selector in the bottom right.
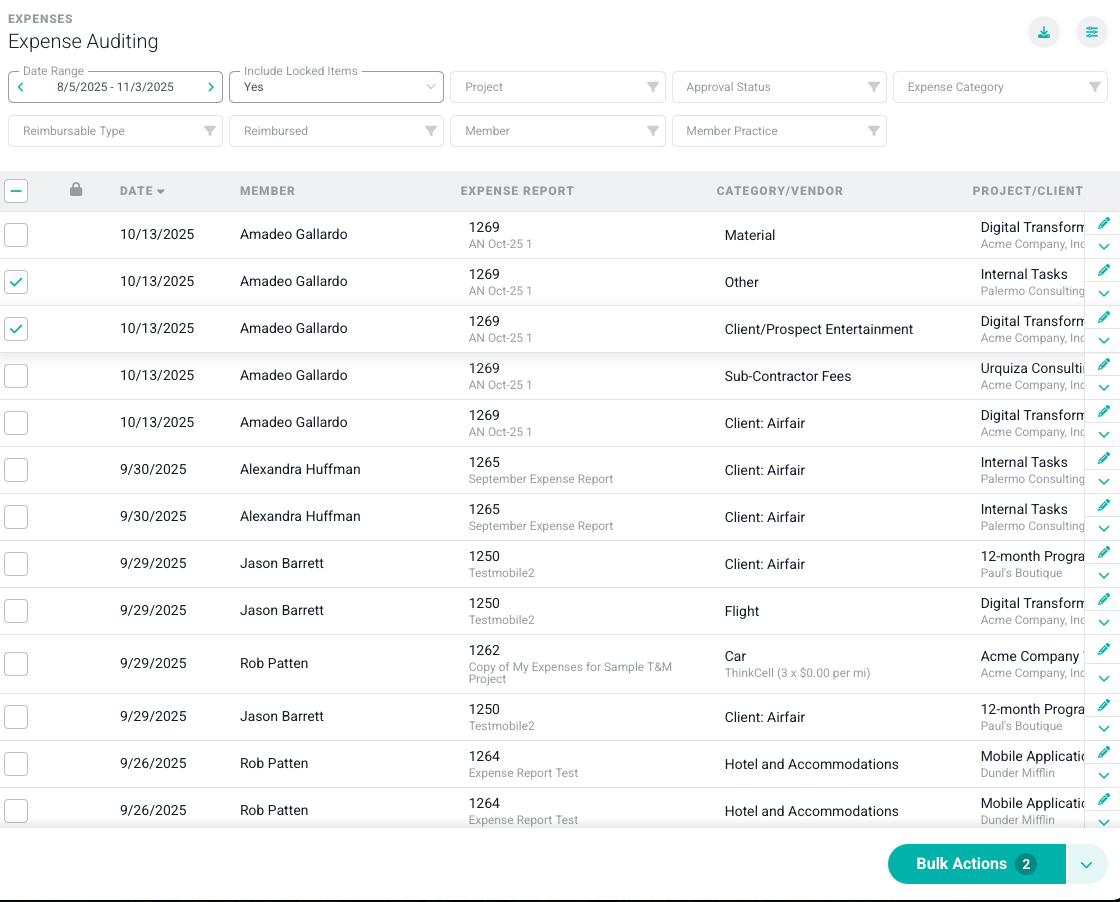
Audit Screen for expenses and bulk updates
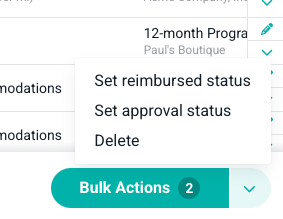
Figure 4 - Audit Screen for expenses and bulk updates

Once you have selected the expenses you want to bulk update, you will be able to select the type of update you want to make, (Figure 5) whether that is to set the expenses as reimbursed or to apply an approval status or to delete the expense(s). Once you bulk delete, those items are permanently deleted.
Select what bulk update you want to make
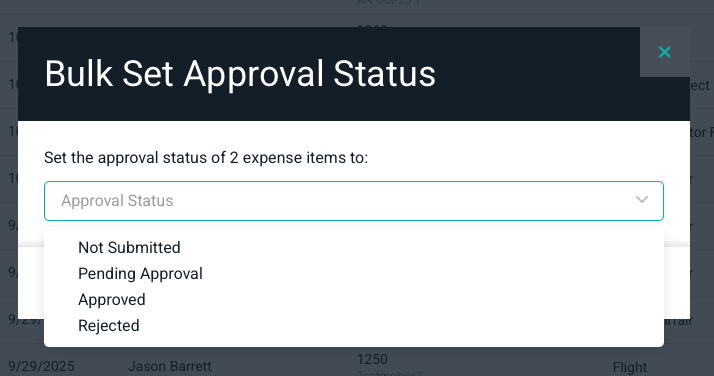
Figure 5 - Select what bulk update you want to make

You will be able to complete your updates and once finalized, (Figure 6) you will receive a confirmation of what was updated. (Figure 7)
Finalize your selection based on if you want to change approval status
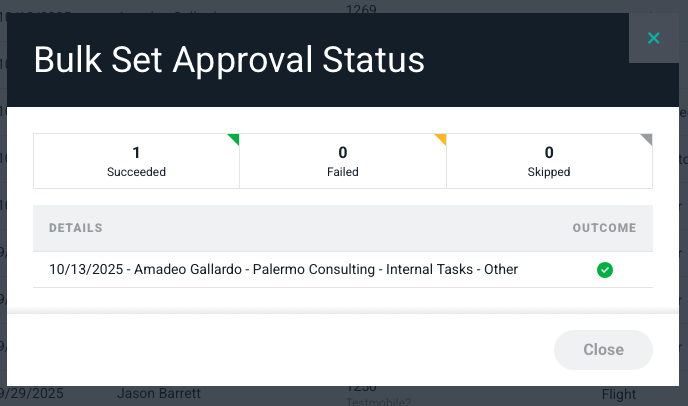
Figure 6 - Finalize your selection based on if you want to change approval status

Confirmation of bulk action approval status

Figure 7 - Confirmation of bulk action approval status

There will be times you see locked expenses for which you can not make any updates (Figure 8). You will see a lock icon next to the check box. Once you hover over the lock, it will give you a description of why that expense was locked.
Locked Expense

Figure 8 - Locked Expense