The status of an expense item correlates to the item’s stage in the approval process. Like time entries, expense items have four possible states which are Not Submitted, Pending Approval, Rejected, and Approved. Each status setting is associated with a color so you can glance at an expense item and immediately know its state. Items in the Not Submitted state will be gray, Pending Approval will be yellow, Rejected will be red, and Approved will be green. When a project is configured, it can be set up for either manual or automatic expense approvals. With manual approvals, the expenses on expense reports must be submitted for approval, and the items will flow to the expense approver(s) for that project. Expense items on projects that use automatic approval will immediately turn green (Approved) when they are created. Below is a brief explanation of the four expense item states.

Not Submitted

All new expense items that require manual approval start in the Not Submitted state. This simply means that the item has been created but has yet to be submitted for approval. When an expense item is in the Not Submitted state, the expense amount will be shown within a gray status oval (Figure 1).
Not Submitted Expense Item

Figure 1 - Not Submitted Expense Item

Pending Approval

The pending approval state means that the expense item has been submitted for approval but the approver has not taken action yet. When an expense item is in the Pending Approval state, it will be shown within a yellow status oval (Figure 2).

Pending Approval Expense Item

Figure 2 - Pending Approval Expense Item
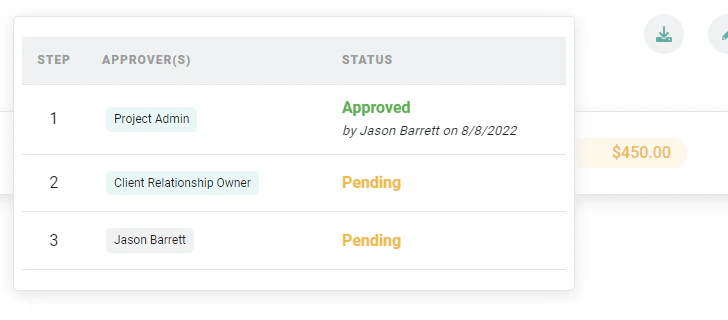
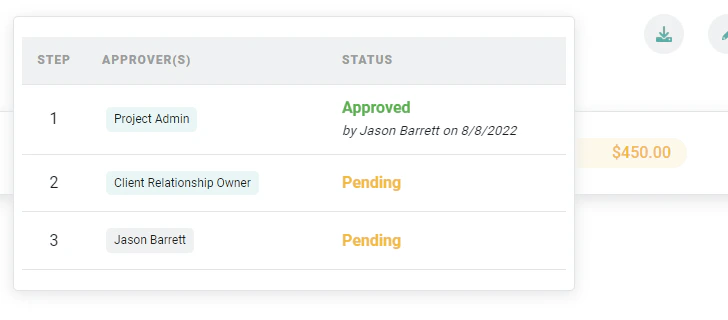
For workspaces where Multi-Step Approval Workflow is enabled, hovering over the yellow oval will display the current progress of the expense item in the workflow (Figure 3).
Hover over a Pending Expense Item to View its Multi-Step Approval Progress

Figure 3 - Hover over a Pending Expense Item to View its Multi-Step Approval Progress

Rejected

When the approver rejects an expense item, the approver must provide an explanation as to why the expense item is being rejected. The original submitter will receive an email notification about the rejection so long as no such rejection notification has been sent in the past 30 minutes. The original submitter can then make any needed adjustments to the expense item and resubmit it for approval. When an expense item is in the Rejected state, it will be shown within a red status oval (Figure 4).

Rejected Expense Item

Figure 4 - Rejected Expense Item

Approved

If a project is set for automatic approvals, all expense items created for the project will automatically show as approved once they are saved. For projects that use manual approvals, the Project Admin will approve or reject all expenses that are submitted on the project. When an expense item is in the Approved state, it will be shown within a green status oval (Figure 5).

Approved Expense Item

Figure 5 - Approved Expense Item

Once an expense item has been approved, it will show up as locked for the submitter unless the submitter’s security role has either the Administer time and expenses for member permission or the Administer and approve time entries and expense items on these projects project permission for the associated project. Once the expense item is associated with a published invoice, the expense item will be locked for all workspace members. When an invoice is published in Ruddr, any time and expenses associated with that invoice that are not already approved will be approved as a part of the publishing process.