

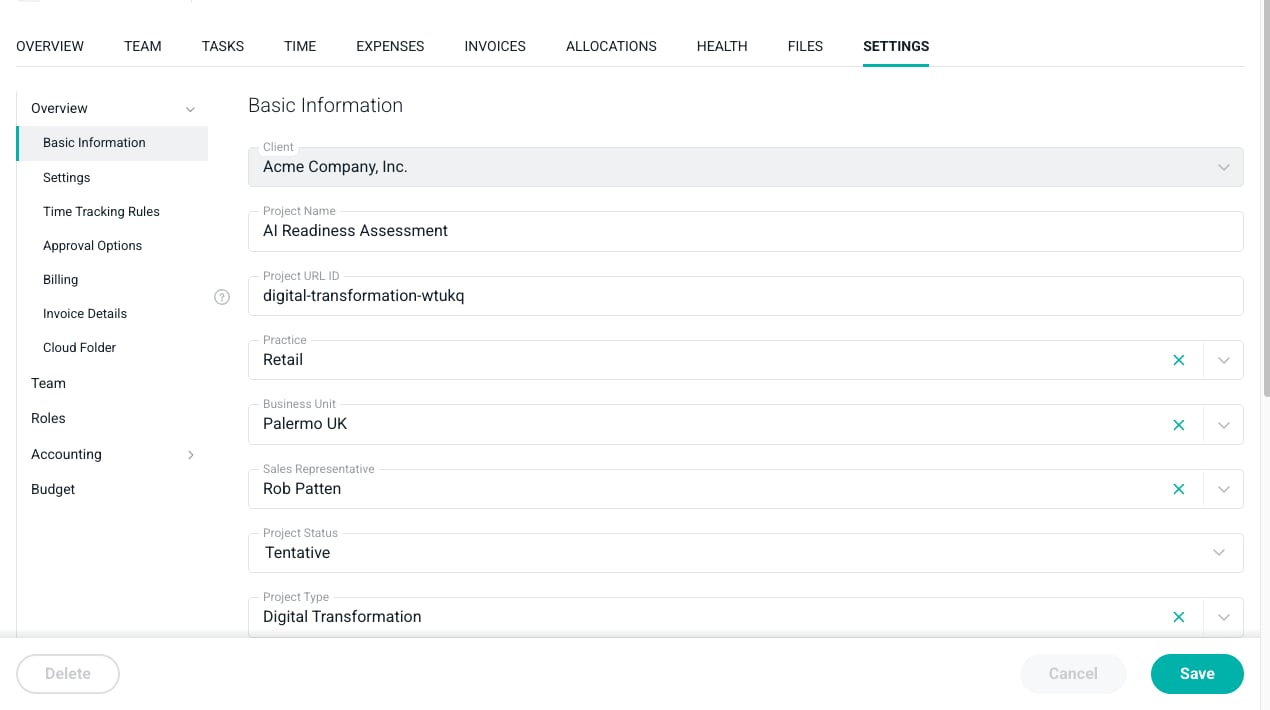
Figure 1 - The Settings Tab of the Project Dashboard
Navigating Project Settings
Clicking on the Settings tab takes you to the Basic Information section of the project overview. On the left side of the screen is a navigation menu with the following sections:- Overview - The project’s basic information and configuration options. This section contains the anchored sections Basic Information, Settings, Time Tracking Rules, Approval Options, Billing, Invoice Details, and Cloud Folder. As you scroll, the menu highlights the section currently in view. Each of these sections is described in detail in the Create a New Project article.
- Team - Manage the project team members. See the Project Team article.
- Roles - Manage project roles and rates. This section is only shown when the project uses roles. See the Project Roles article.
- Accounting - The project’s accounting ledgers. Clicking on Accounting expands the group and takes you to the first available ledger.
- Budget - A read-only summary of the project’s overall budget. This section is only shown when the project tracks an overall budget.
- Monthly Budget - A read-only summary of the project’s monthly budget. This section is only shown when the project tracks a monthly budget.
Overview
The Overview section (Figure 1) contains the same fields that are captured when you create a new project. Make any edits and click the Save button at the bottom-right of the screen. The Cancel button becomes available once you have unsaved changes, and if you navigate away with unsaved changes, Ruddr will warn you before discarding them. The Delete button at the bottom-left of the screen deletes the project. This button is disabled when the project has associated invoices, credit notes, or opportunities. For more, see Archive or Delete a Project. Note that a few fields become locked once the project has an associated invoice or credit note. The Client, Billing Type, Billable, Use roles, and Currency settings cannot be changed on a project that has been invoiced. Also note that changing the project’s Client will change the project’s URL, since the URL contains the client’s key. The project’s own URL ID does not change.Completing a Project
When you change the Project Status to Completed and save, Ruddr stamps the project’s Completed On date with the completion date. On fixed fee projects that use the Manual or an Automated revenue recognition method, if there is still unrecognized revenue on the project, Ruddr will ask whether you would like an entry added to the project’s revenue recognition ledger to recognize the remaining revenue. Choosing Yes saves the project and adds the entry, dated on the completion date. Choosing No saves the project without adding an entry.Team
The Team section (Figure 2) lists the project team members along with their job title, practice, and location. From here you can add members, set a member as Project Admin, edit bill rates and cost rates, and deactivate or remove members from the team. For detailed information, see the Project Team article.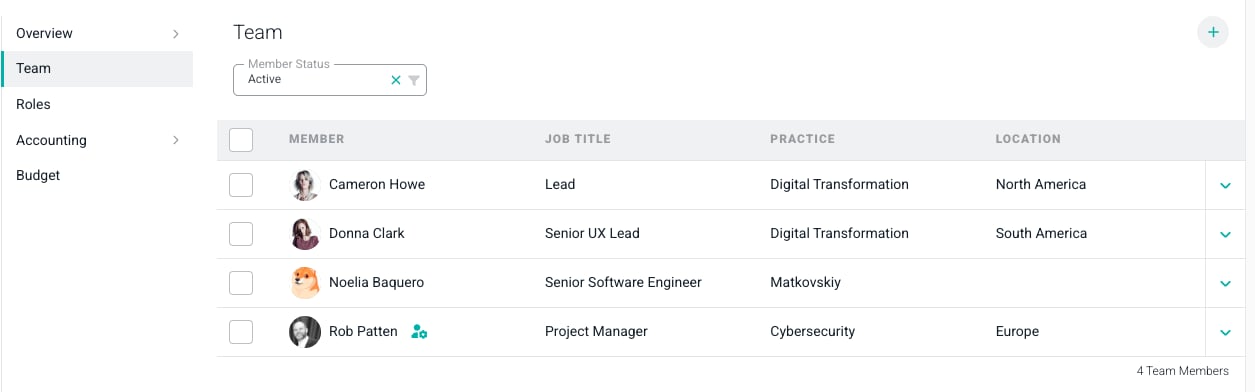
Figure 2 - Manage the Project Team from the Team Section
Roles
For projects that use roles, the Roles section (Figure 3) allows you to manage the project’s roles and rates. Each role row shows the assigned members as a stack of avatars, along with the role’s practice, location, discipline, and bill rate. For detailed information, see the Project Roles article.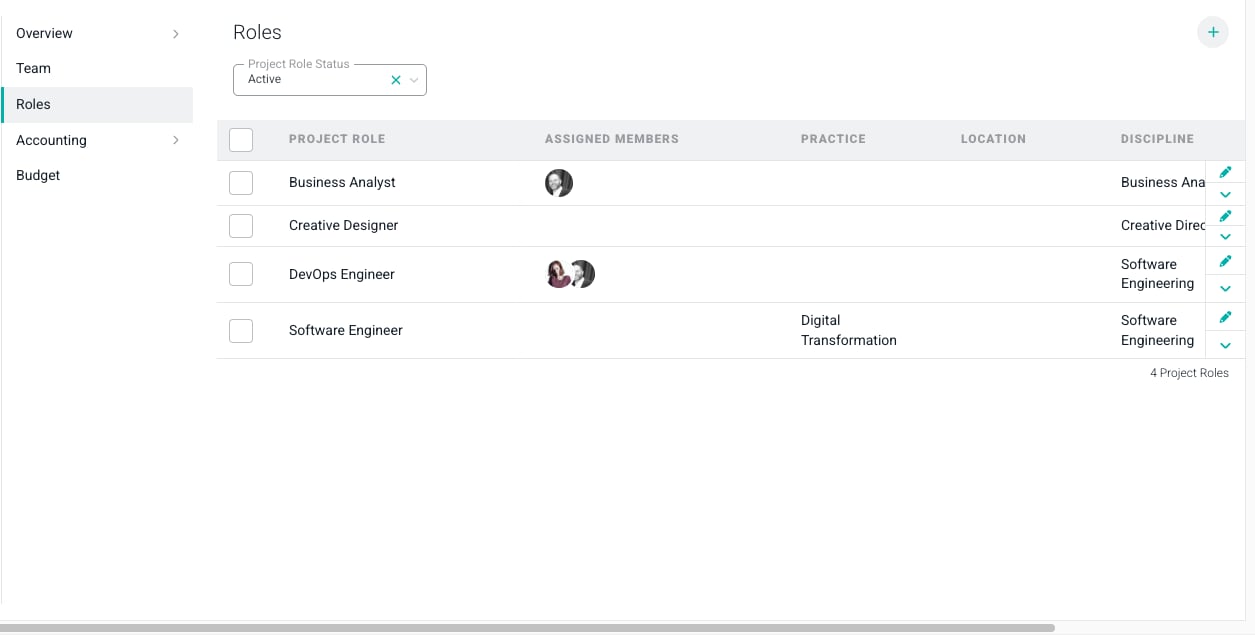
Figure 3 - Manage Project Roles and Rates from the Roles Section
Accounting
The Accounting section (Figure 4) groups the project’s accounting ledgers. The ledgers shown depend on the project’s billing type, billability, and revenue recognition method:- Fixed Fee Billing Schedule - The invoice milestones for fixed fee and fixed monthly projects.
- Revenue Recognition - The entries that tell Ruddr when to recognize revenue and how much revenue to recognize.
- Products - Products to be billed to the client.
- Additional Services - Services delivered outside of the project’s primary services.
- Other Items - Any other billable items for the project.
- Project Expenses - Billable and non-billable expenses scheduled at the project level.
- Revenue Adjustments - Positive or negative adjustments to the project’s earned revenue.
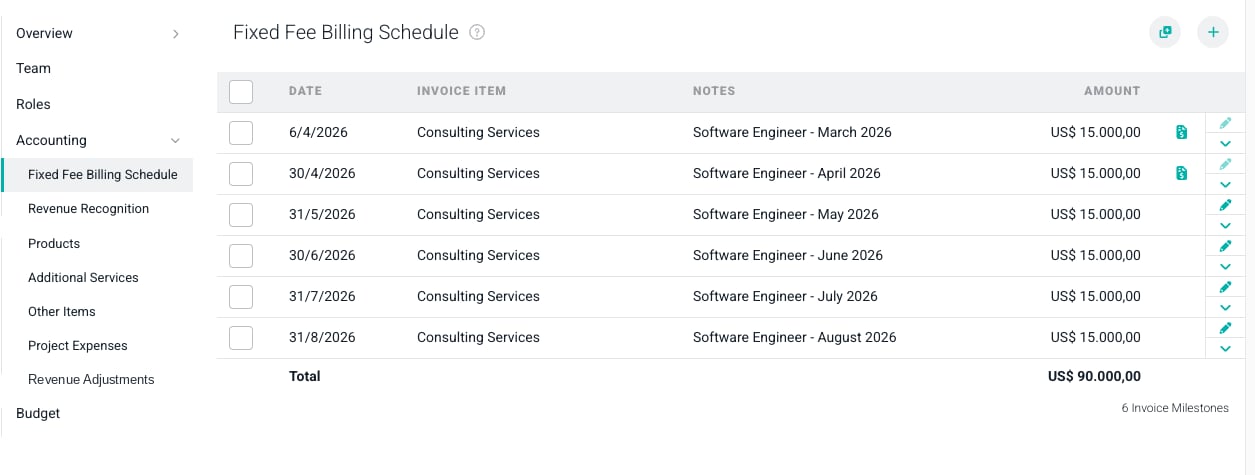
Figure 4 - The Accounting Section Groups the Project's Ledgers
Budget and Monthly Budget
The Budget and Monthly Budget sections (Figure 5) present a read-only summary of the project’s budgets, including budget revenue, hours, cost, gross profit and margin, effective bill rate, and realization rate. To make changes, click the pencil button at the top-right of the section to open the Edit Overall Budget or Edit Monthly Budget drawer. For detailed information about creating budgets, see the Create a Project Budget article.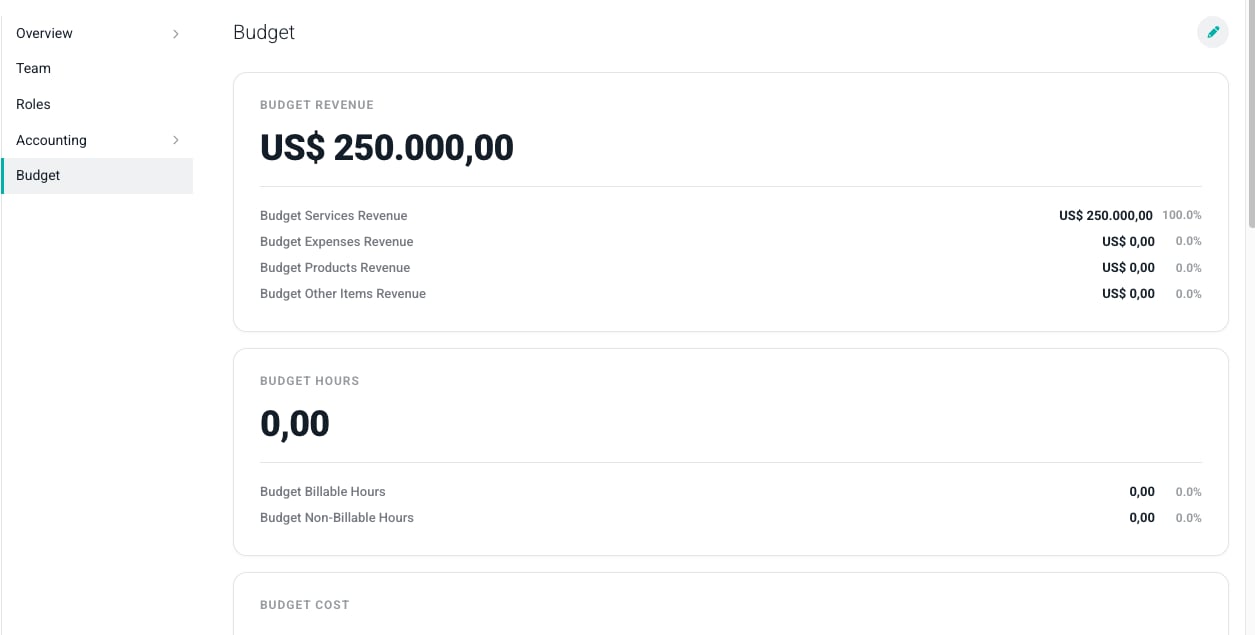
Figure 5 - The Budget Section Summarizes the Project's Budget
Permissions
Access to the Settings tab is controlled by a few independent permissions:- Edit project - Required to see the Settings tab and edit any section. Any member that can edit the project can also see the project’s bill rates and revenue figures.
- View project margin - Required to see cost, gross profit, and margin figures, including the budget cost cards and member cost rates. This permission is independent of the ability to edit the project.
- Workspace Admin - Required to override a team member’s cost rate for the project.