- Workspace Admin - The most privileged role in the workspace that has access to all information and settings. As explained below, this is a read-only role.
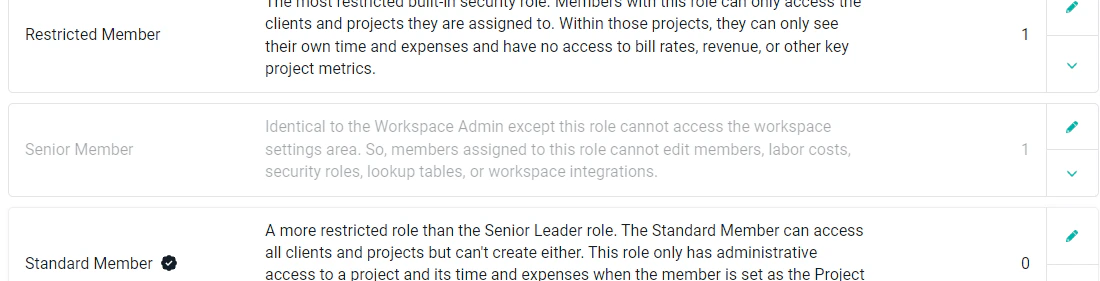
- Senior Member - This role is identical to the Workspace Admin role except that its members will not be able to access workspace settings or administer workspace members.
- Standard Member - The Standard Member can access clients and projects where they are on the project team. On those projects, they can view time and expense for all project team members. If this member is a Project Admin on a project, they can administer and approve time and expense for those projects. This role can view resource allocations for projects where they are on the project team. If this member is a Project Admin on a project, they can administer resource allocations for that project.
- Restricted Member - The default Security Role. A restricted role whose members can only access projects they are assigned to. Additionally, these members cannot view time or expense entries of other members, nor can they view invoices, bill rates, revenue, or profit.
View Security Roles
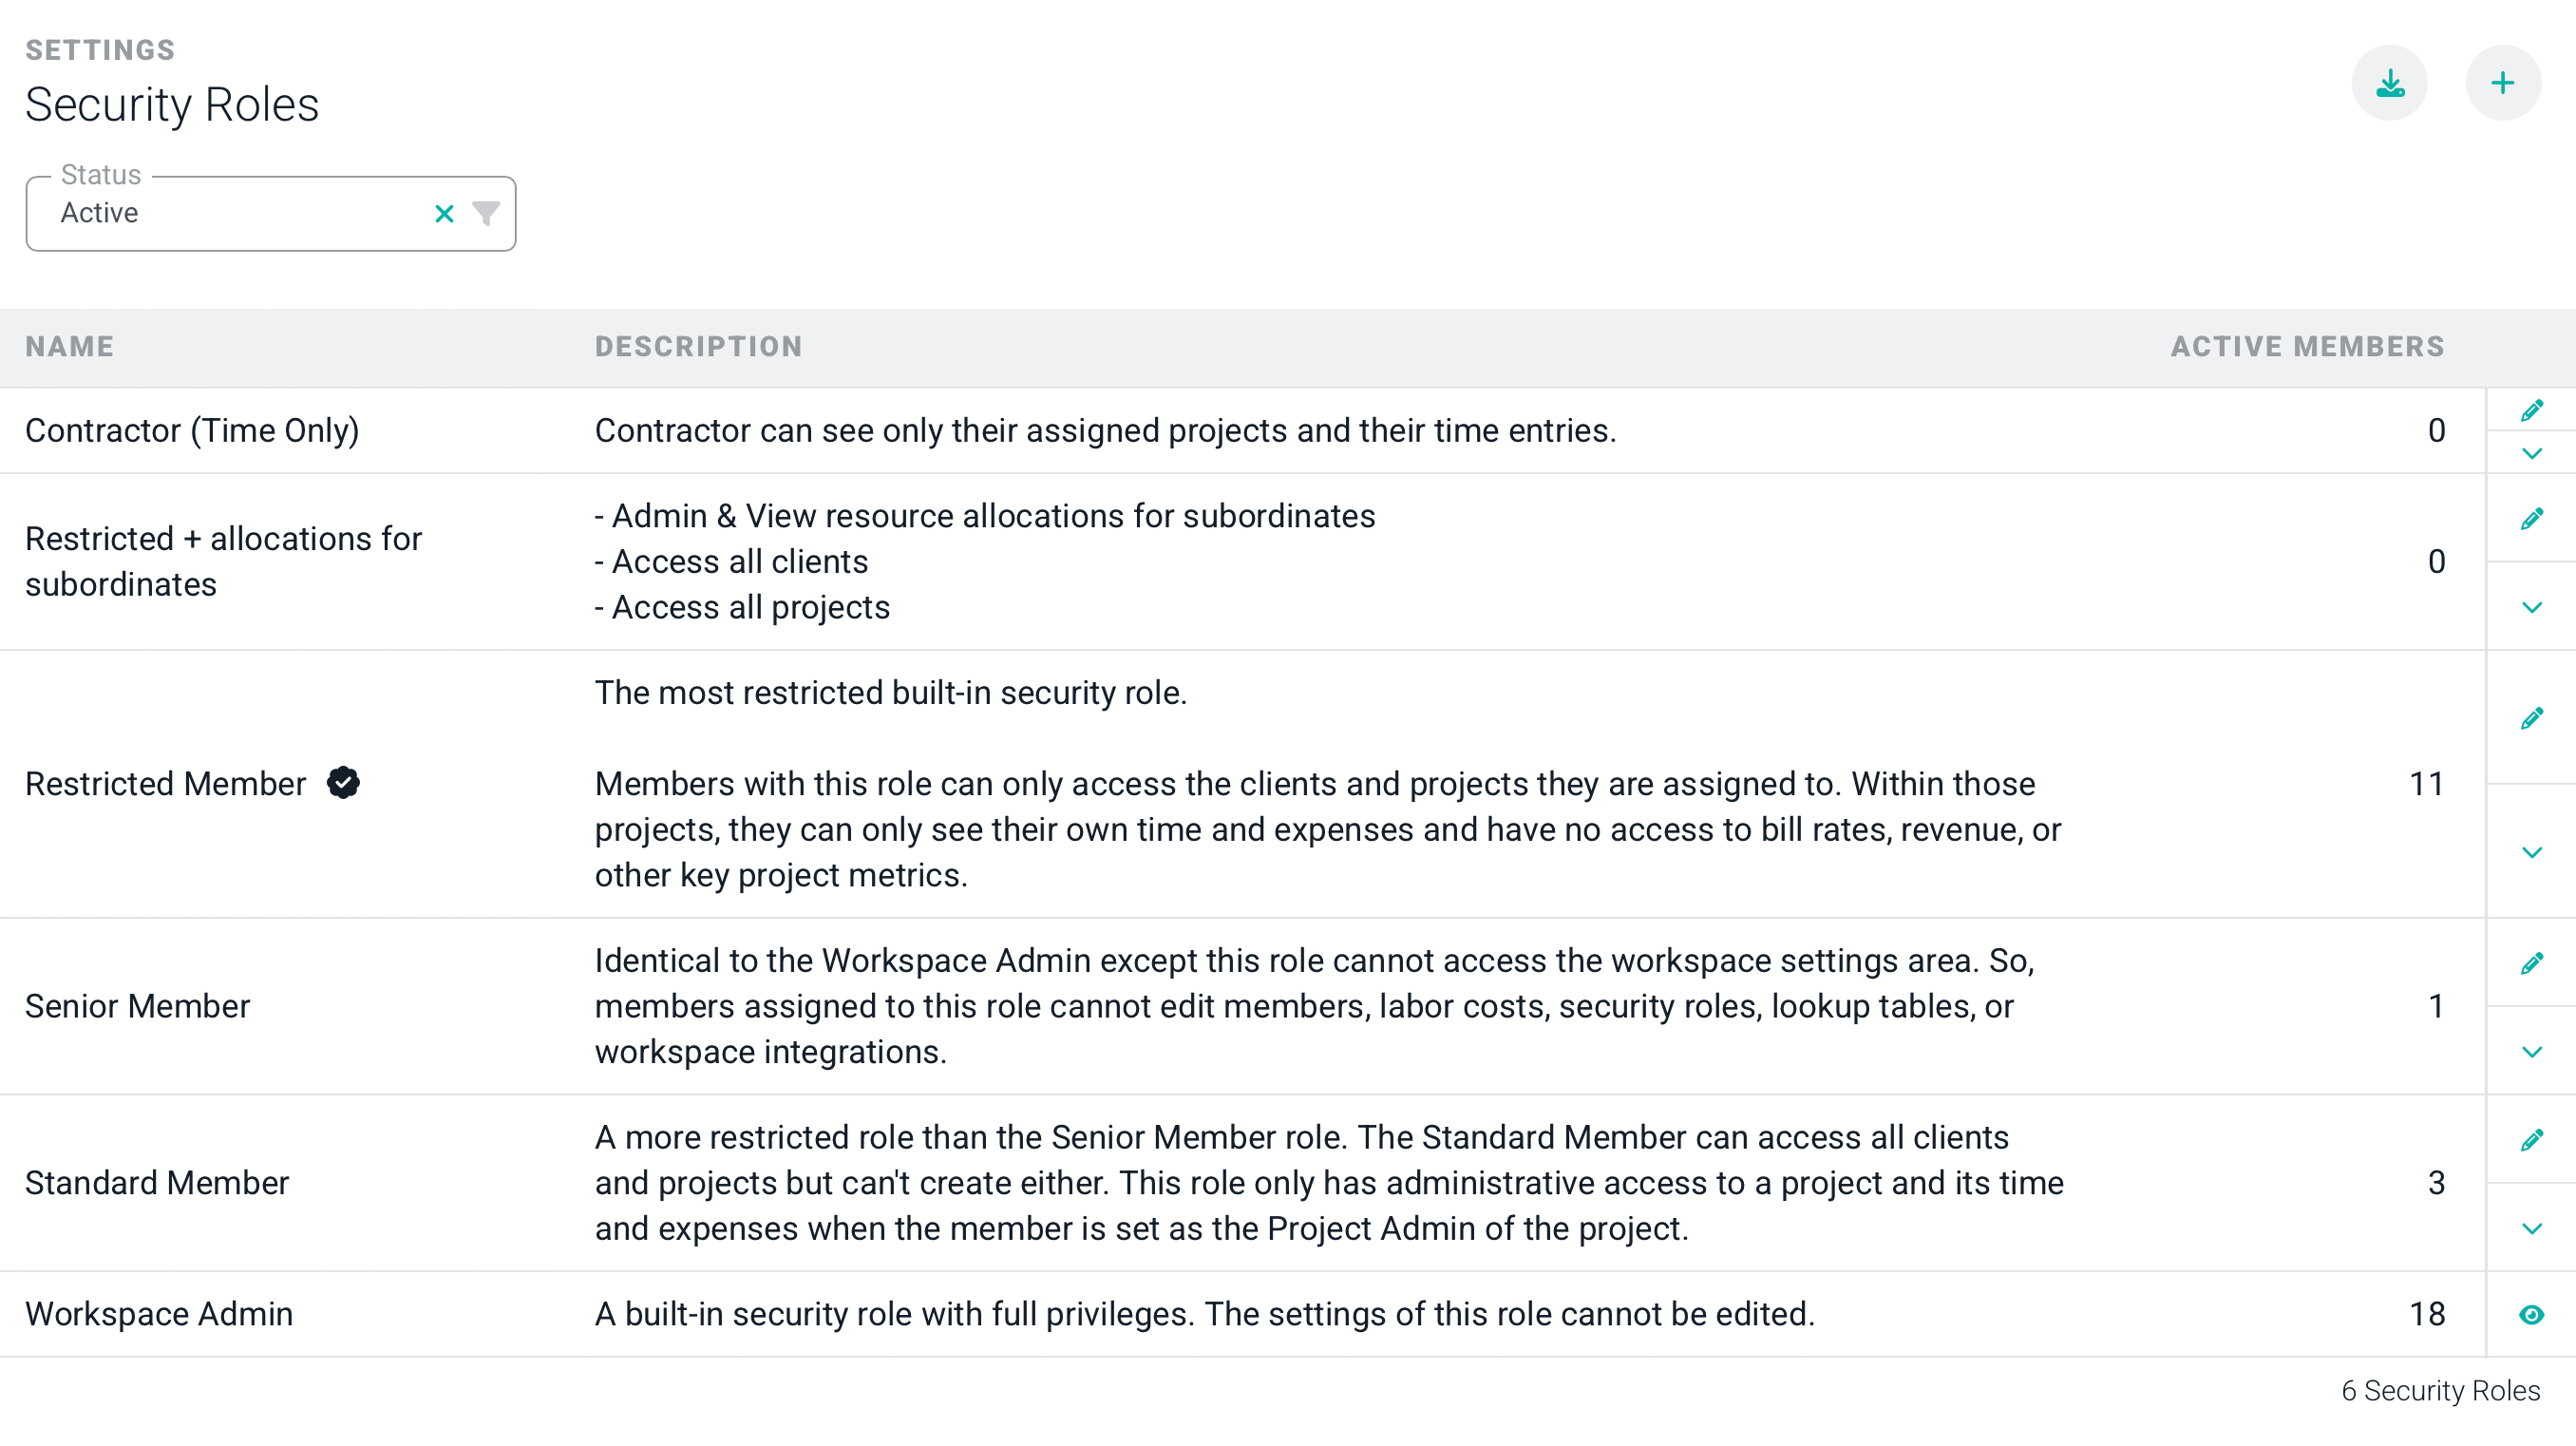
To view the list of current security roles for your workspace, click the Settings main nav bar option and then select the Security Roles menu option (Figure 1). From here you can edit or export your security roles. In order to access the workspace settings, your assigned security role must have the Administer all workspace settings and members permission. The Workspace Admin role is the only built-in security role that has this permission.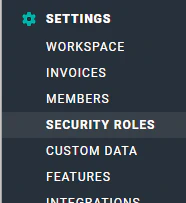
Create a Security Role
To create a new security role, click the + button at the top-right of the security roles list. This will bring up the new security role drawer (Figure 3). Type in a name and optional description for the new role.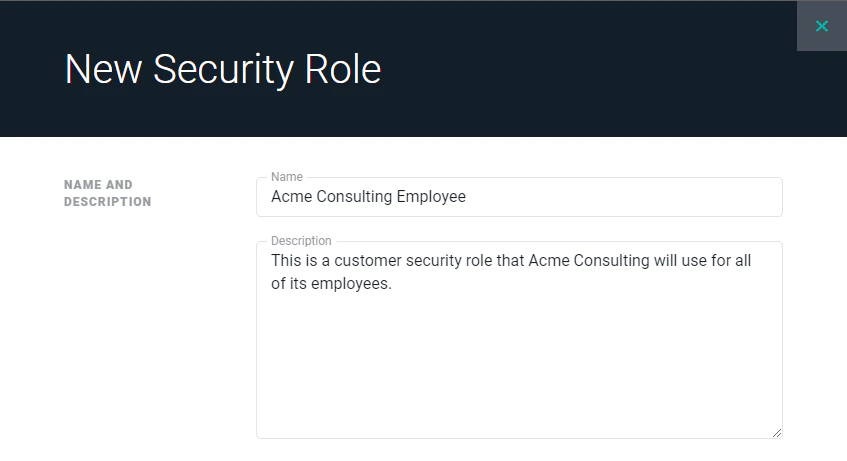
Workspace Admin Permissions
Workspace Admin Permissions
When creating / editing a security role in the Security Role drawer (Figure 3), you will always see a Workspace Admin Permissions section (Figure 4). It is important to note that this section, while always visible, is unavailable to any security role in the workspace other than the built-in Workspace Admin role, which is why it appears greyed out in the image below (Figure 4).When creating / editing a security role in the Security Role drawer (Figure 3), you will always see a Workspace Admin Permissions section (Figure 4). It is important to note that this section, while always visible, is unavailable to any security role in the workspace other than the built-in Workspace Admin role, which is why it appears greyed out in the image below (Figure 4). As a Workspace Admin with these permissions, a member can manage the workspace settings including the ability to administer workspace members. As a Workspace Admin with these permissions, a member can manage the workspace settings including the ability to administer workspace members. Figure 4 - Workspace Admin Permissions (Only Available for Built-in Workspace Admin Security Role)Figure 4 - Workspace Admin Permissions (Only Available for Built-in Workspace Admin Security Role)Pipeline Permissions
If your workspace has the Pipeline feature enabled, you will have a set of pipeline-related permissions available. These permissions determine whether a member with can administer and / or view contacts, companies, and opportunities within the Pipeline area of Ruddr. There are two permissions “concepts” with regards to Pipeline:- Administer - This permissions concept enables View, Edit, and Delete permissions for companies, contacts, and opportunities.
- View - This permissions concept enables read-only View permissions for companies, contacts, and opportunities.
Member Permissions
Pipeline Permissions
If your workspace has the Pipeline feature enabled, you will have a set of pipeline-related permissions available. These permissions determine whether a member with can administer and / or view contacts, companies, and opportunities within the Pipeline area of Ruddr. There are two permissions “concepts” with regards to Pipeline:- Administer - This permissions concept enables View, Edit, and Delete permissions for companies, contacts, and opportunities.
- View - This permissions concept enables read-only View permissions for companies, contacts, and opportunities.
Member Permissions
The Member Permissions for a security role establish the access that a member has to time and expenses for another member or members. Additionally, this permission set controls access to other members’ resource allocations. There are two permissions “concepts” with regards to Time and Expenses and Resource Allocations:The Member Permissions for a security role establish the access that a member has to time and expenses for another member or members. Additionally, this permission set controls access to other members’ resource allocations. There are two permissions “concepts” with regards to Time and Expenses and Resource Allocations:- Administer - This permissions concept enables View, Edit, and Delete permissions for time and expense entries and / or resource allocations. In addition, Administer grants permissions for approving time and expense entries, and submitting/un-submitting time and expense entries. Additionally, if your workspace has the Timesheets feature enabled, Administer grants permission to submit / un-submit timesheets.
- View - This permissions concept enables read-only View permissions for time and expense entries and resource allocations.
- Administer - This permissions concept enables View, Edit, and Delete permissions for time and expense entries and / or resource allocations. In addition, Administer grants permissions for approving time and expense entries, and submitting/un-submitting time and expense entries. Additionally, if your workspace has the Timesheets feature enabled, Administer grants permission to submit / un-submit timesheets.
- View - This permissions concept enables read-only View permissions for time and expense entries and resource allocations.
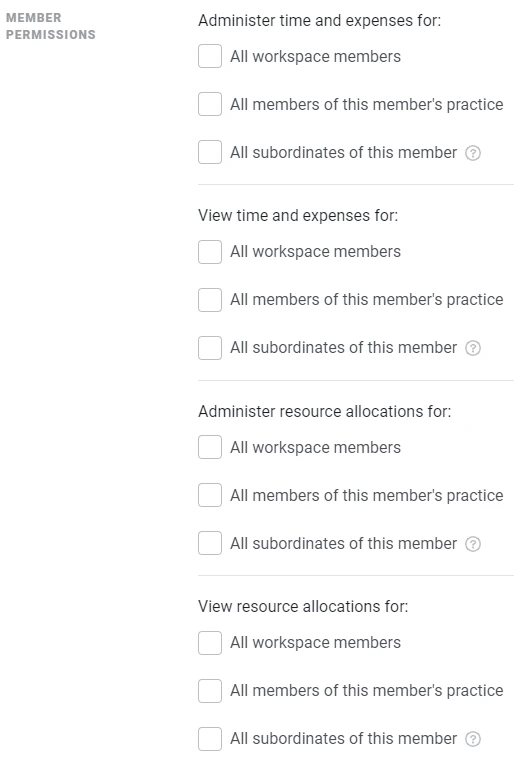
Time and ExpenseTime and Expense
- Administer time and expensetime and expenses for:
- View time and expensetime and expenses for:
Resource AllocatResource Allocations
- Administer resource allocations for:
- View resource allocations for:
Client Permissions
The client permissions (Figure 6) control the user’s ability to access, create, edit, and delete clients, and to manage permissions on other actions for clients as well. These settings determine if the user can access all clients and projects in the workspace or just those where the user is on a project team for the client.- Administer resource allocations for:
- View resource allocations for:
Client Permissions
The client permissions (Figure 6) control the user’s ability to access, create, edit, and delete clients, and to manage permissions on other actions for clients as well. These settings determine if the user can access all clients and projects in the workspace or just those where the user is on a project team for the client. By default (as shown in Figure 6), each Security Role grants access to any clients to which a member is assigned to that clients’ projects.By default (as shown in Figure 6), each Security Role grants access to any clients to which a member is assigned to that clients’ projects.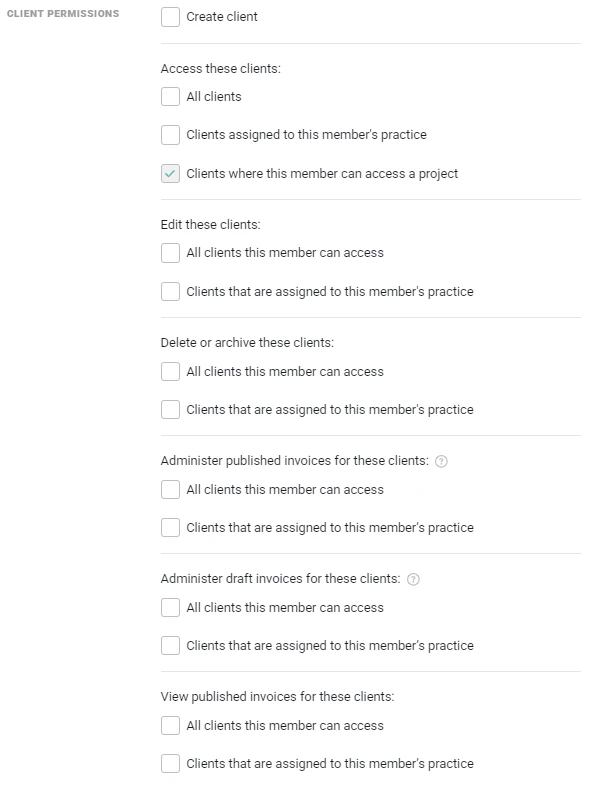
- All clients
- Clients assigned to this member’s practice (Reference Custom Data for more information on practices)
- Clients where this member is assigned to a project
- All clients
- Clients assigned to this member’s practice (Reference Custom Data for more information on practices)
- Clients where this member is assigned to a project
- All clients
- Clients assigned to that member’s business unit (when the Business Units feature is enabled)
- Clients assigned to that member’s practice
- Those clients where the member is assigned to a project
- All clients
- Clients assigned to that member’s business unit (when the Business Units feature is enabled)
- Clients assigned to that member’s practice
- Those clients where the member is assigned to a project
- Edit
- Delete or archive
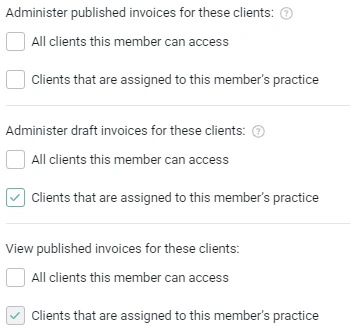
- Administer published invoices
- Administer draft invoices
- View published invoices
- Edit
- Delete or archive
- Administer published invoices
- Administer draft invoices
- View published invoices

-
Administer published invoices
- Administer draft invoices
- View published invoices
-
Administer draft invoices
- View published invoices
-
Administer published invoices
- Administer draft invoices
- View published invoices
-
Administer draft invoices
- View published invoices
-
Delete or archive clients will grant:
- Access all projects within an accessible client
- Delete or archive projects
-
Administer published invoices will grant:
- Access all projects within an accessible client
- View time entries and expense items on accessible projects
- View bill rates on accessible projects
- View revenue on accessible projects
- Publish invoices for accessible projects
- Administer invoices for accessible projects
- View published invoices for accessible projects
-
Administer draft invoices will grant:
- Access all projects within an accessible client
- View time entries and expense items on accessible projects
- View bill rates on accessible projects
- View revenue on accessible projects
- Create and draft invoices for accessible projects
- View published invoices for accessible projects
-
View published invoices will grant:
- Access all projects within an accessible client
- View time entries and expense items on accessible projects
- View bill rates on accessible projects
- View revenue on accessible projects
- View published invoices for accessible projects
-
Delete or archive clients will grant:
- Access all projects within an accessible client
- Delete or archive projects
-
Administer published invoices will grant:
- Access all projects within an accessible client
- View time entries and expense items on accessible projects
- View bill rates on accessible projects
- View revenue on accessible projects
- Publish invoices for accessible projects
- Administer invoices for accessible projects
- View published invoices for accessible projects
-
Administer draft invoices will grant:
- Access all projects within an accessible client
- View time entries and expense items on accessible projects
- View bill rates on accessible projects
- View revenue on accessible projects
- Create and draft invoices for accessible projects
- View published invoices for accessible projects
-
View published invoices will grant:
- Access all projects within an accessible client
- View time entries and expense items on accessible projects
- View bill rates on accessible projects
- View revenue on accessible projects
- View published invoices for accessible projects
Project Permissions
Project Permissions
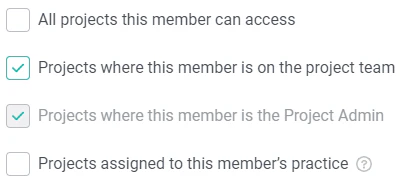
The project permissions (Figure 9) control the user’s ability to access, create, edit, and delete clients, and to manage permissions regarding time and expenses for projects as well. These settings determine if the user can access all projects in the workspace or just those where the user is on a project team for the client(Figure 9) control the user’s ability to access, create, edit, and delete clients, and to manage permissions regarding time and expenses for projects as well. These settings determine if the user can access all projects in the workspace or just those where the user is on a project team for the client. By default (as shown in Figure 9), each Security Role grants access to any project to which a member is on that project team. By default (as shown in Figure 9), each Security Role grants access to any project to which a member is on that project team. The project permissions also control whether members will have access to potentially sensitive project data such as invoices, bill rates, revenue, and profit margin.The project permissions also control whether members will have access to potentially sensitive project data such as invoices, bill rates, revenue, and profit margin.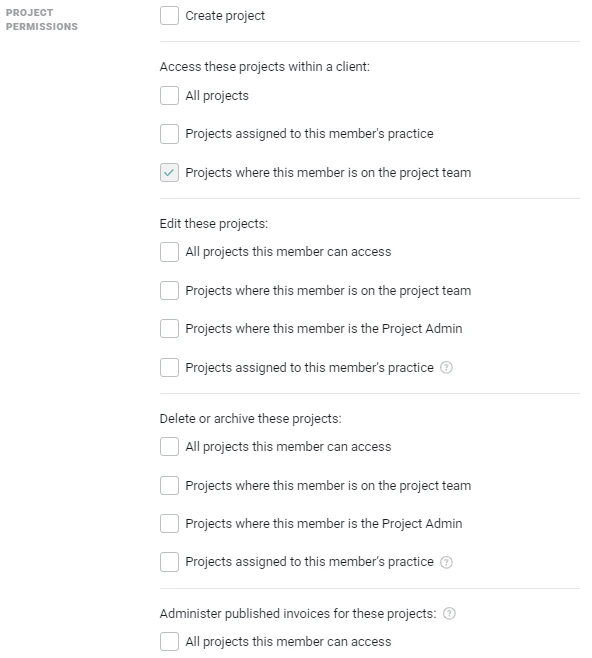
- Clients where this member is assigned to projectClients where this member is assigned to project
- Projects where this member is on the project team
- Projects where this member is on the project team
- Projects where thisProjects where this member is the Project Admin
- Bill rates for projects where the member is the Project Admin
- Revenue for the projects where the member is the Project Admin
- Bill rates for projects where the member is the Project Admin
- Revenue for the projects where the member is the Project Admin

- All projects
- Projects assigned to that member’s business unit (when the Business Units feature is enabled)
- Projects assigned to that member’s practice
- Projects where the member is on the project team
- All projects
- Projects assigned to that member’s business unit (when the Business Units feature is enabled)
- Projects assigned to that member’s practice
- Projects where the member is on the project team
- Edit - Edit the project details including the team, tasks, roles, rates, and budget.
- Delete or archive - Delete or archive the project.
- Administer published invoices
- Administer draft invoices
- View published invoices
- Administer time entries and expense items - Manage all time and expense entries on the project.
- View time entries and expense items - If a billable member does not have this permission, the member can only view his or her own time entries.
- Administer resource allocations - Manage all resource allocations for a project.
- View resource allocations
- View bill rates
- View revenue
- View profit
- Administer project health reports
- View project health
- Edit will grant:
- View bill rates on projects
- View revenue on projects
- Administer published invoices
- Administer draft invoices
- View published invoices
- Administer draft invoices
- View published invoices
- Administer time entries and expense items will grant:
- View time entries and expense items
Set a Default Security Role
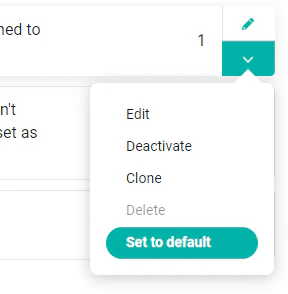
Ruddr provides the ability for you to specify a default security role. This default is designated in the Security Roles section (Figure 2) as a black badge with a checkmark (Figure 12).Ruddr provides the ability for you to specify a default security role. This default is designated in the Security Roles section (Figure 2) as a black badge with a checkmark (Figure 12).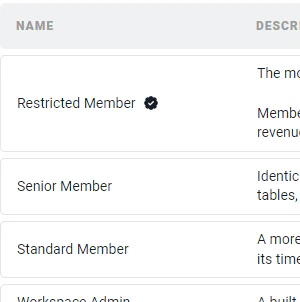
Clone a Security Role
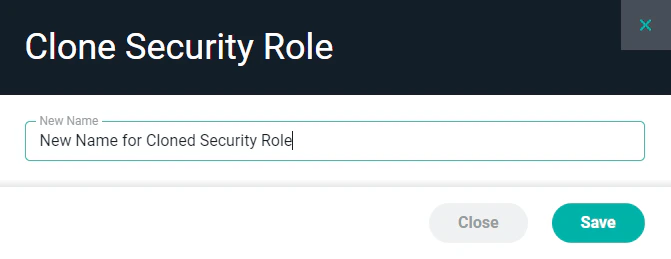
Often times, it may be necessary to create a security role that closely mimics another security role. To assist with creating these types of closely-related roles, Ruddr allows Workspace Admins to clone existing security roles. You can generate an exact copy of an existing role and then have the ability to modify that new copy to fit the permissions needed.Clone a Security Role
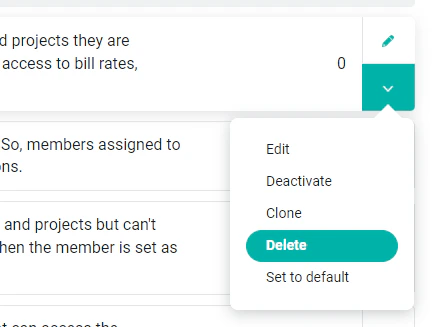
Often times, it may be necessary to create a security role that closely mimics another security role. To assist with creating these types of closely-related roles, Ruddr allows Workspace Admins to clone existing security roles. You can generate an exact copy of an existing role and then have the ability to modify that new copy to fit the permissions needed. To do this, select Clone from the menu for a specific role (Figure 14), accessible from the Security Roles section (Figure 2). Give the role a new name (Figure 15) and click Save to create your new role.To do this, select Clone from the menu for a specific role (Figure 14), accessible from the Security Roles section (Figure 2). Give the role a new name (Figure 15) and click Save to create your new role.
Deactivate a Security Role
Deactivate a Security Role
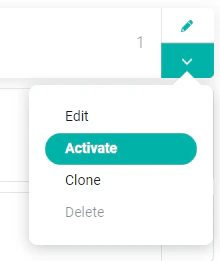
To prevent the future assignment of a security role to member, a security role can be deactivated. This will take the security role out of the list of available security roles to be assigned to a member. Deactivating a security role does not prevent the login of any users assigned to that security role, nor will inhibit their current permissionsprevent the future assignment of a security role to member, a security role can be deactivated. This will take the security role out of the list of available security roles to be assigned to a member. Deactivating a security role does not prevent the login of any users assigned to that security role, nor will inhibit their current permissions. While deactivated, a security role can be edited, cloned, or deleted. However, per the conditions outlined in Delete a Security Role, the Delete menu item will be disabled if any members are assigned to the security role. While deactivated, a security role can be edited, cloned, or deleted. However, per the conditions outlined in Delete a Security Role, the Delete menu item will be disabled if any members are assigned to the security role. To deactivate an active security role, select Deactivate from the menu for a specific role (Figure 16), accessible from the Security Roles section (Figure 2). When deactivated, a security role is greyed out in the Security Roles section (Figure 17).To deactivate an active security role, select Deactivate from the menu for a specific role (Figure 16), accessible from the Security Roles section (Figure 2). When deactivated, a security role is greyed out in the Security Roles section (Figure 17).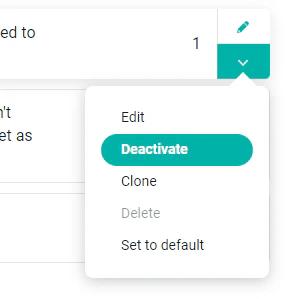
Delete a Security Role
Delete a Security Role
A security role can only be deleted when there are no members assigned to the role. In this case, the Delete menu item for a security role will be disabled (Figure 13) and the number of Active Users will be shown as more than zero (Figure 13)A security role can only be deleted when there are no members assigned to the role. In this case, the Delete menu item for a security role will be disabled (Figure 13) and the number of Active Users will be shown as more than zero (Figure 13). The Members section of the workspace settings displays each project member and their assigned security role. Additionally, you can filter this list by security role to find all members assigned to a particularhe Members section of the workspace settings displays each project member and their assigned security role. Additionally, you can filter this list by security role to find all members assigned to a particular role. Once all members have been removed from the security role (or reassigned to another role), that security role can be deleted. Once all members have been removed from the security role (or reassigned to another role), that security role can be deleted. To delete the security role, select Delete from the menu for a specific role (Figure 19), accessible from the Security Roles section (Figure 2). When asked for confirmation (Figure 20), click Delete to finalize the removal of the security role.To delete the security role, select Delete from the menu for a specific role (Figure 19), accessible from the Security Roles section (Figure 2). When asked for confirmation (Figure 20), click Delete to finalize the removal of the security role.