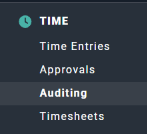
To audit time entries in Ruddr, simply click on the Auditing sub-menu item (Figure 1) in the Time area in the nav bar. All workspace members can get to the time auditing screen (Figure 2) to manage their own time entries. Depending on their assigned security role, members may also be able to view and administer time entries of other workspace members.
Select Auditing to Administer Time Entries

Figure 1 - Select Auditing to Administer Time Entries
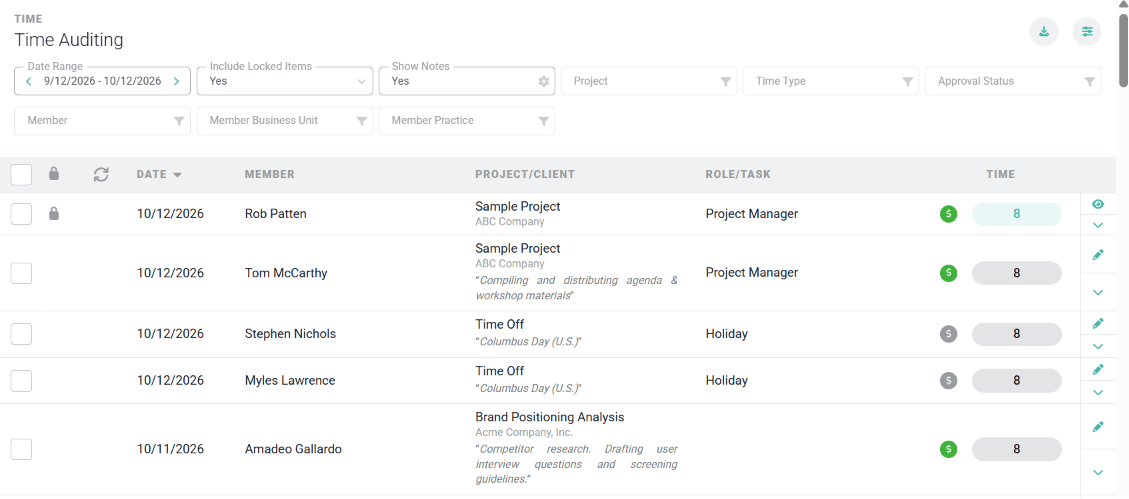
Time Auditing screen with Show Notes set to Yes, showing each entry's notes below its project and client

Figure 2 - Administer Multiple Time Entries from the Time Auditing Screen

Use the filters at the top of the screen to narrow the list of time entries. To see each entry’s notes, set the Show Notes filter to Yes (Figure 2). Notes appear below the entry’s project and client, or below its time type for non-project time. When Show Notes is set to Yes, exporting the list to CSV or Excel also includes a Notes column. If the member’s security role has the View time and expenses for member permission or the View time entries and expense items on these projects project permission, the member will be able to view the time entries those permissions cover. If the member’s security role has the Administer time and expenses for member permission or the Administer and approve time entries and expense items on these projects project permission, the member will be able to edit or delete the time entries those permissions cover, unless those entries are on a published invoice in which case they will appear locked. For more information regarding View / Administer time and expense permissions, view the Security Roles article in the Ruddr Help Center. When the member is designated as a time off approver, the member will be able to view time off entries where the member is set as the approver. If the time off entry is not locked, the member will also be able to make edits. For more information, see the time entry locking article.

Bulk updates

To complete bulk updates for time entries, you will utilize the check boxes on the far left (Figure 3).
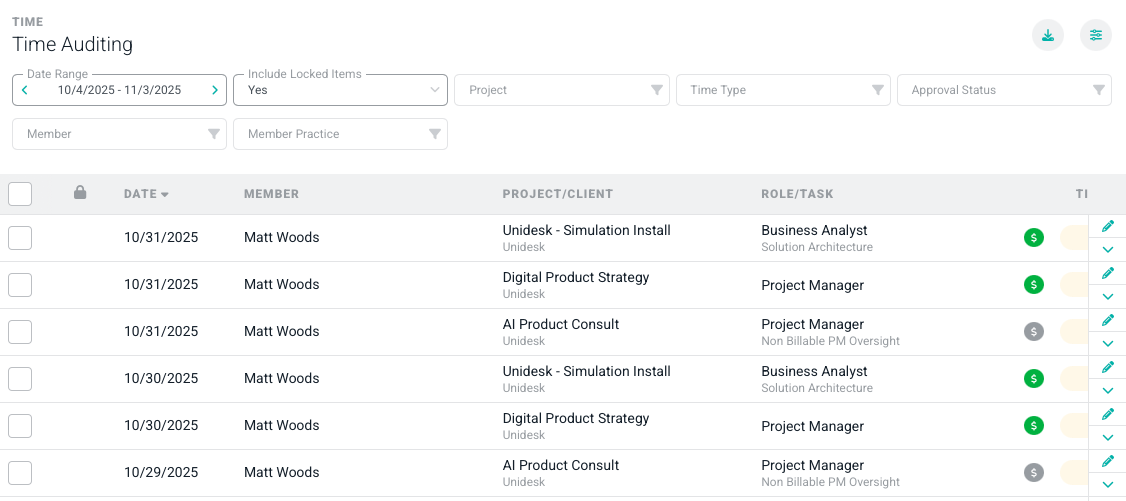
Select Multiple Time Entries to Update
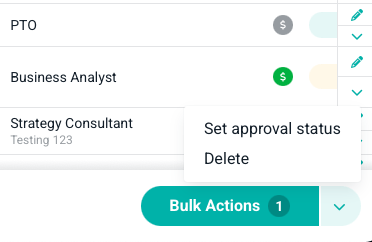
Figure 3 - Select Multiple Time Entries to Update

Once you select multiple time entries, you will see a Bulk Actions button (Figure 4) in the bottom right of the screen. Once you select the Bulk Actions button you will see what actions you can take. Once you bulk delete, those items are permanently deleted.
Choose the Bulk Action to Take on Multiple Time Entries
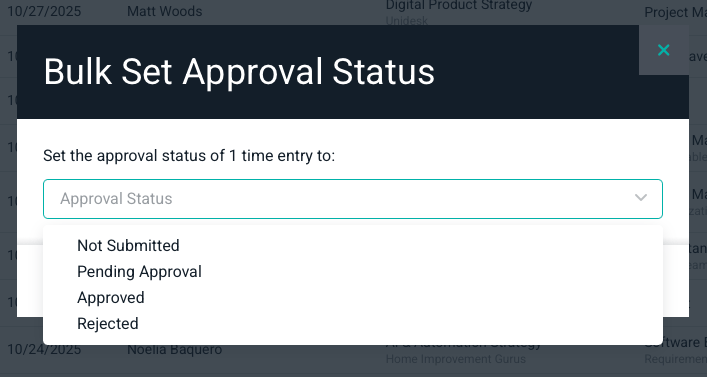
Figure 4 - Choose the Bulk Action to Take on Multiple Time Entries

You will be able to select what value you would like to set on the selected items. (Figure 5)
Select the Value to Apply by Bulk Edit
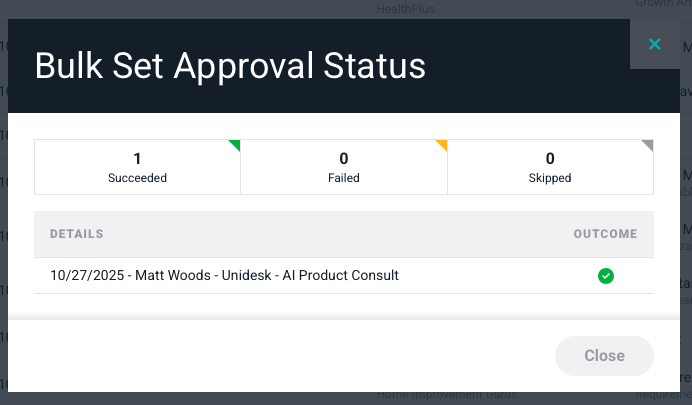
Figure 5 - Select the Value to Apply by Bulk Edit

Once you complete your bulk update, you will receive a confirmation of your changes. (Figure 6)
Confirmation of Bulk Updates

Figure 6 - Confirmation of Bulk Updates

There will be times where locked time entries are presented on the Auditing screen. This lock will prevent you from applying bulk updates for these items. (Figure 7) In these cases, you will see a lock icon next to the check box. Once you hover over the lock, it will give you a description of why that time entry was locked. For more on this, please refer to the Ruddr Help Center article Time Entry Locking.
A Padlock Icon Indicates a Locked Time Entry

Figure 7 - A Padlock Icon Indicates a Locked Time Entry