
Contact Dashboard
The contact dashboard (Figure 4) presents information about the contact as well as any related pipeline activity for that contact.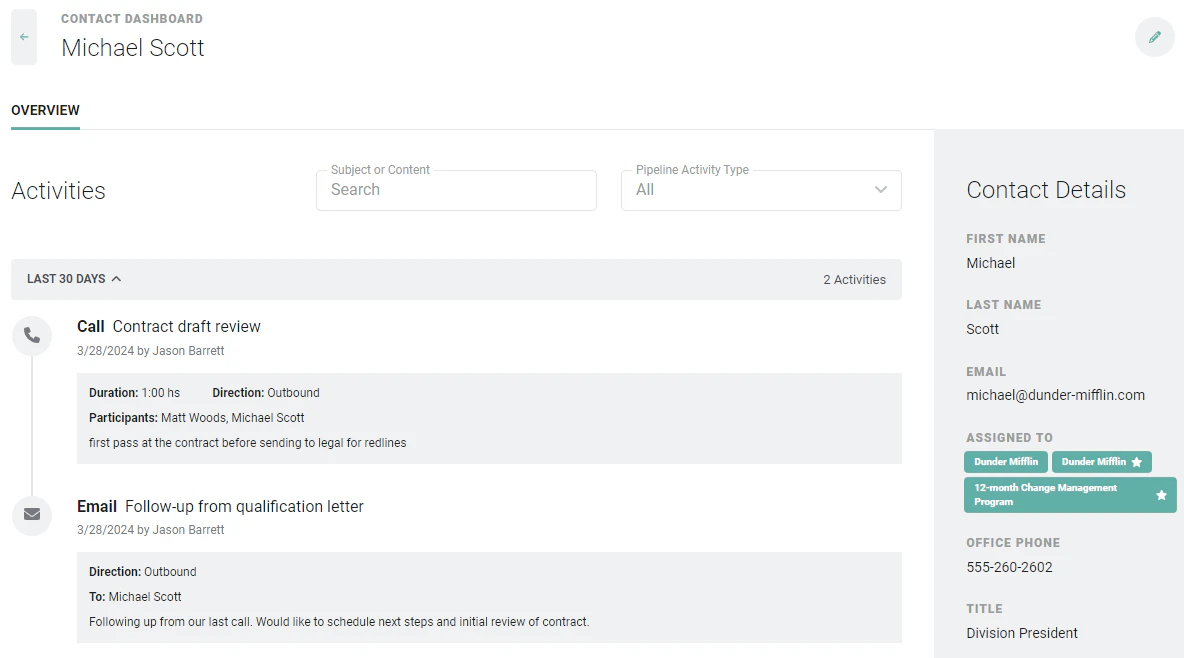
Editing a Contact
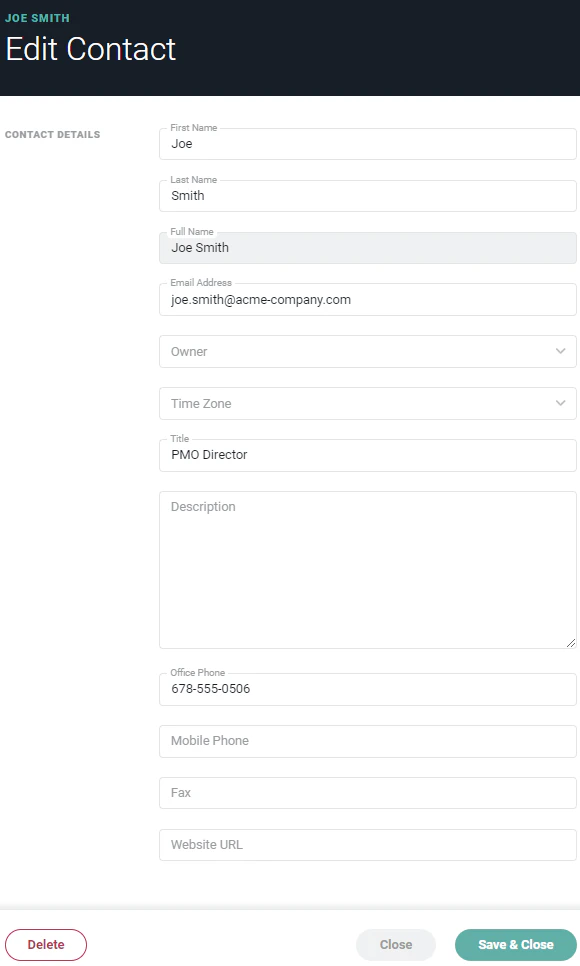
Once a contact has been created, you can edit the contact by clicking the edit pencil icon at the top right of the contact dashboard (Figure 4). This will open the Edit Contact drawer (Figure 5), where you can provide the following information about the contact.- First Name - The first name of the contact.
- Last Name - The last name of the contact.
- Full Name - Ruddr will display the full name of the contact based on the values entered for first name and last name. Note that this field is disabled and read-only.
- Email Address - The email address of the contact. Note that each contact must have a unique email address. If you attempt to create / save a contact with an email address that is in use by another contact in Ruddr, you will receive an error and will be unable to create / save the contact.
- Owner - The workspace member who is responsible for the contact relationship.
- Time Zone - Specify the time zone in which the contact is located.
- Title - The contact’s job title.
- Description- Any information about the contact that would be helpful for those viewing the contact.
- Office Phone - The business phone number of the contact.
- Mobile Phone - The mobile phone number of the contact.
- Fax - The fax phone number of the contact.
- Website URL - The website you wish to associate with the contact. This could be a URL to their LinkedIn profile, to their company’s website, etc.