Changing Project Status from the Dashboard
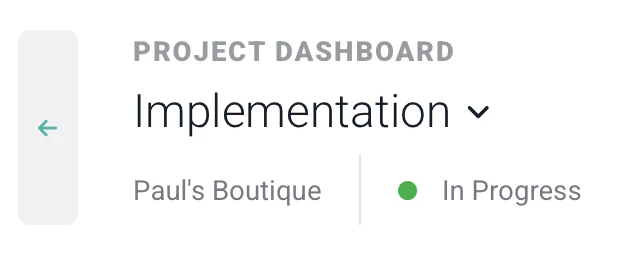
If you have Edit project permissions, you can change the project’s status from within the project header (Figure 1). This is done by hovering the mouse over the current status and selecting an alternate status from the dropdown (Figure 2) that appears. NOTE: When changing the project’s status to Completed on the dashboard, the project’s Completed Date will be set to the current date.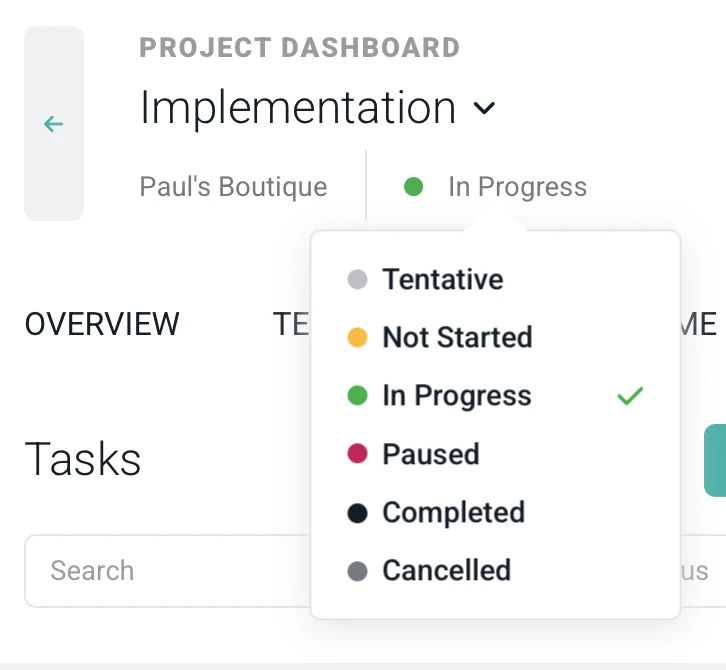
Overview Tab
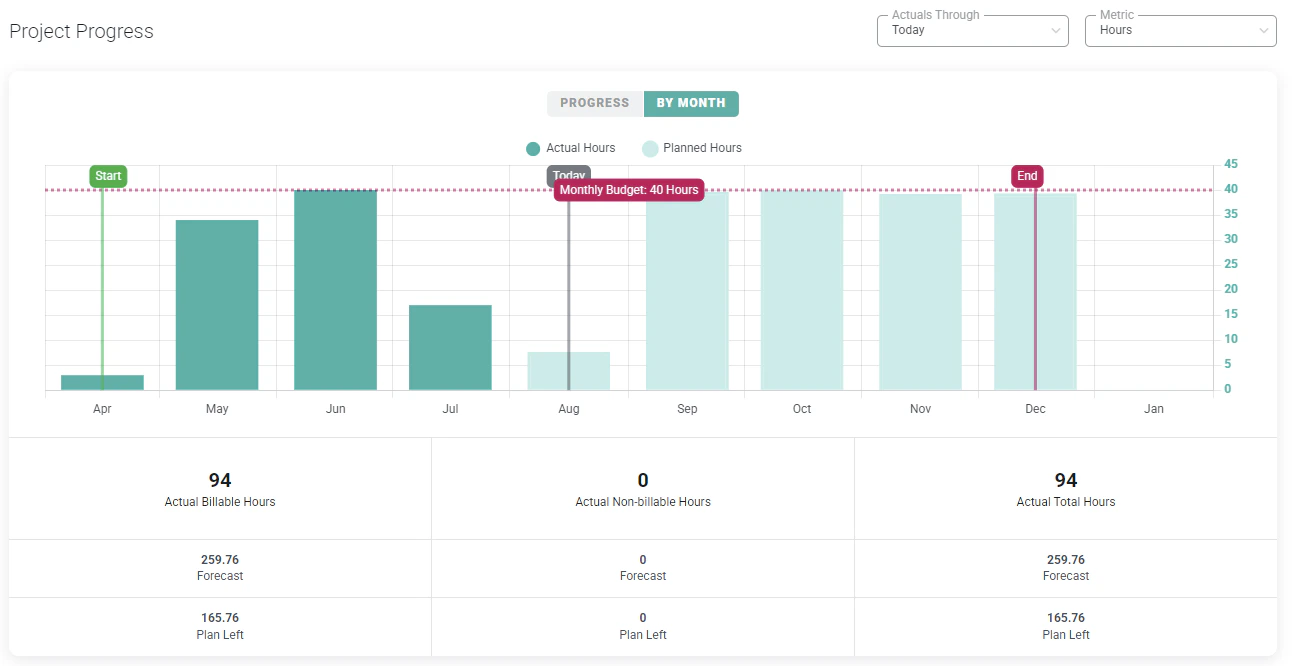
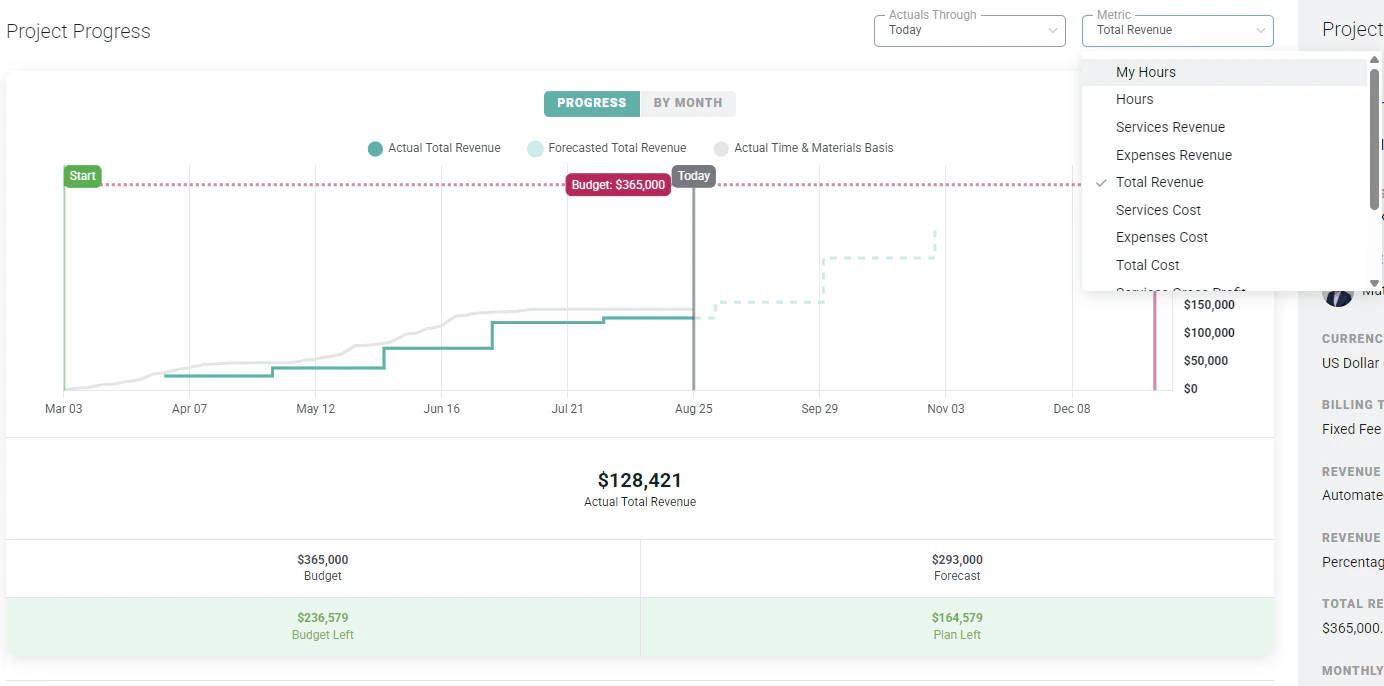
Project Progress
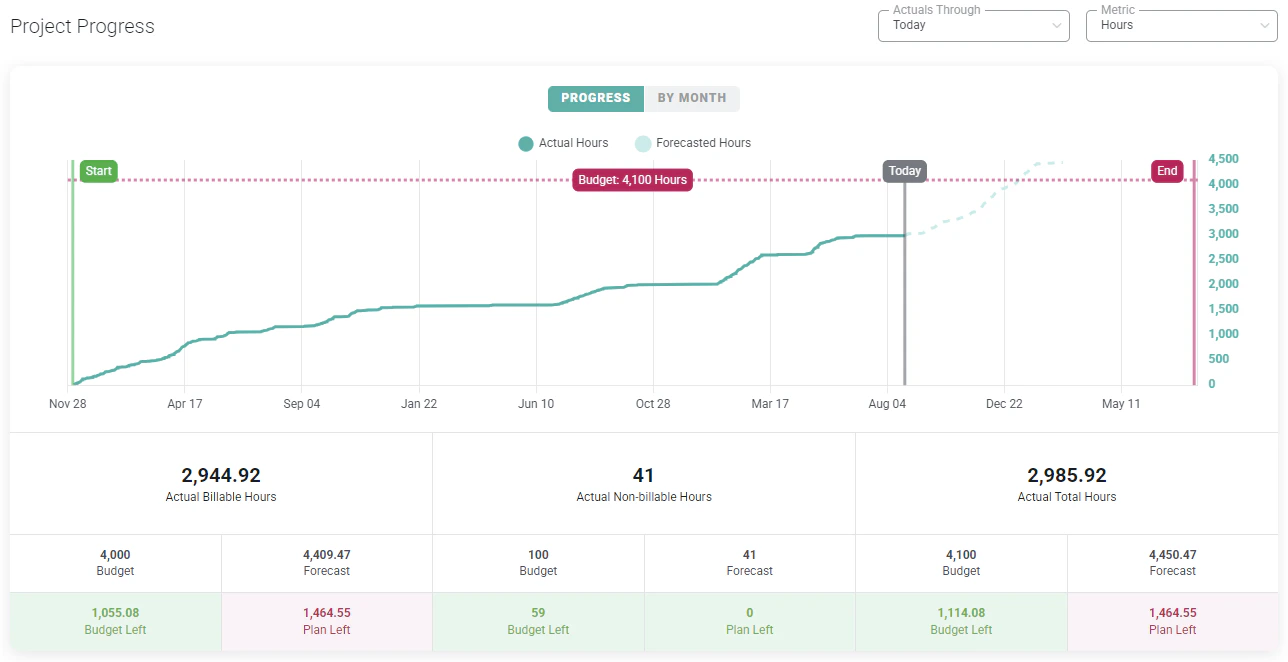
At the top of the Overview tab (Figure 3) of the project dashboard is the Project Progress line graph. This graph defaults to show the history of the worked hours on the project. If the project has resource allocations, then the graph will also show a planned view of hours. In this case, the graph will display the actual hours to date and the planned remaining hours, as allocated to the project. Budgeted hours will also display, giving the member visibility into how the projects hours are tracking against the budget. Actuals Through When the project progress graph is displaying forecasted metrics, you can specify when the “transition” from actuals to plan remaining occurs. By default, Ruddr shows actual data through today’s date, and planned remaining from tomorrow through the end of the project. For workspaces that typically do not have time entered on a daily basis, you can now evaluate project performance by using actuals through the prior week or month and plan values after that date. The following values are available for the Actuals Through setting found just above the project progress graph (Figure 3):- Today
- Yesterday
- Last Week
- Last Month
Project Details
On the right side of the overview tab, is an information bar (Figure 6) that will contain the primary information about the project and client. The project information shown in this bar can be edited using the Edit Project drawer.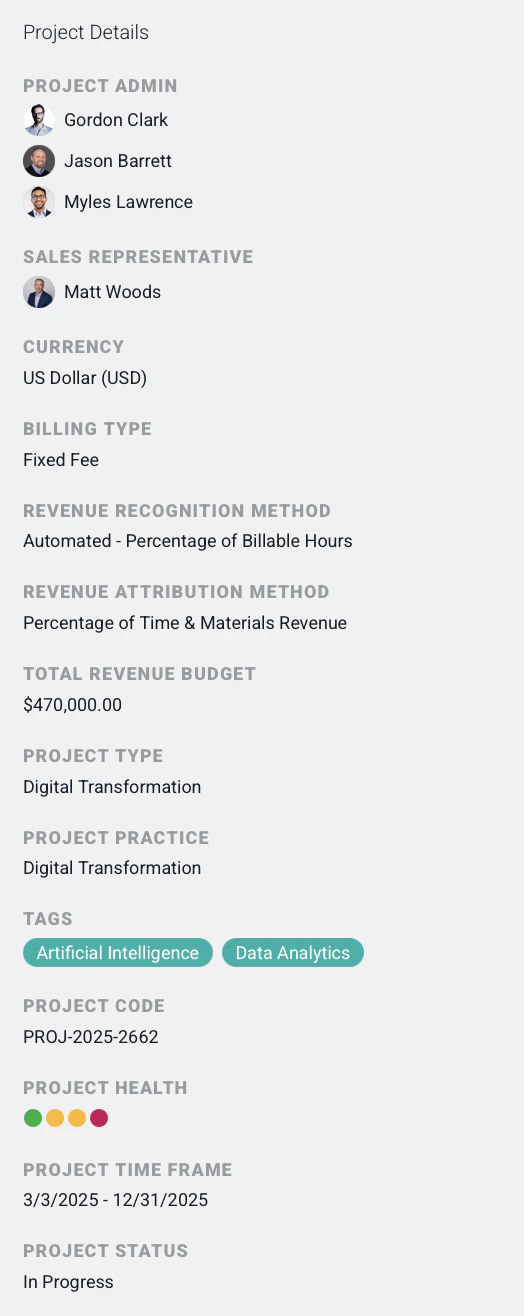
Key Performance Indicators
At the bottom of the Overview tab (Figure 7), there are some high-level key performance indicators (KPIs) related to the project performance. Depending on the project configuration and your permissions, some of these KPIs may not be displayed. At the top-right of this KPI area, you can select the timeframe for evaluation.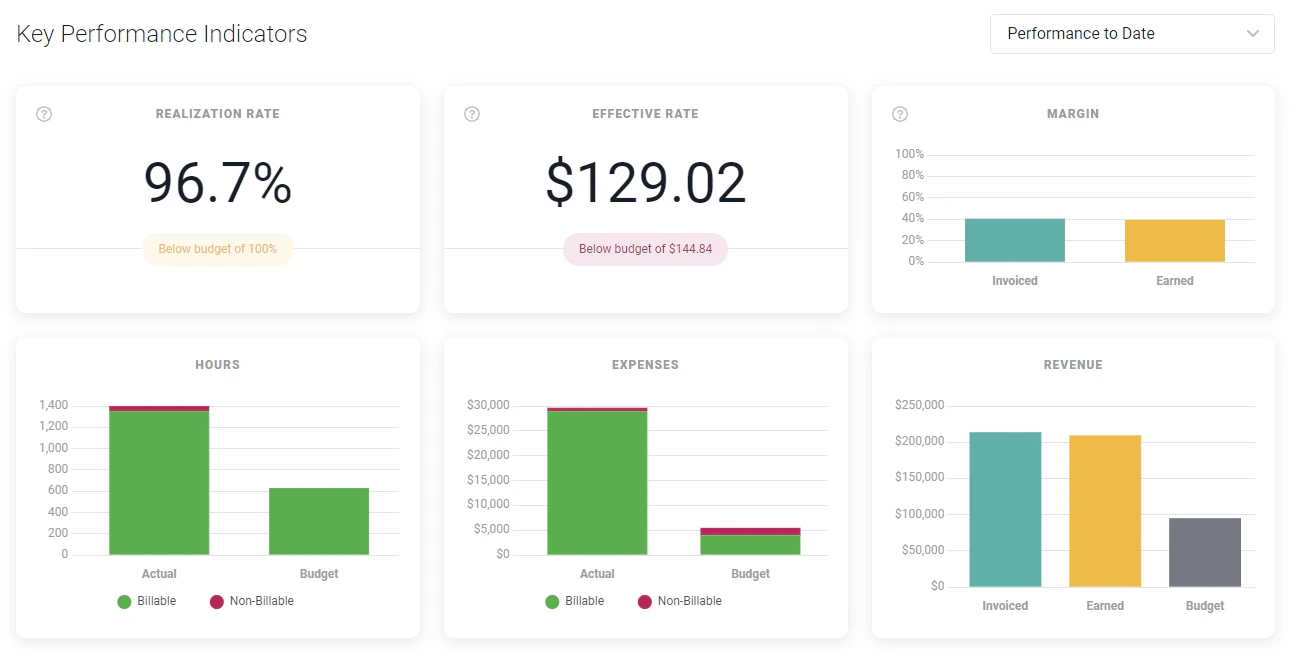
- Realization Rate - The realization rate is the percentage of all hours worked on the project that are billable. For billable projects, this figure is ideally close to 100% throughout the project. The realization rate KPI is only visible if you have project-level View time and expense permissions. If you have a budget created for the project, the budget realization rate will be shown below the actual rate.
- Effective Rate - The effective bill rate is the sum of all earned revenue on the project divided by the hours (billable and non-billable) worked. The effective rate KPI is only visible if you have project-level View bill rates permissions. To learn more about earned revenue, see the earned versus invoiced revenue article. If you have a budget created for the project, the budget effective bill rate will be shown below the actual rate.
- Margin - The projects earned and invoiced margin. The project’s earned margin is the services gross profit of the project divided by the earned revenue. The project’s invoiced margin is the invoiced gross profit of the project divided by the invoiced revenue. The margin KPI is only visible if you have project-level View profit permissions for the project. Note that Ruddr can only calculate services cost on a project if each team member assigned to the project has a labor cost set on their member profile.
- Hours - The project’s budgeted billable and non-billable hours compared to the actual billable and non-billable hours.
- Expenses - The project’s budgeted billable and non-billable expenses compared to the actual billable and non-billable expenses.
- Revenue - The project’s budgeted, earned, and invoiced revenue. The revenue KPI is only visible if you have project-level View revenue permissions for the project.
Team Tab
The Team tab (Figure 8) of the project dashboard shows all of the project team members. By default, this list shows active team members. Active team members can access the project and record time and expenses to the project. To see any inactive team members (who likely worked on the project previously), simply change the filter at the top of the member list to Inactive. Inactive members show with a semi-transparent display.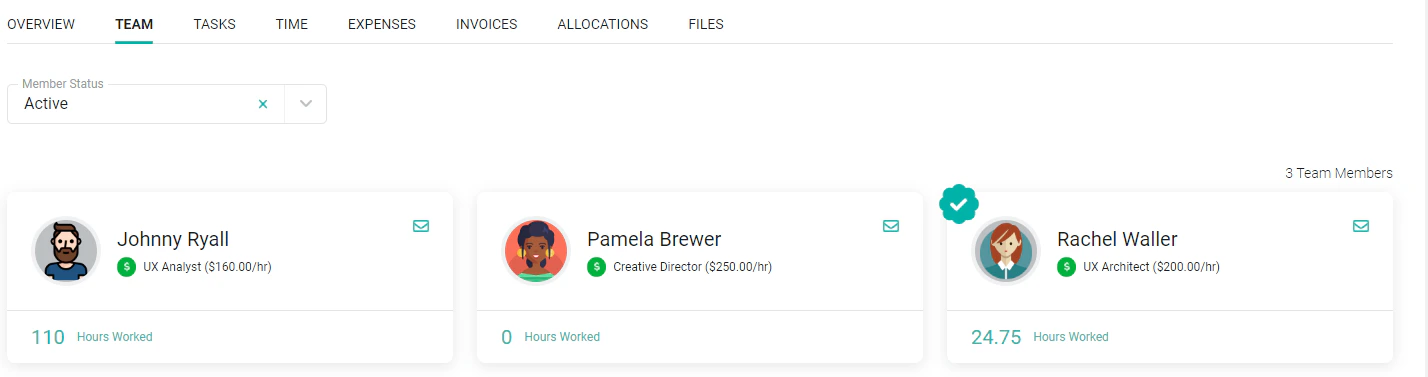
Tasks Tab
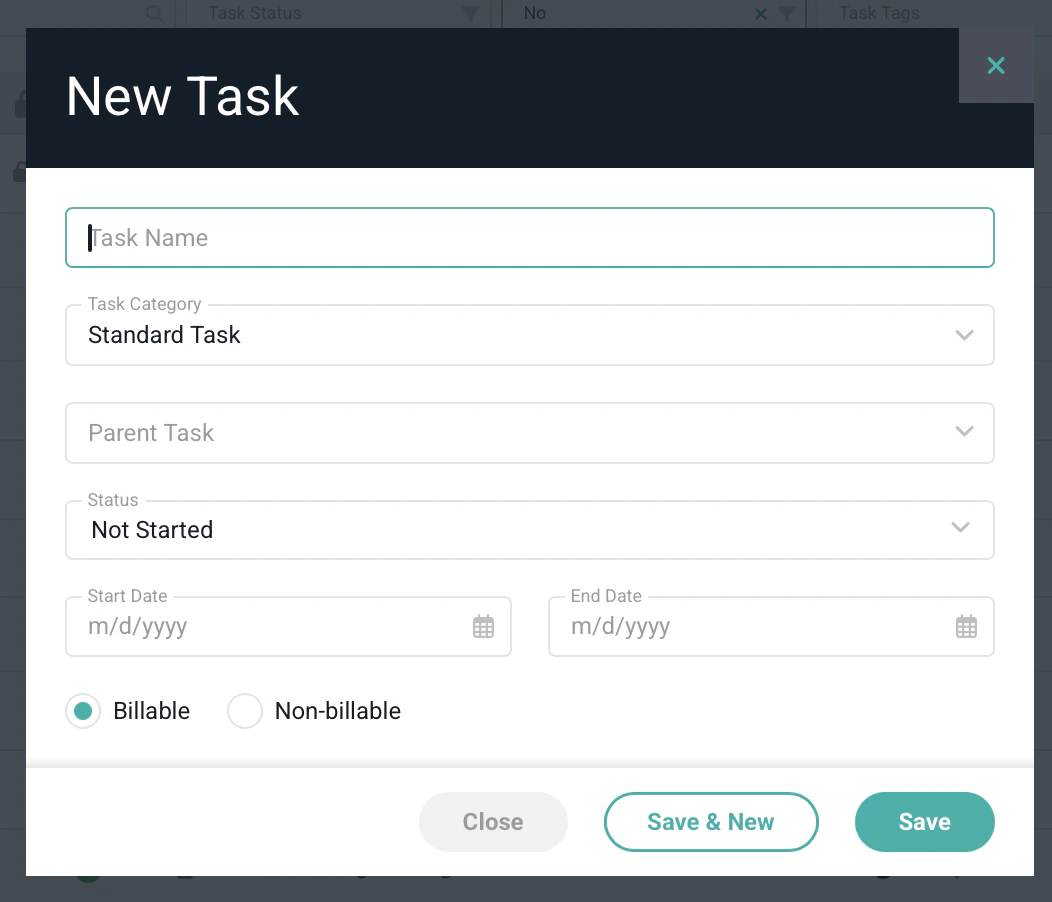
The Tasks tab (Figure 9) of the project dashboard shows a list of the project tasks. Projects in Ruddr can optionally be broken down into individual tasks. Those tasks can be used to aggregate a budget for the project and can also be used for more granular time tracking. You can create grouping for tasks, creating a parent/child relationship and opting for task budget rollups. For more information, visit the Project Tasks page. Recognized revenue is attributed to project tasks according to the Fixed Fee Revenue Attribution method set on the project.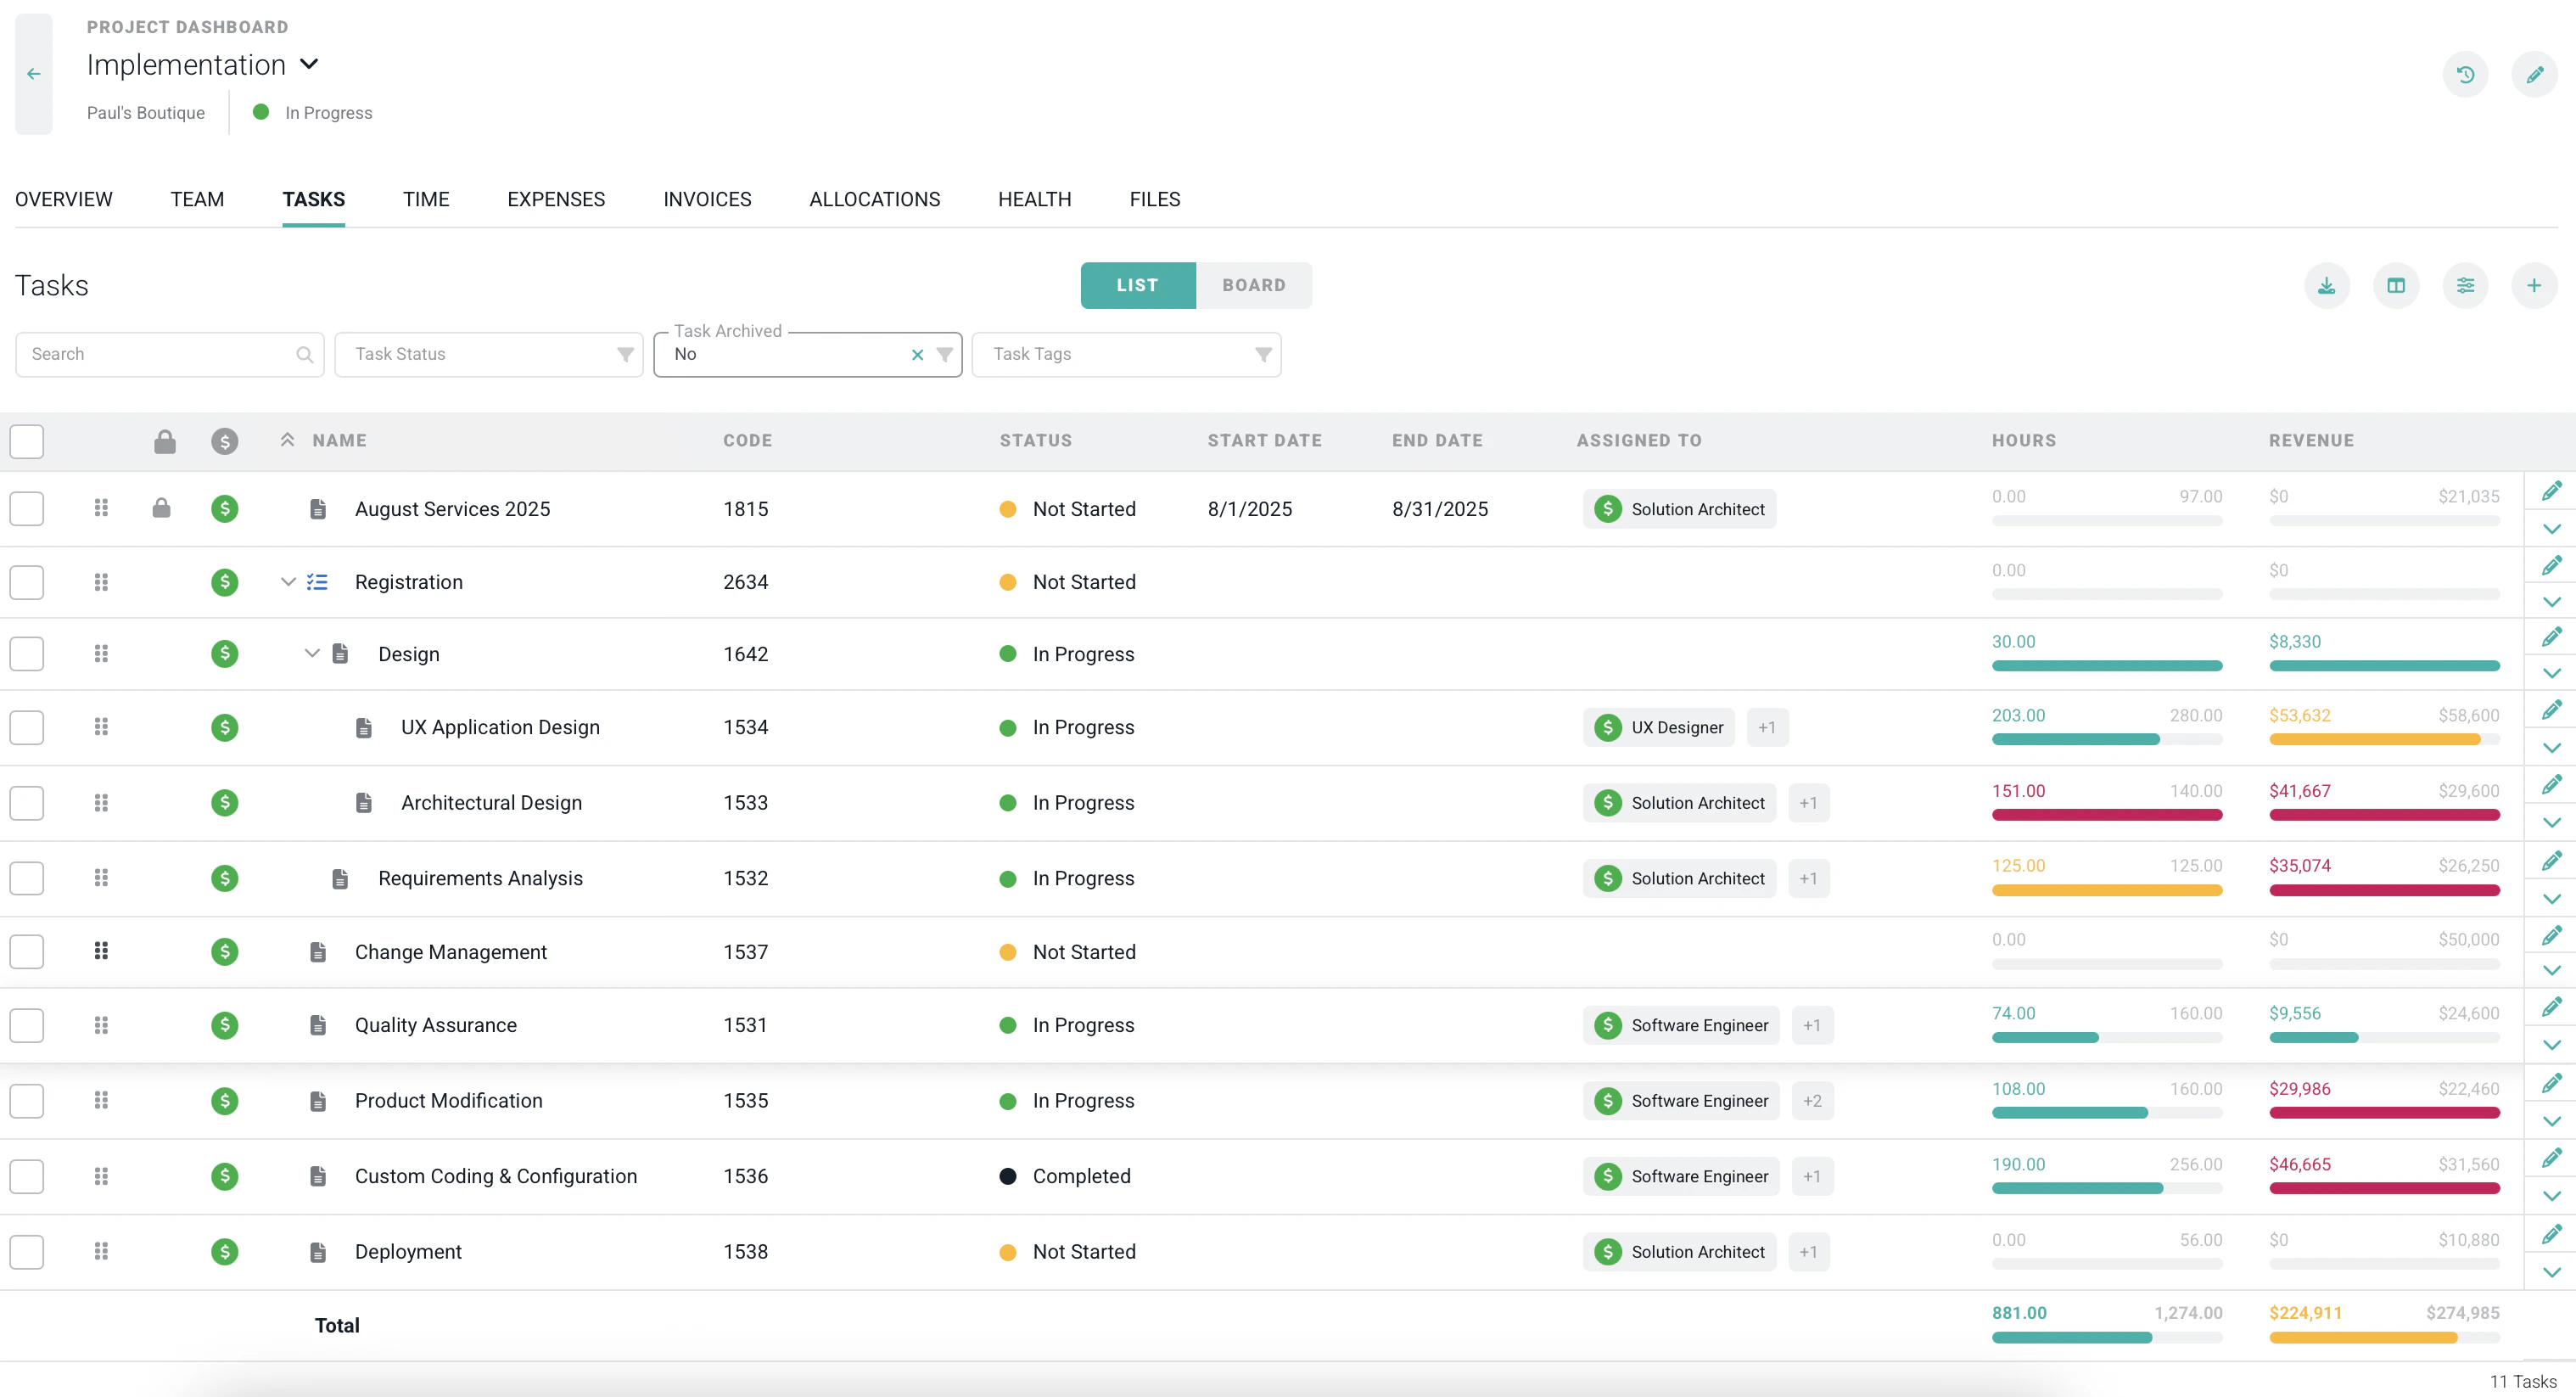
Time Tab
The Time tab (Figure 11) allows you to see a summary of the project’s time entries. If the project uses roles, you can set the View selector to either “Time by Role” or “Time by Member”.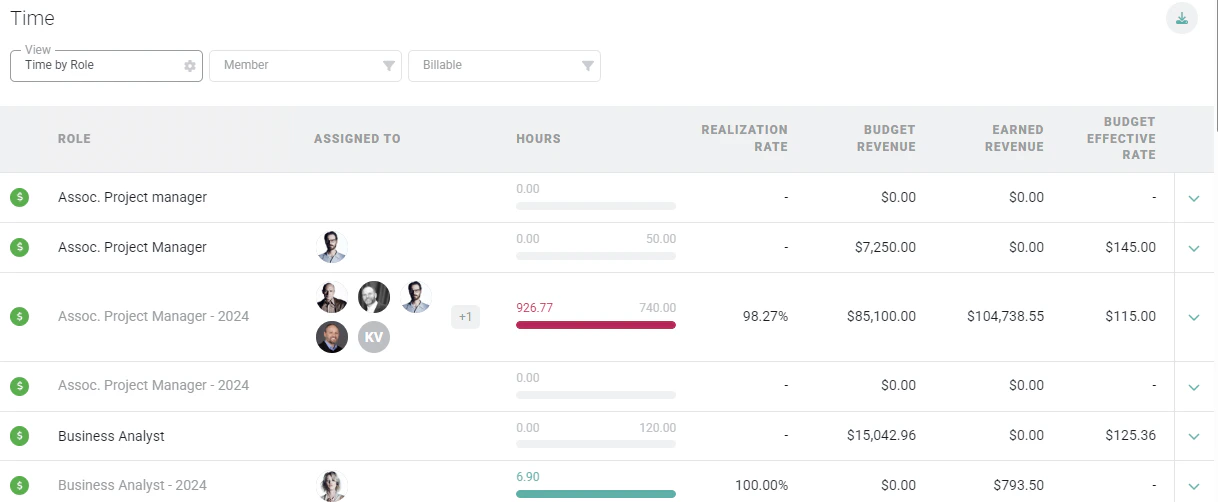
Entering Time for Project Team Members
Any member that has Administer Time and Expense permissions in their security role may have an option to track time for project team members available on the Time tab of the project dashboard when the view is grouped by members. For those members that have permissions to administer time for the project, a Track Time menu item (Figure 12) will be present for each member listed when the view is grouped by member. For those members that have permissions to administer time for certain members in the workspace, a Track Time menu option (Figure 12) will be present for each / every member on the project team for which they have those permissions.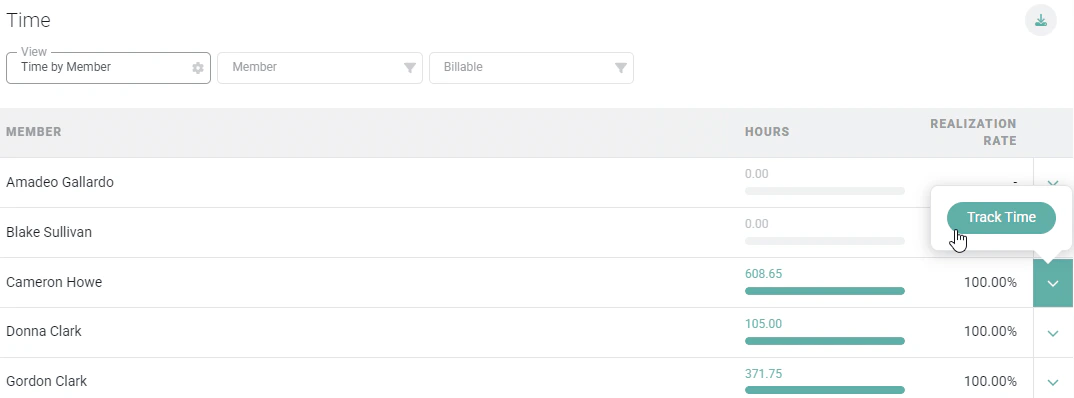
Expenses Tab
The Expenses tab (Figure 12) works similarly to the Time tab. The Expenses tab allows you to see all expenses recorded to the project grouped by the expense category.
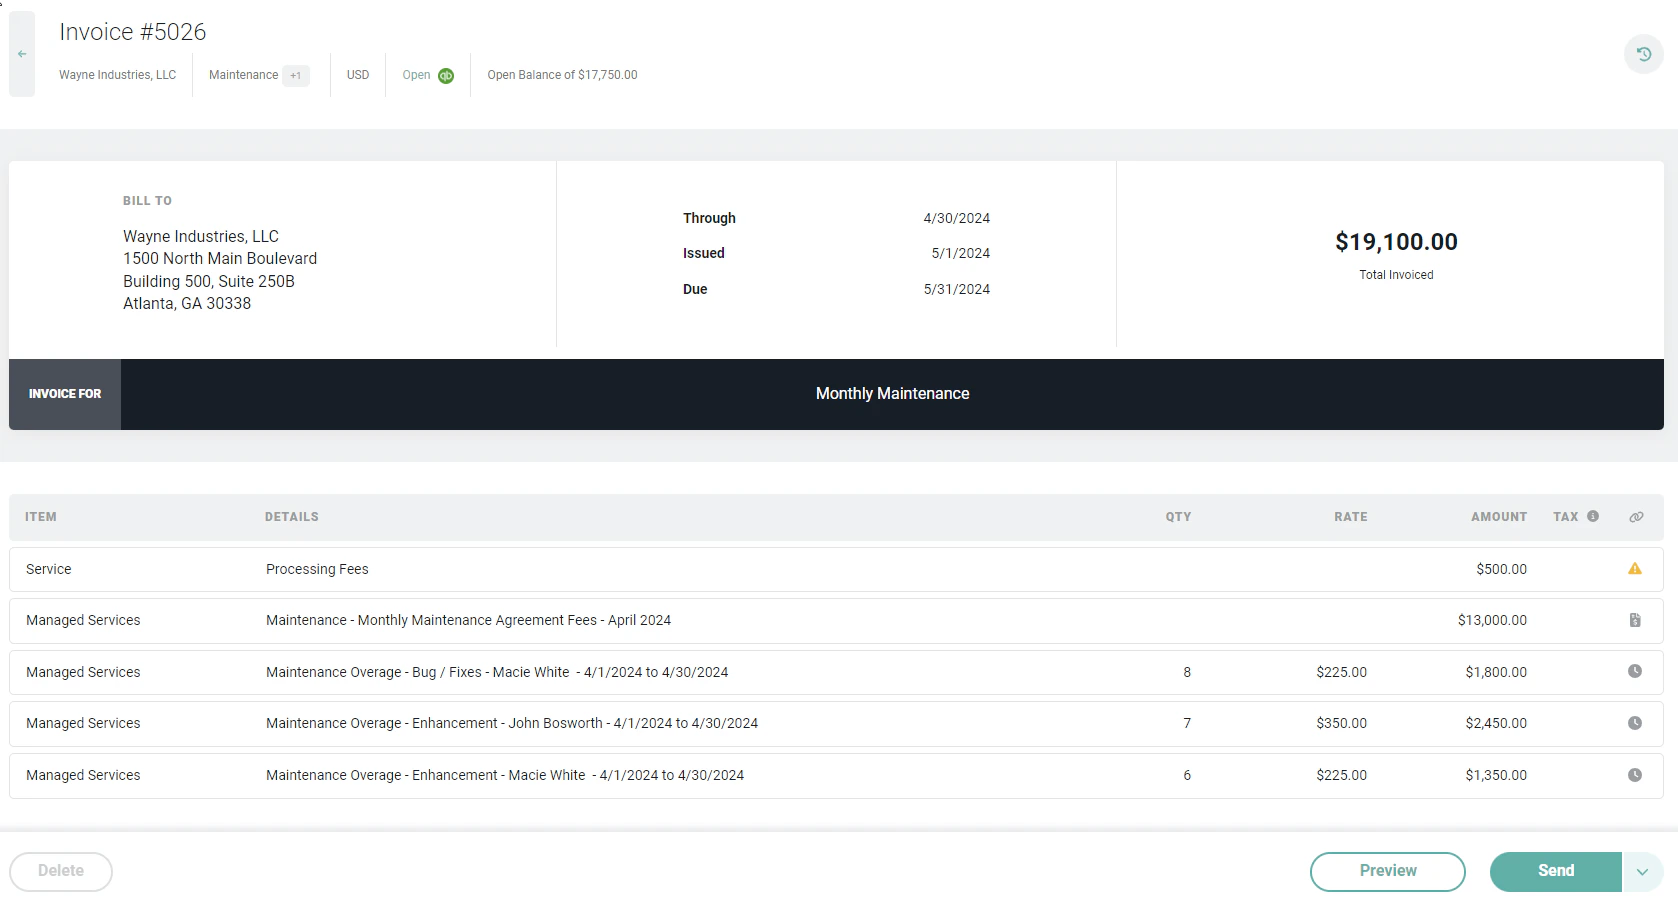
Invoices Tab
The Invoices tab (Figure 13) allows you to see invoices associated with the project. In order to see published invoices, you must have the View published invoices permission set on your member profile. To see draft invoices, you must have the Create and edit draft invoices permission.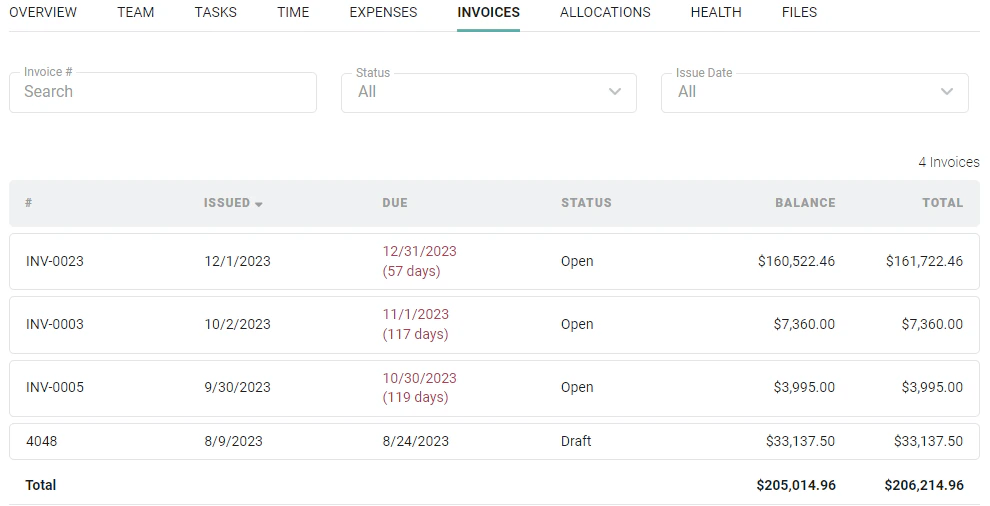
Client Approvals Tab
If client approvals are enabled on the Edit Project drawer, then the Client Approvals tab (Figure 15) will be shown. Client approvals are used to send a batch of time and expenses to a client for approval on a periodic basis. These approvals are often done before an invoice is created for the time and expenses. For detailed information about client approvals, see the Client Approvals help article.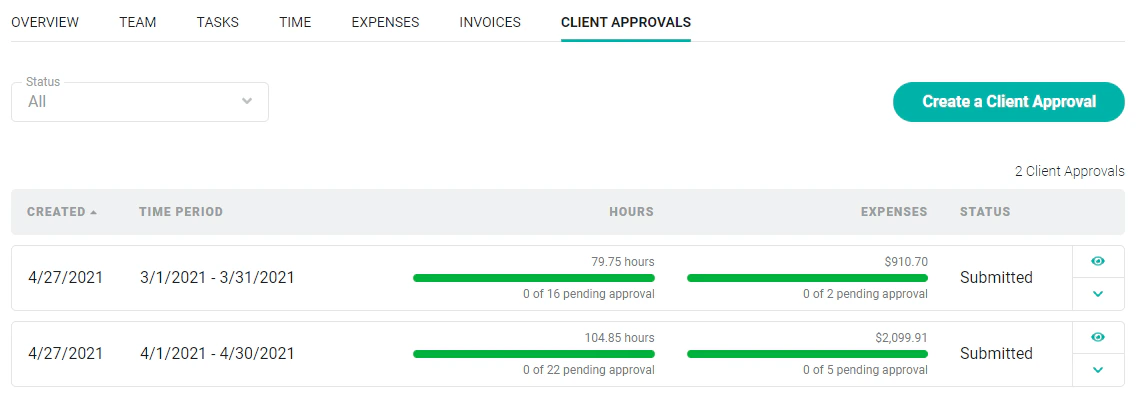
Allocations Tab
The Allocations tab (Figure 16) displays a list of all resource allocations for the project. Use the date picker to view allocations for a given time period, and use the Month/Week/Day view picker to toggle between those views of allocations. Finally, project allocations can be exported in Excel or CSV format from this tab. Both confirmed and soft bookings are included on this tab and in the project’s planning metrics; soft bookings are shown faded so you can distinguish them from confirmed allocations. For more, see Confirmed and Soft Bookings. For more on Resourcing in Ruddr, please refer to this article in the Ruddr Help Center.
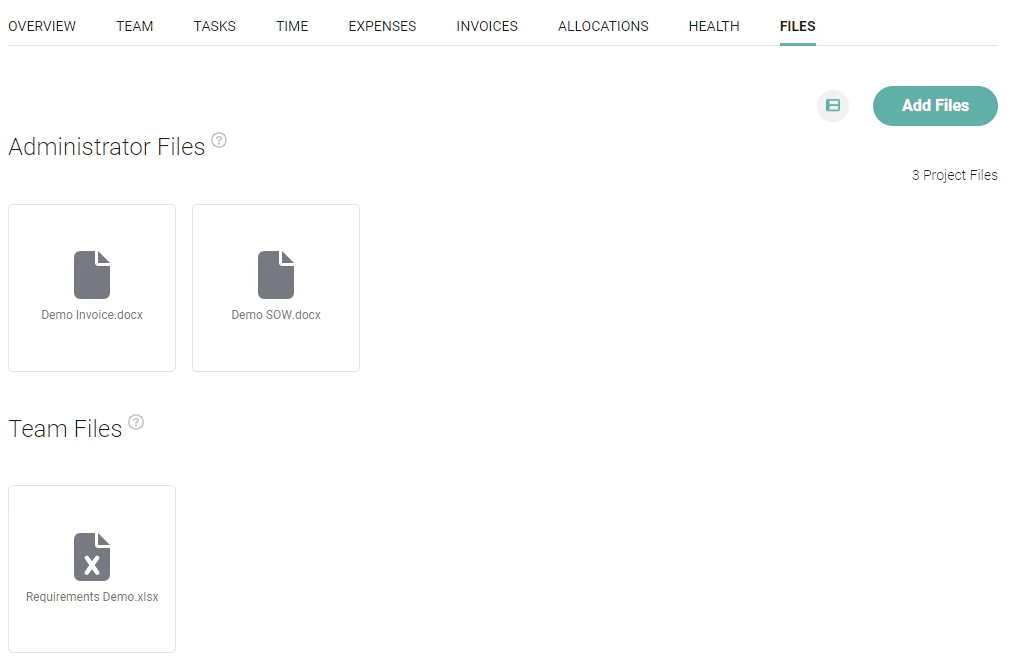
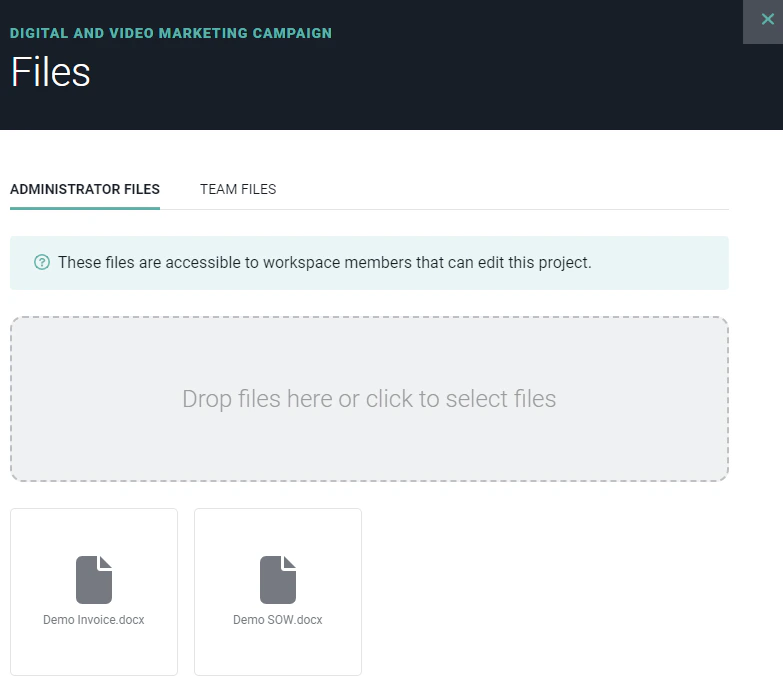
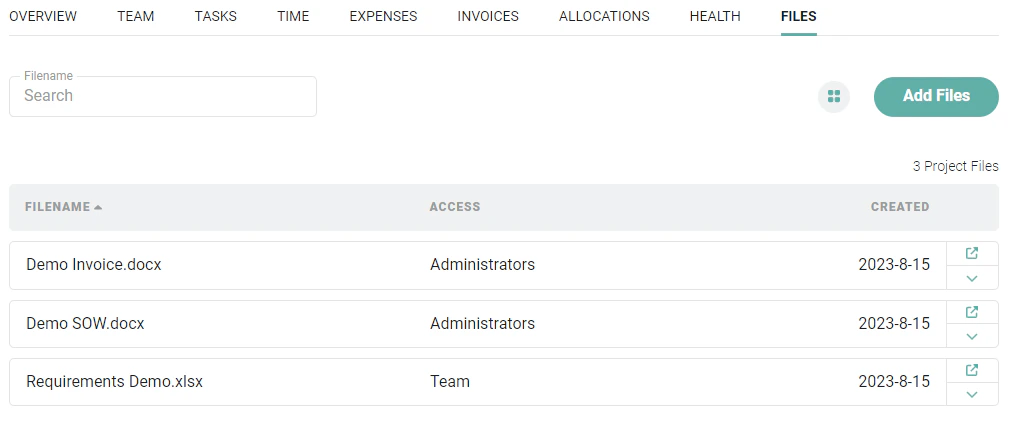
Files Tab
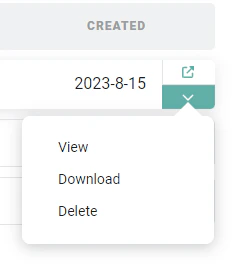
The Files tab is available to those workspaces that have turned on the Client and Project Files feature in workspace settings. On the Files tab (Figure 17), a member can upload files to the project record in Ruddr and, subsequently, access those files. (Note that there is a 20MB file upload limit). There are two types of files that can added to the project:- Administrator Files: These files are only accessible (and able to be uploaded) by members that can edit the project.
- Team Files: These files can be accessed by any workspace member with access to the project. Only members that can edit the project can add Project Team files.