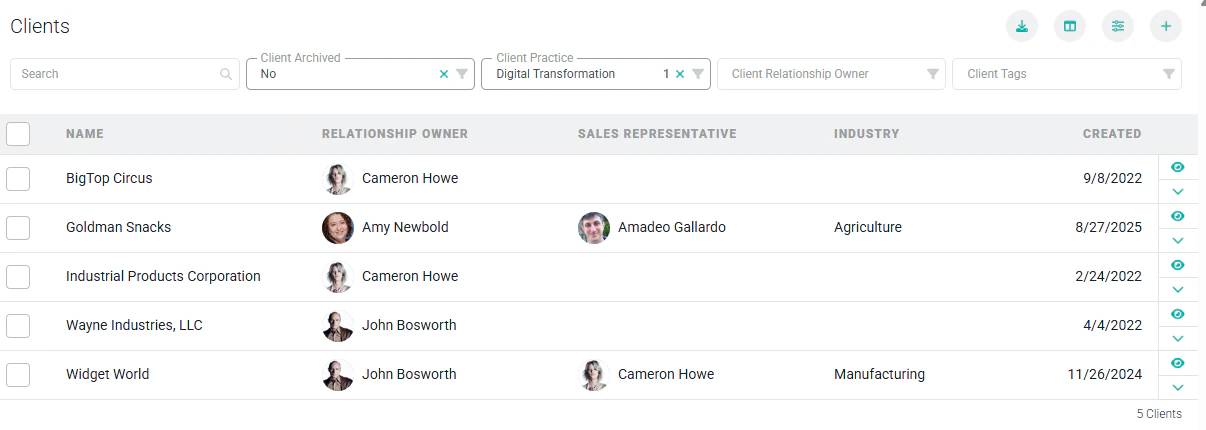
- Search - You can type in a partial client name to narrow the results.
- Client Archived - Specify “Yes” to view archived clients or “No” to only view non-archived clients. In the client list illustrated above (Figure 2), the “greyed out” items are archived clients that are displaying based on the search criteria.
- Client Practice - The practice that is assigned as the owner of the client. Practices are optional in Ruddr.
- Client Relationship Owner - Narrow down the results for a specific Client Relationship Owner.
- Client Tags - If you leverage client tags in your workspace, search the list of clients by active and/or inactive tags. For more information on client tags, refer to the Custom Data article in the Ruddr Help Center.
Edit a Client
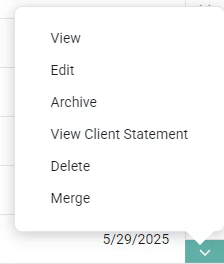
To edit a client, you must have the Edit clients permission on your security role. Simply click on the Edit menu option on the row that you want to edit. This will open up the same client drawer (Figure 4) that is used to create a client. Alternatively, you can click on the edit button (a pencil icon) at the top-right of the client dashboard.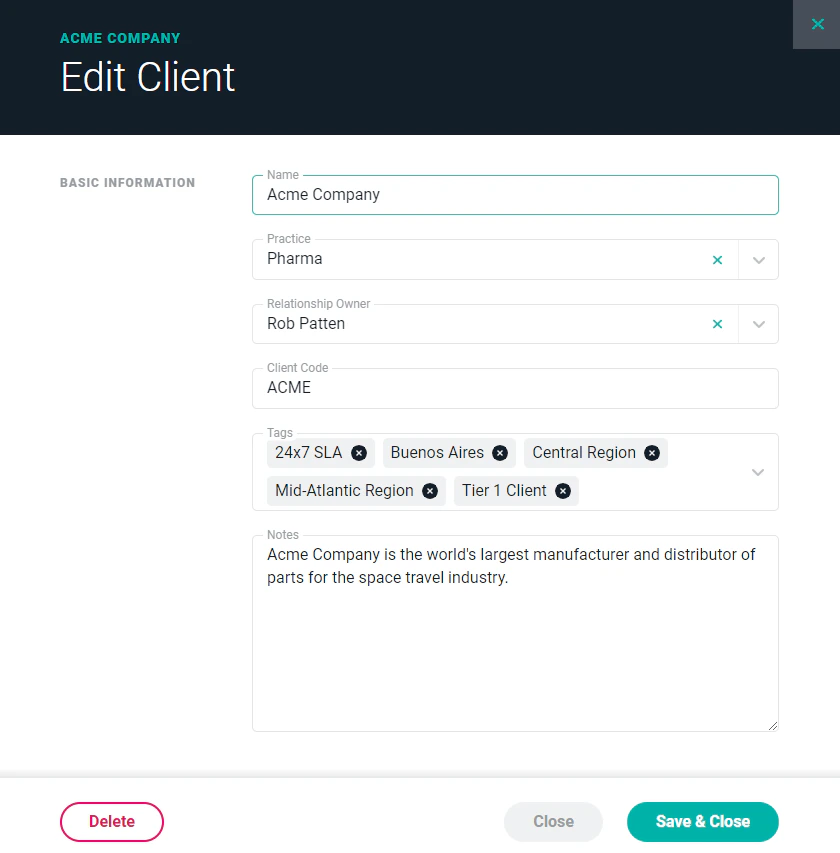
Archive a Client
To archive a client, you must have the Delete or archive clients permission. Simply click on the Archive menu option (Figure 3) on the row that you wish to archive. This will bring up a confirmation window (Figure 5). When you archive a client, you will also archive all of the projects within that client.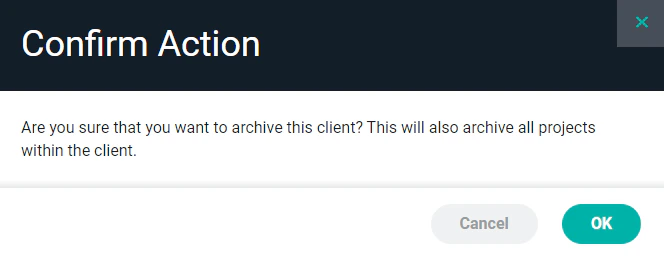
Bulk Updates for Clients
Workspace Admins have the ability to archive or unarchive clients in bulk. Once you select the clients you want to update, select the Bulk Actions button in the bottom right corner of the Clients list screen. (Figure 6) You will have the option of archiving, unarchiving, or deleting multiple clients.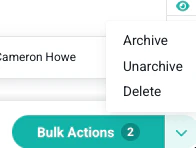
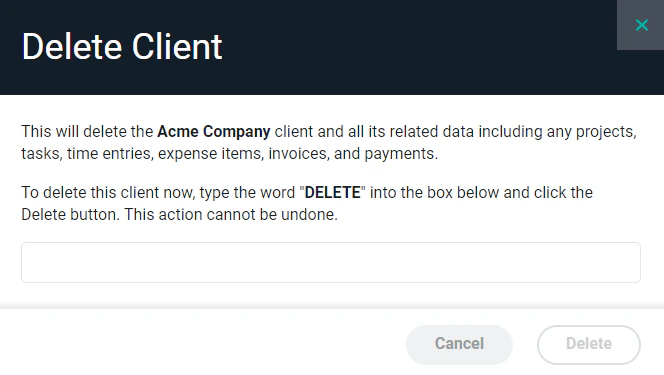
Delete a Client
To delete a client, you must have the Delete client permission. Simply click on the Delete menu option (Figure 3) on the row that you want to delete. This will bring up a confirmation window (Figure 7). If the client has projects, it is strongly recommended that you archive the client instead of deleting it. Once you delete a client, you cannot reverse this action and all associated data (including projects, time entries, expenses, invoices, and payments) will be gone forever!