

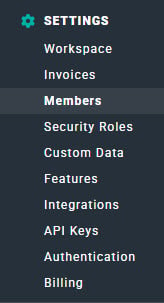
Figure 1 - Workspace Settings Options
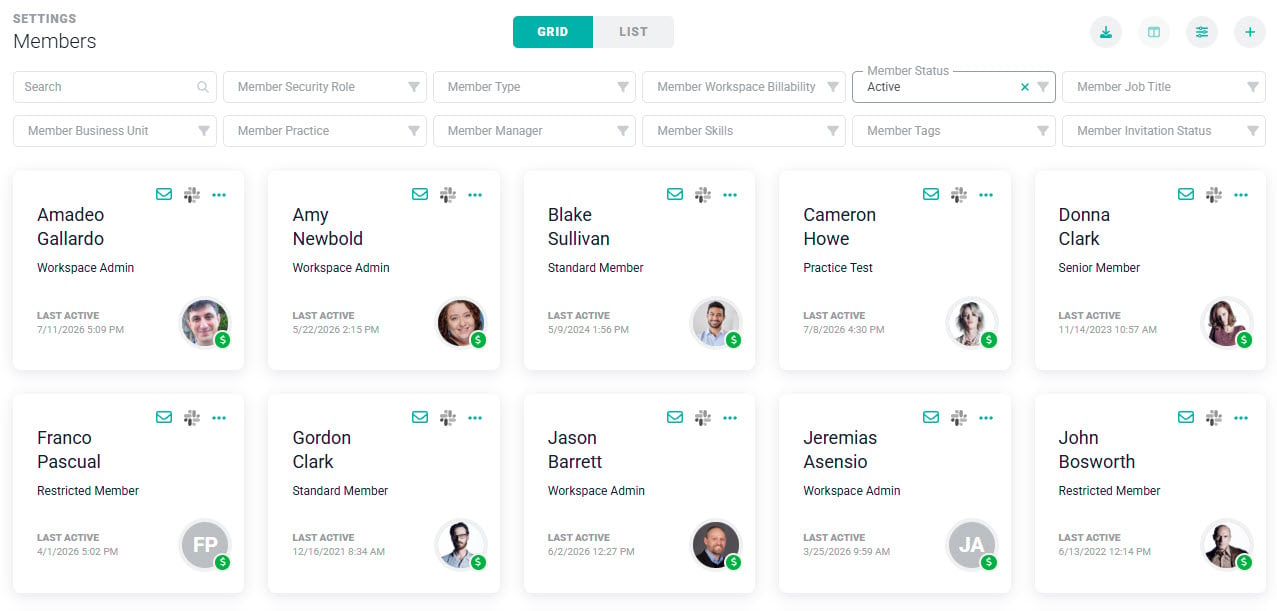
Figure 2 - The Grid View of the Members Screen
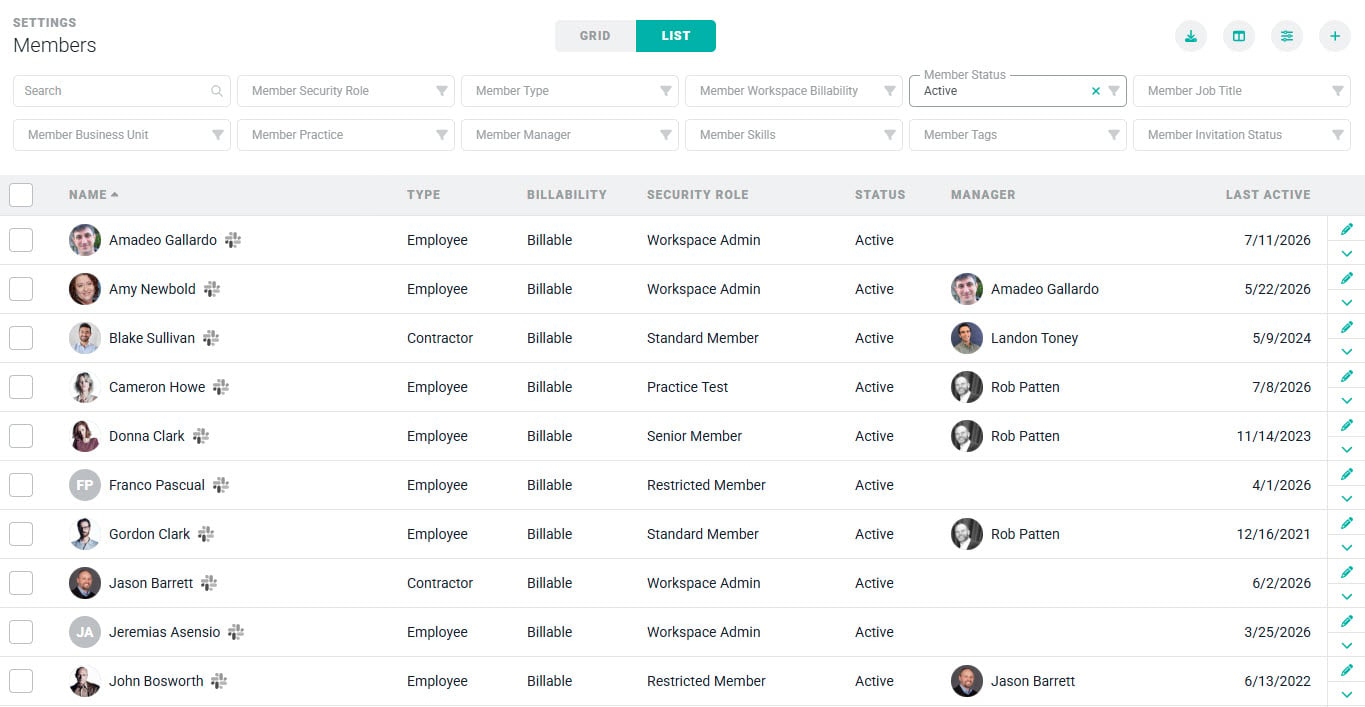
Figure 3 - The List View of the Members Screen
Figure 4 - The Grid/List View Selector
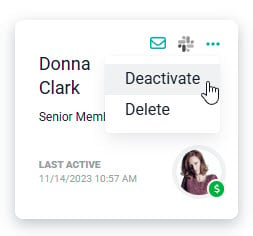
Figure 5 - The Ellipsis Menu from the Member Card
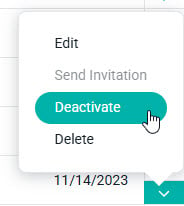
Figure 6 - The Action Menu from Member Row
Add a New Member
To add a new member to the workspace, click on the + button at the top-right of the screen. This will open the New Member window (Figure 7). You are required to supply the new member’s name and email address.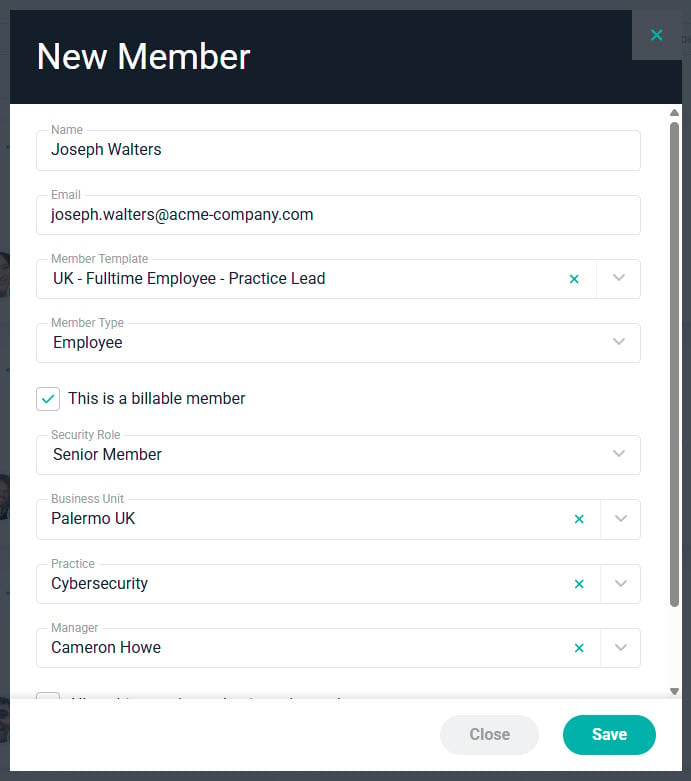
Figure 7 - The New Member Window
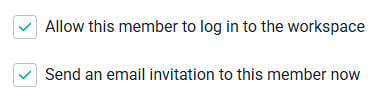
Figure 8 - New Member Login and Invitation Settings
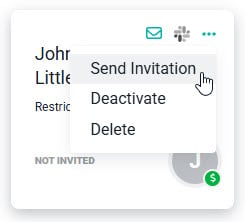
Figure 9 - The Send Invitation Menu Option
Email Suppression
If Ruddr sends an email but receives an undeliverable response, that email address will be placed on Ruddr’s email suppression list. This is done for security and abuse prevention purposes. The member card will show a red exclamation mark icon if the member is on Ruddr’s email suppression list (Figure 10). Ruddr will not send any emails to an address on the suppression list. The most common cause of an email address bring suppressed is that a new employee was invited into the workspace before that employee’s email address had been provisioned. Workspace Admins should ensure that a new hire’s email address is active before inviting the member into the workspace.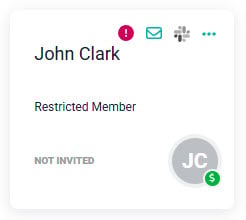
Figure 10 - A Workspace Member on the Email Suppression List
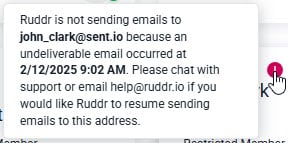
Figure 11 - Suppressed Email Address Tooltip
The Member Dashboard
The New Member window provides a small subset of a workspace member’s settings. To review and edit the full set of options, click on the member’s card to bring up the Member Dashboard. From the Member Dashboard, you can configure all member settings including capacity, cost, billable utilization target, notifications preferences, and many more.Delete a Member
The only time a member can be deleted from a workspace is when the member is not associated with other data entities in the workspace. If the member has no such associations, the member can be deleted by choosing the Delete option (Figure 12) from the ellipsis menu at the top-right of the member’s profile card on the members list.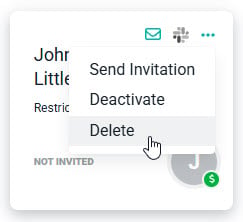
Figure 12 - Delete a Member
Deactivate a Member
Typically, a member cannot be deleted because the member is associated with operational data in the workspace (such as time entries or expense items). In these cases, the member can only be deactivated. This has the same effect as deleting the member, as the member will no longer be able to access the workspace. Any time a member is deactivated or deleted, any prepaid but unused fees related to the member are credited to the workspace account. To deactivate a member, simply select the Deactivate option (Figure 13) from the ellipsis menu. The member will automatically be set to inactive on all project teams that the member is assigned to.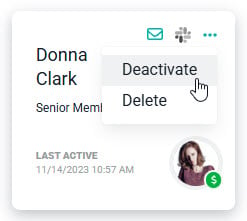
Figure 13 - Deactivate a Member
- The member is a Project Admin on one or more projects. Typically you would want to assign a new Project Admin to those projects.
- The member is a Client Relationship Owner of one or more clients.
- The member is a Sales Representative of one or more clients.
- The member is a Sales Representative of one or more projects.
- The member is a named approver in one or more time approval workflows.
- The member is a named approver in one or more expense approval workflows.
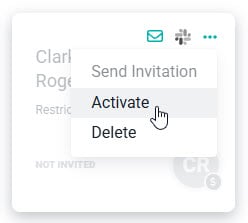
Figure 14 - Activate a Member
Applying Bulk Updates
Workspace Admins have the ability to perform bulk updates on members. Fields that can be updated in bulk include:- Login Enabled
- Manager
- Business Unit (available when the Business Units feature is enabled)
- Practice
- Discipline
- Job Title
- Level
- Tags
- Skills
- Certifications
- Timesheet Attestation (available when the Timesheet Attestation feature is enabled)
- Holiday Schedule
- Ruddr Assistant
- Member Type
- Location
- Security Role
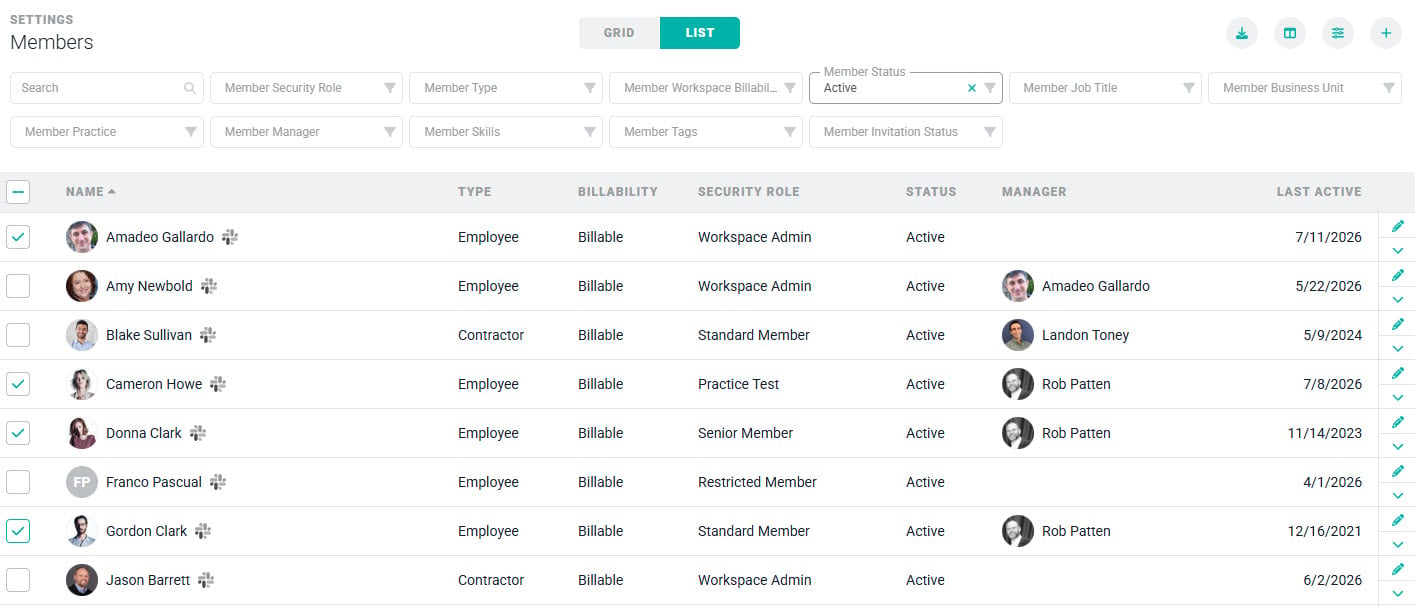
Figure 15 - Selecting Members for a Bulk Update
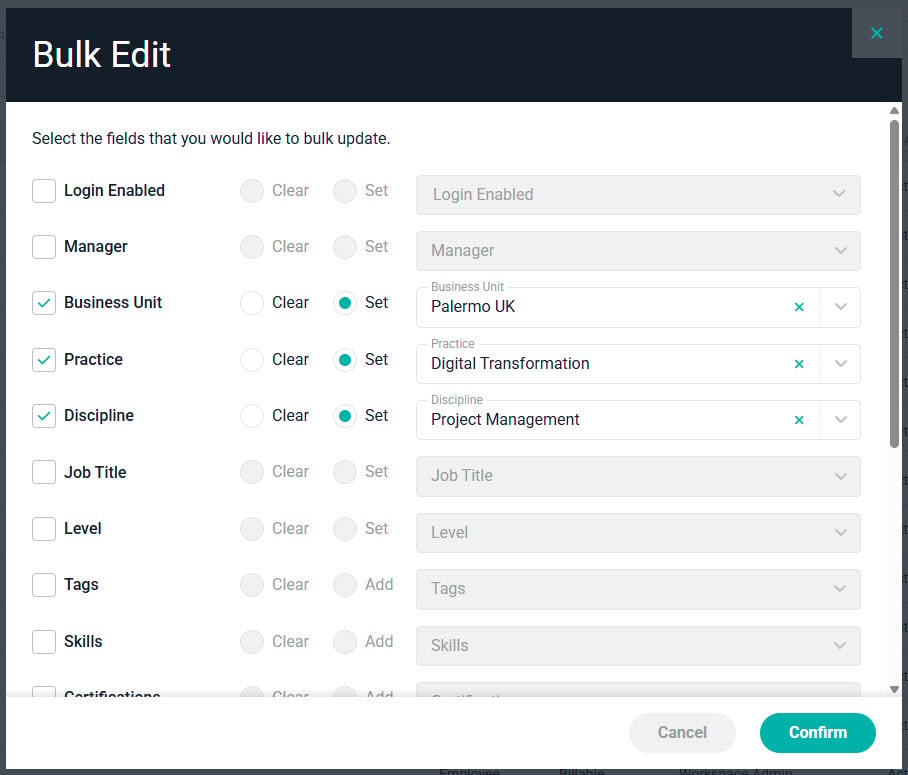
Figure 16 - Set Bulk Update Fields