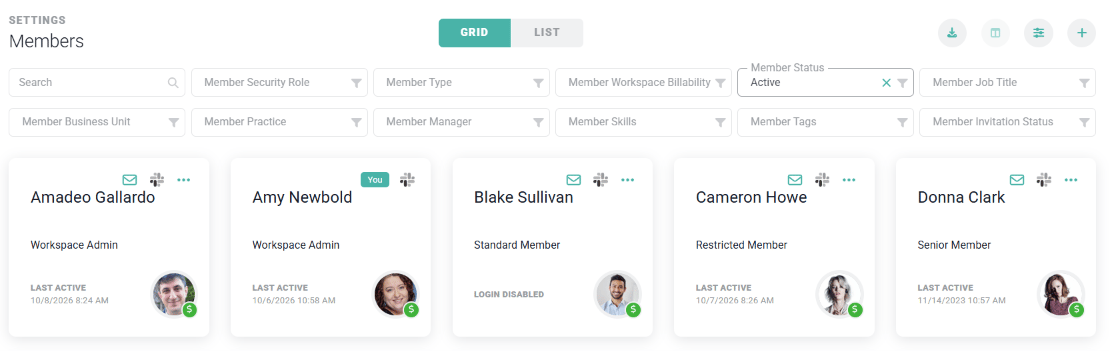
A workspace is an instance of Ruddr that contains members, clients, projects, time, expenses, and so forth. Anything a user does in Ruddr happens within the context of a workspace. You can create a new workspace by signing up for Ruddr, or join an existing workspace when a Workspace Admin invites you. You can be a member of multiple workspaces at the same time. You might be a member of your company’s workspace but then also maintain a personal workspace for your freelance work. You can quickly switch between workspaces to manage your tasks, time, expenses, etc. The information you create in one workspace is never visible in any other workspace. Join a workspace To join an existing Ruddr workspace, a Workspace Admin will need to invite you from the Members section of the Settings area (Figure 1). From there, the Workspace Admin can click the + (New Member) button, fill in your details, and check Send an email invitation to this member now to invite you into the workspace. See Accepting Workspace Invitations for what happens next.
A Workspace Administrator can Click the New Member Button to Invite a Member to Your Workspace

Figure 1 - A Workspace Administrator can Click the + (New Member) Button to Invite a Member to Your Workspace
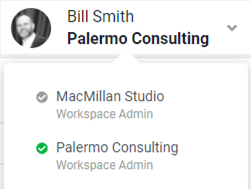
Create a workspace To create a new workspace, click the Start Trial button on the www.ruddr.io website and submit a new workspace request. Once our team validates your request, you will receive an email with a link to finalize your workspace. See Signing Up for Ruddr for the full process. When you finalize your workspace, you provide a company name, type of professional service, workspace name, and a unique Workspace URL ID. Ruddr suggests a workspace name and Workspace URL ID based on your company name. While your workspace name does not have to be unique, you cannot choose a Workspace URL ID that is already in use. Ruddr asks for the professional services type in order to create default values for various types of data entities (such as project types) within the workspace. You can always change this data once your workspace is created. Switch workspaces If you are a member of multiple workspaces, you can switch between them from the user profile menu (Figure 2). Click your avatar at the top-right of the screen, then click the current workspace below My Profile to see a list of your other workspaces. Click any workspace to switch to it. To log in to a workspace that isn’t listed, click Log in to Another Workspace.
Access Your Workspaces via the User Profile Menu

Figure 2 - Access Your Workspaces via the User Profile Menu