Invoice Settings
The first section is Invoice Settings (Figure 2) which includes the settings that will be applied to all invoices, including invoice street address and the logo to be applied to each invoice. These settings can not be overridden on a per-invoice basis.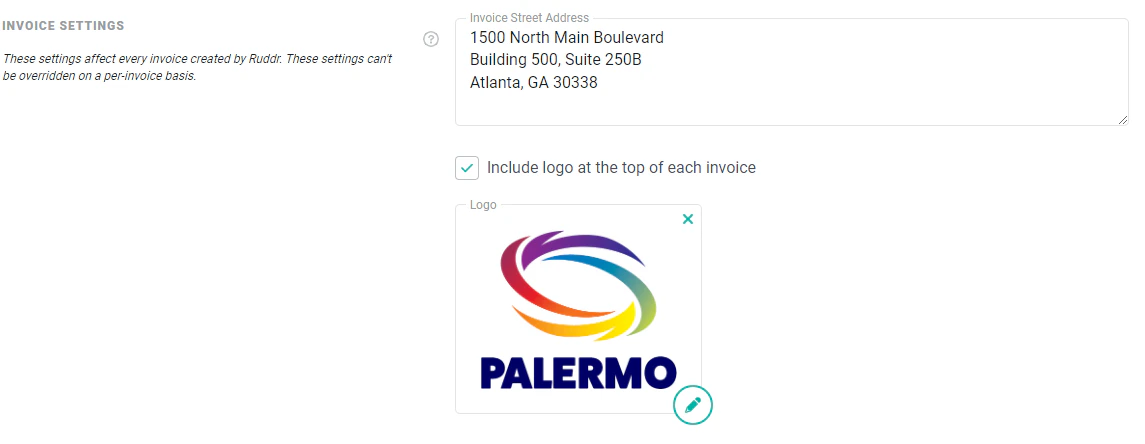
Basic Invoice Defaults
The second section is Basic Invoice Defaults (Figure 3) and here you can set the default terms, tax rate, and invoice note for the workspace. Tax rates can be configured in the Custom Data screen within Workspace Settings. The default tax rate can then be inherited or overridden at the client and project levels.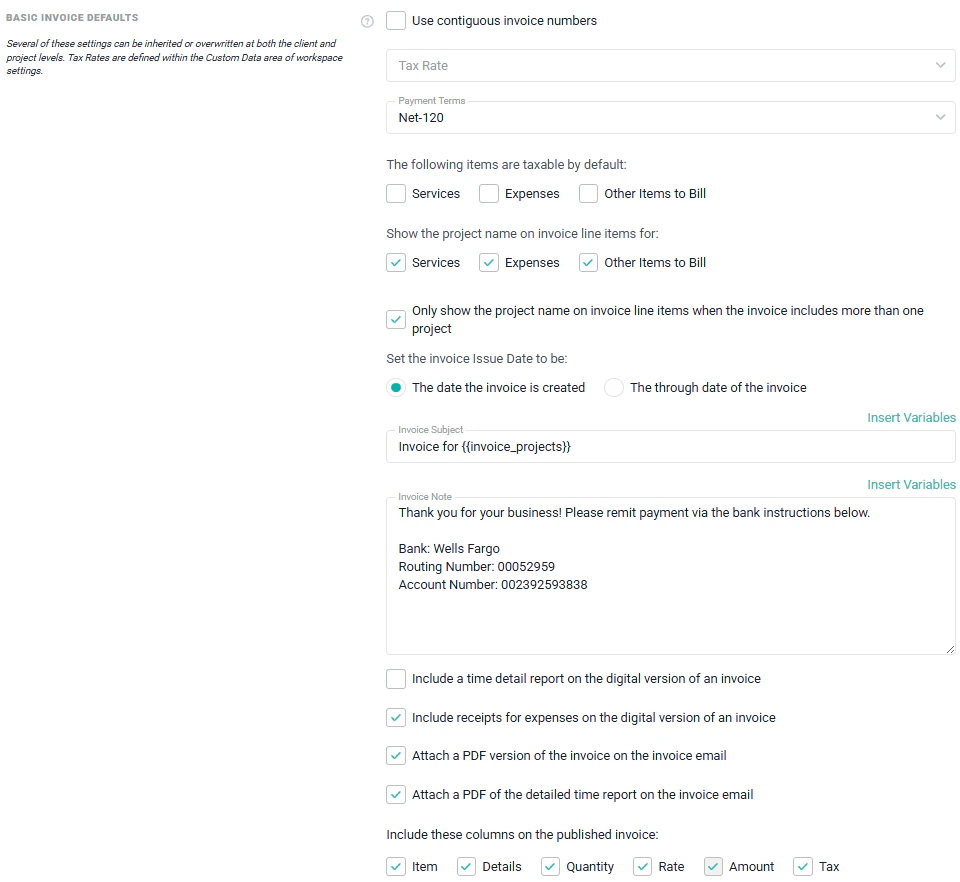
Using Invoice Variables
The Basic Invoice Defaults section introduces invoice variables. Invoice variables are common fields found on an invoice that can be applied to various text fields on an invoice, and as described below, in the invoice email that you send to clients. In this section, you can include invoice variables in the Invoice Subject field as well as the Invoice Note field. By clicking the Invoice Variables link above the setting text box, you can insert an invoice variable (Figure 4) at any point within the text of the field. You can either check the box next to any variable(s) you wish to include at the point where your cursor currently is in the field, or you can click the clipboard icon next to any variable to copy the variable name for inserting at any point in the text.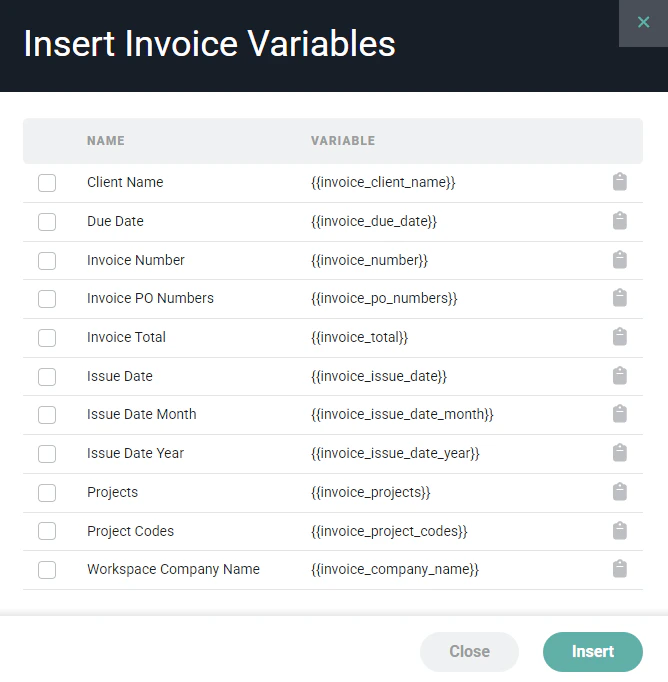
Time Presentation Defaults
The settings in the Time Presentation Defaults section (Figure 5) allow you to set defaults for how time-entry, invoice line items display on invoices. Time entries can either be shown in detail or they can be grouped. If you select the Group time entries on invoices option (Figure 5), you will have the option to group by project, project role, project role and person, project task, project task and person, or just person.

Expense Presentation Defaults
The Expense Presentation Defaults section (Figure 7) of the Invoice Settings allows you to configure the default invoice line item format for expense entries. Expense entries can either be shown in detail or they can be grouped. If you select the Group expense items on invoices option (Figure 7), you will have the option to group by project, expense category, category and person, or just person.

Time Report Defaults
If you elect to Provide a time detail report on the digital version of an Invoice in the Basic Invoice Defaults section (Figure 3), you can configure the report format using the Time Report Defaults section (Figure 9). You can control the grouping of time entries as well as the specific columns to include in the detailed time report. Note that any changes to this setting will apply to future invoices.
Invoice Email Defaults
The next Invoice Settings section is Invoice Email Defaults (Figure 10). These settings will applied when sending invoices to customers via Ruddr. These settings include the From Name, Reply To email address, and the Body of the email message. Each of these defaults can be overridden on a per-invoice basis. Here, you can also apply Invoice Variables. Clicking on the Invoice Variables link just above either of the Invoice Email Subject or Invoice Email Body fields will allow you to insert common invoice variables (Figure 4) into the text. As draft invoices are generated, the values associated with the variables will be included in the text.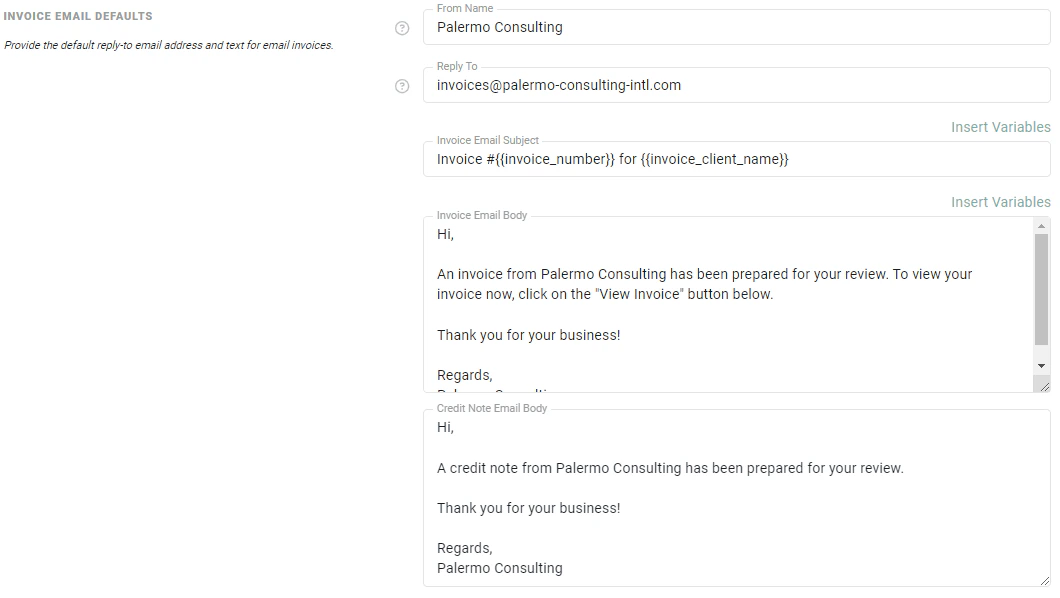
Ad-hoc Invoices
Ad-hoc invoices are invoices that are created “from scratch”, as opposed to invoices that are created from the Ready to Bill screen. In Ruddr, ad-hoc invoices should very rarely be created, as you will want to generate invoices from transactional data on your projects. As such, you have the ability to restrict members from creating ad-hoc invoices by disabling the Allow ad-hoc invoice creation setting (Figure 11) in the Invoices settings area of workspace settings.
Workspace Accounting Integration
If the Multiple Accounting Integrations feature is enabled, there will be an additional setting available in the Invoices section of workspace settings. Here, you will find an Accounting Integration setting (Figure 12). Here, you will specify the default accounting integration to use for the workspace.