- Set up and Configure a Salesforce Integration User
- Set up and Configure Salesforce Permission Set
- Install and Configure Salesforce Integration in Ruddr
Set up and Configure a Salesforce Integration User
Before following the steps below, please be sure to consult the Salesforce literature on Best Practices for Configuring your Integration User. The steps outlined here will be tailored to the needs for Ruddr’s Salesforce integration, but recommended best practices as documented by Salesforce should be followed. The Salesforce integration user will be the account that Ruddr leverages for read-only access to Companies, Contacts, and Opportunities. There are four steps to creating this user:- Create a new user
- Configure the user
- Verify the new user account
- Reset the security token for the new user account
- Convert user to a Salesforce integration license
Step 1: Create a new user
While logged in as a Salesforce administrator, navigate to the Users list page. From there, click the New User link / button.Step 2: Configure the user
Generally, you will configure this user as you normally would (Figure 1). Note that the email address specified for this user will need to be a valid address that you will be able to access. You may want to consider setting up a system email account for this user. You will need to verify that account, where you will receive important information in a later step.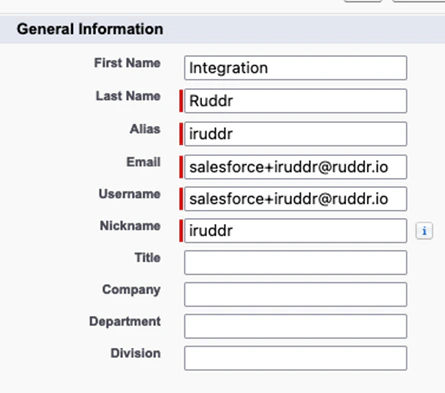
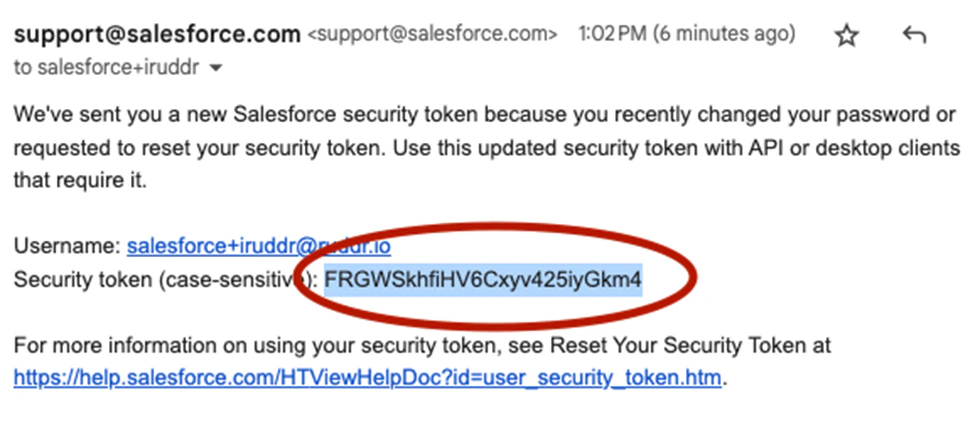
Step 3: Verify new user account
Once you have created the user, Salesforce will send an email (Figure 3) to the address specified for that user. To verify the account, access the email inbox provided in Step 2. Click the Verify Account link in the verification email from Salesforce.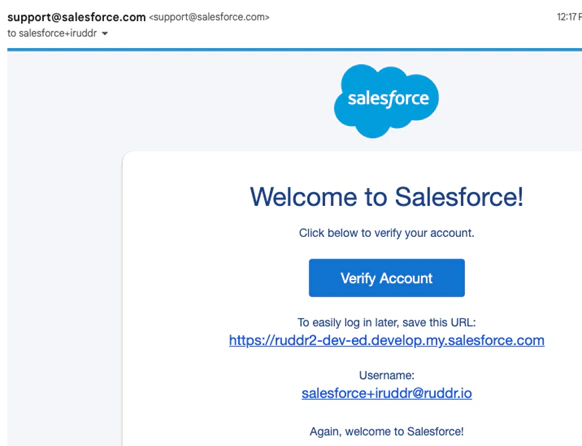
Step 4: Reset the security token for the new user account
Once you have provided a new password for the new user and are logged into Salesforce with that account, you will need to reset the security token for the account. Navigate to My Settings > Personal > Reset My Security Token (Figure 5). From here, click the Reset Security Token button on that page.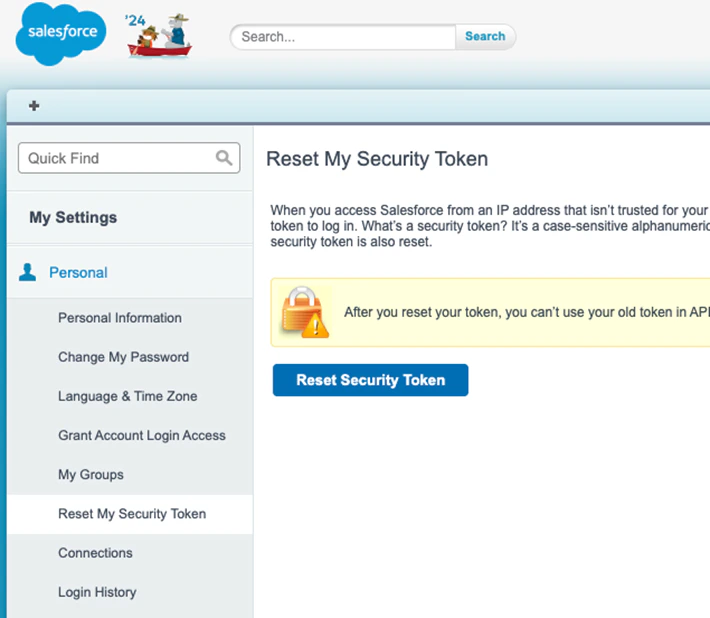
Step 5: Convert the integration user to a Salesforce Integration license
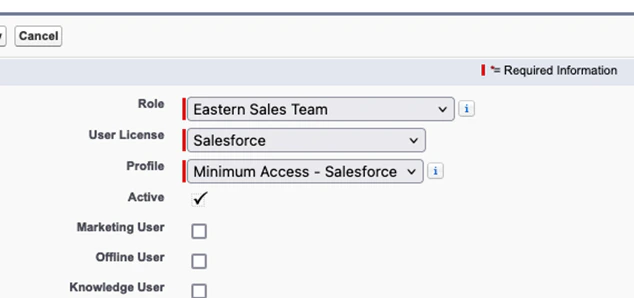
Once you have received the new security token from Step 4, edit the user record in Salesforce (while logged in as a Salesforce administrator). Change the User License (Figure 7) on the user to a Salesforce Integration license. Additionally, set the Profile of the user to Salesforce API Only System Integrations.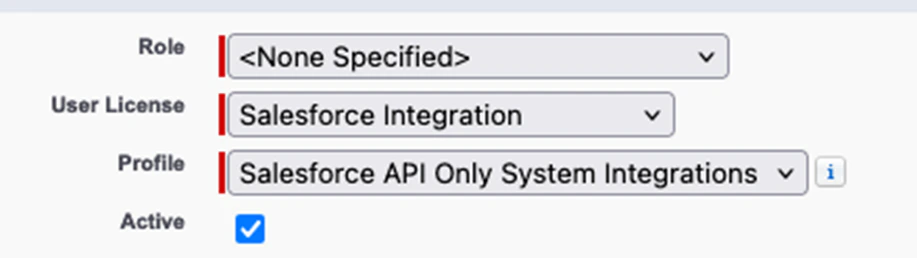
Set up and Configure Salesforce Permission Set
Once the integration user has been created, you will need to assign permissions to the user such that it can access specific Salesforce data via the API. This process will also result in establishing restrictions for the user, in that you will only be providing read access to companies, contacts, and opportunities in Salesforce and any related activity data for those entities. The four steps to complete this activity are as follows:- Create a new permission set
- Configure the object settings for the permission set
- Grant the permission set access to Salesforce activities
- Assign the new permission set to the integration user
Step 1: Create a new permission set
As a Salesforce administrator, access the Permission Sets for your Salesforce instance. Create a new permission set (Figure 8) for the Ruddr API Integration. Ensure that the permission set license is set to the Salesforce API Integration license (Figure 9) specified for the integration user in the steps above.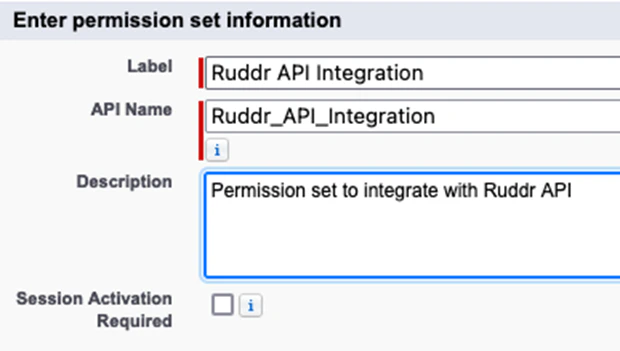

Step 2: Configure the Object Settings for the new permission set
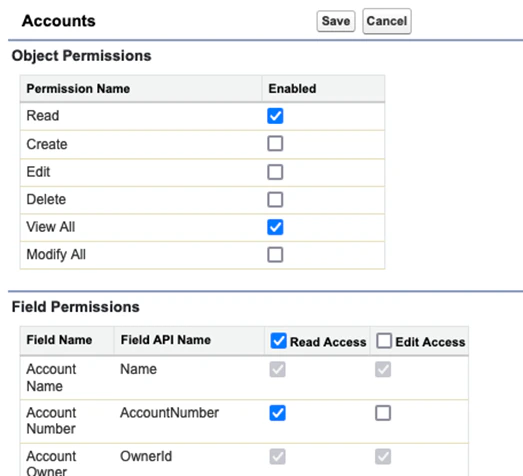
Edit the new permission set (Figure 10), selecting to manage the Object Settings for the permissions set.
- Read
- View All with Read Access
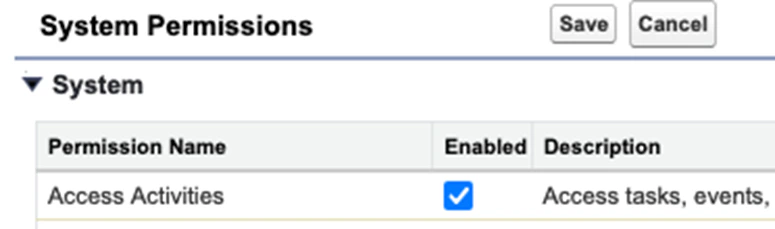
Step 3: Grant permission set access to Salesforce activities
Navigate to the Permission Set Overview and modify System Permissions (Figure 12) to give access to activities.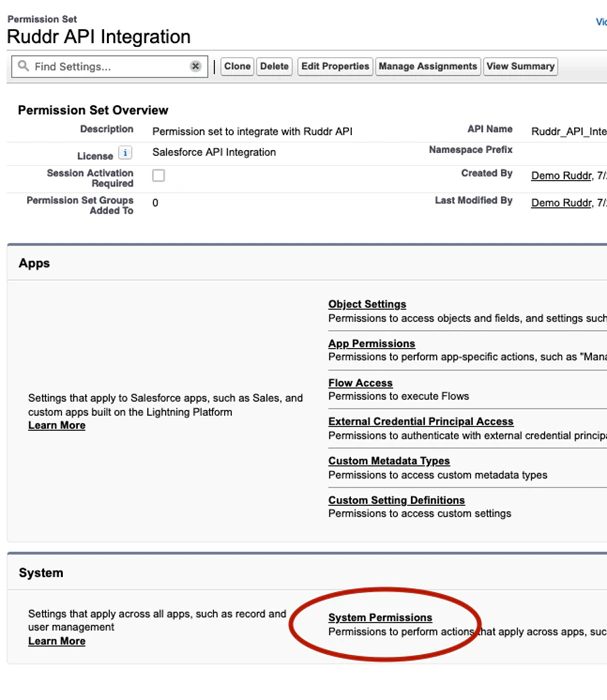
Step 4: Assign the permission set to the integration user
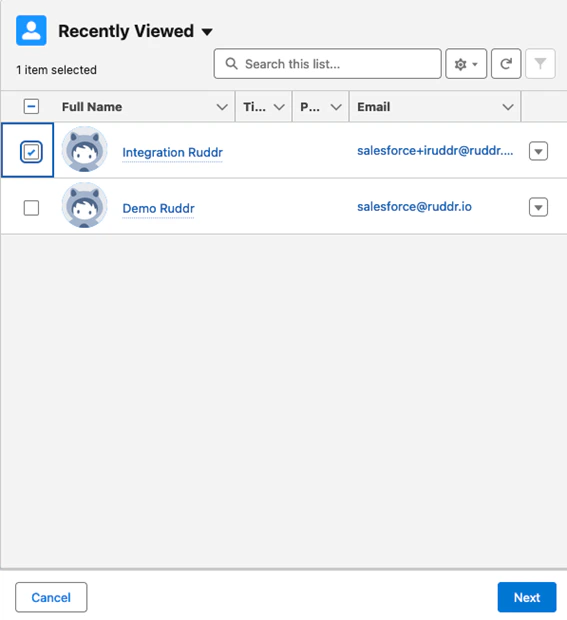
Navigate to the Permission Set Overview and click the Manage Assignments button (Figure 14) at the top of the overview. From here (Figure 15), you will assign the permission set to the newly created API user.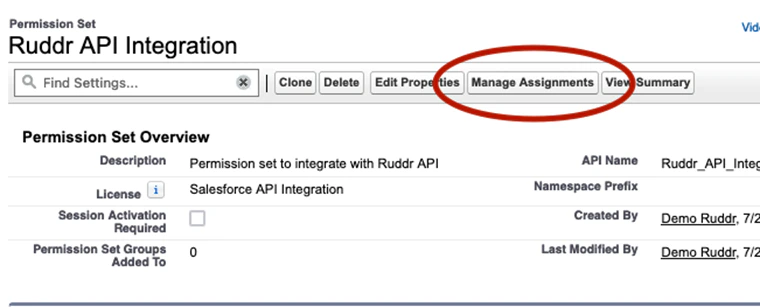
Install and Configure Salesforce Integration in Ruddr
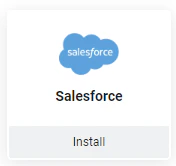
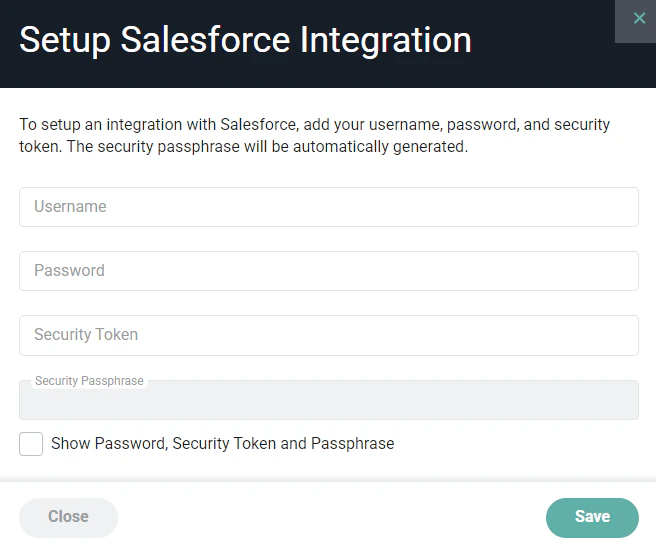
With the Salesforce API user set up and configured, with the appropriate permission set assigned, you are now ready to provide the related credentials to Ruddr to install the Salesforce integration.Step 1: Install the Salesforce Integration
As a workspace administrator in Ruddr, navigate to the Integrations area of workspace settings (Figure 16).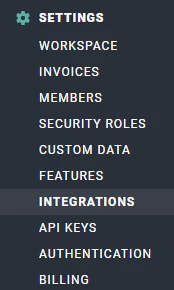
Step 2: Configure Integration
Once connected, you will be taken to the Salesforce integration settings page in Ruddr. Here, you will configure various Sync Settings to control the data that is synced from Salesforce to Ruddr. Click the Change Settings button in the Sync Settings block (Figure 19) of the settings page.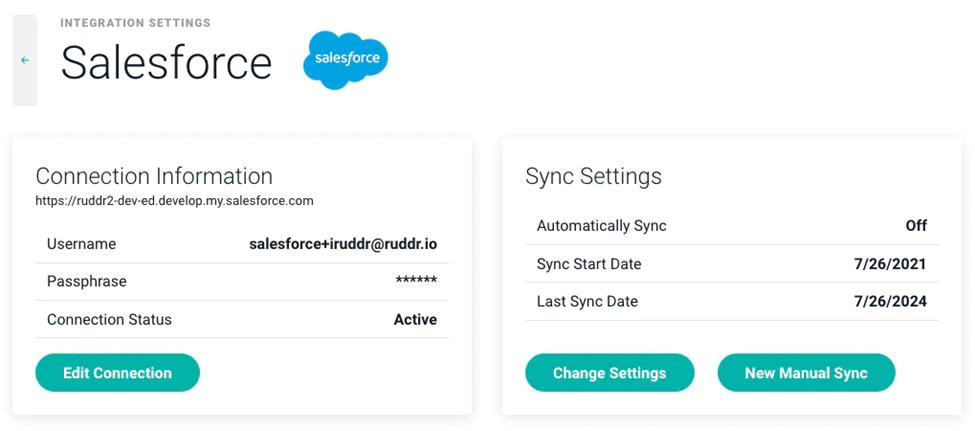
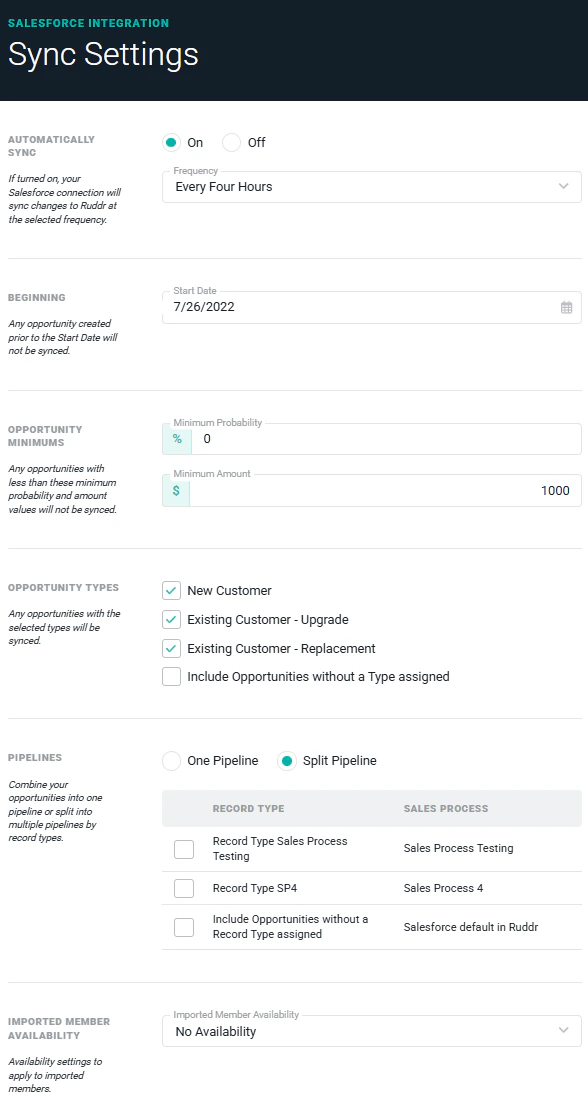
- Automatically Sync: Set whether or not the Salesforce integration will automatically sync data from Salesforce to Ruddr on an interval. You can also set the Frequency of the sync with one of the following values.
- Every Hour
- Every Two Hours
- Every Three Hours
- Every Four Hours
- Every Eight Hours
- Every Twelve Hours
- Daily
- Start Date: Specify the earliest Start Date from which you want to sync opportunities. Any opportunity created prior to the Start Date will not be synced.
- Opportunity Minimums: Any opportunities with a Probability less than the Minimum Probability or with an opportunity amount less than the Minimum Amount will not be synced.
- Opportunity Types: Any opportunities with the selected opportunity types will be synced. These opportunity types are based on the types in your Salesforce instance.
- Pipelines: Ruddr supports multiple pipelines and you can choose whether or not you want all Salesforce opportunities to be associated with a single, default pipeline (“One Pipeline”) in Ruddr or if you would like to split Salesforce Sales Processes into separate Ruddr pipelines (“Split Pipeline”). Any time you select an additional pipeline in the settings, you will want to follow this guidance.
- Imported Member Availability: Ruddr will create inactive members in Ruddr as needed to support various fields on pipeline entities, including Contact Owner, Company Owner, and Opportunity Owner. Specify whether you want these inactive members to be created with the workspace default capacity or without a capacity (“No Availability”).
Multiple Salesforce Pipelines
If, at any time, you opt to either sync opportunities with multiple pipelines (selecting “Split Pipeline” in the Pipelines section of the integration settings) or include an additional Salesforce sales process for synchronization, you will need to select that sales process (Figure 21) from the settings drawer (Figure 20) within the Salesforce integrations area in Ruddr and save the settings. Then, you will need to immediately run a manual, full synchronization to ensure that the additional pipeline’s settings, custom data, and sales data are synched for the first time.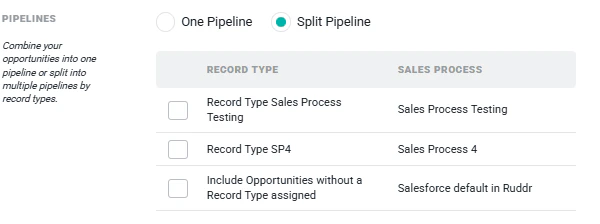
Step 3: Manually Run a Full Salesforce Synchronization
Once you have specified the various sync settings, click the New Manual Sync button found on the Sync Settings block (Figure 19) of the integrations settings page. This will prompt you (Figure 22) to select whether or not you wish to run a Full synchronization, which will fetch all company, contact, opportunity, and activity data going back to the Start Date that you specified in Sync Settings in Step 2. Once the initial, full synchronization has been run, you will be able to leave the Full synchronization setting unchecked, which will result in an incremental sync that will only bring over any updates since the most recent, successful sync was completed.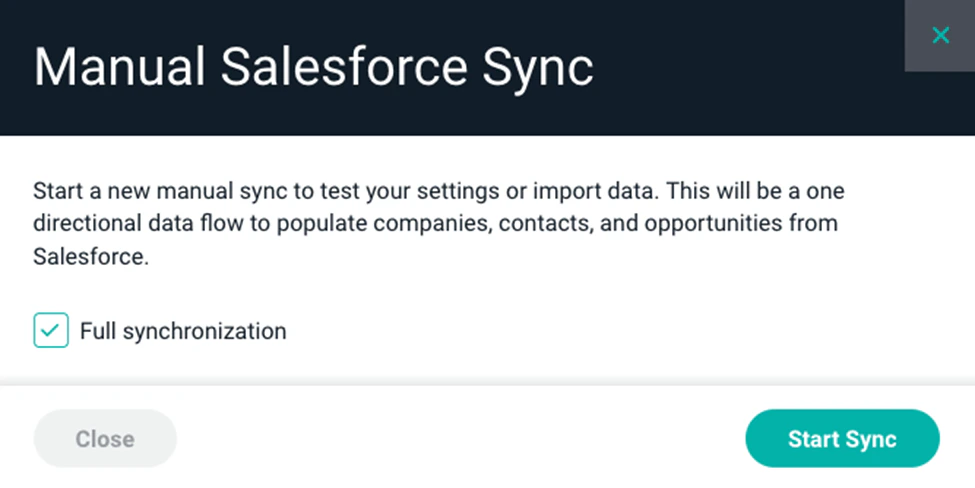
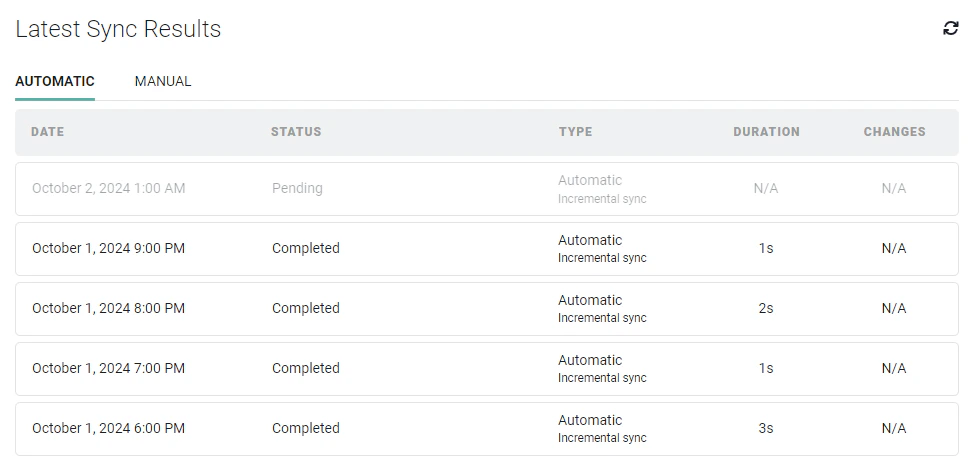
Step 4: Review the Sync Results Log
For both Automatic and Manual syncs, Ruddr will provide a log of the synchronization results, which can be accessed from the Latest Sync Results section (Figure 23) on the Salesforce integration settings page.