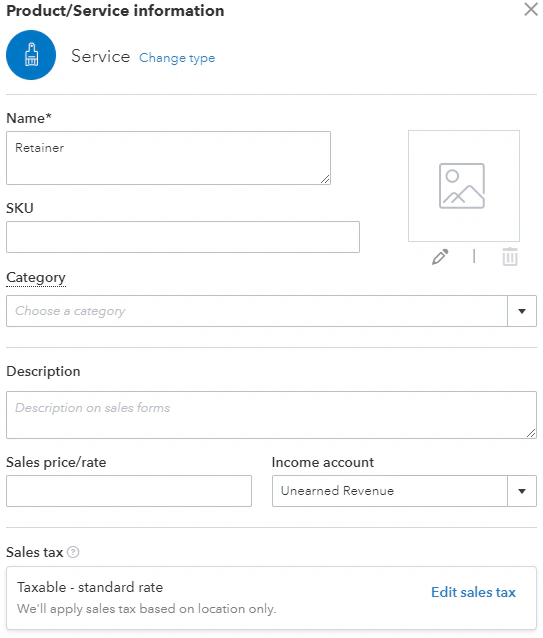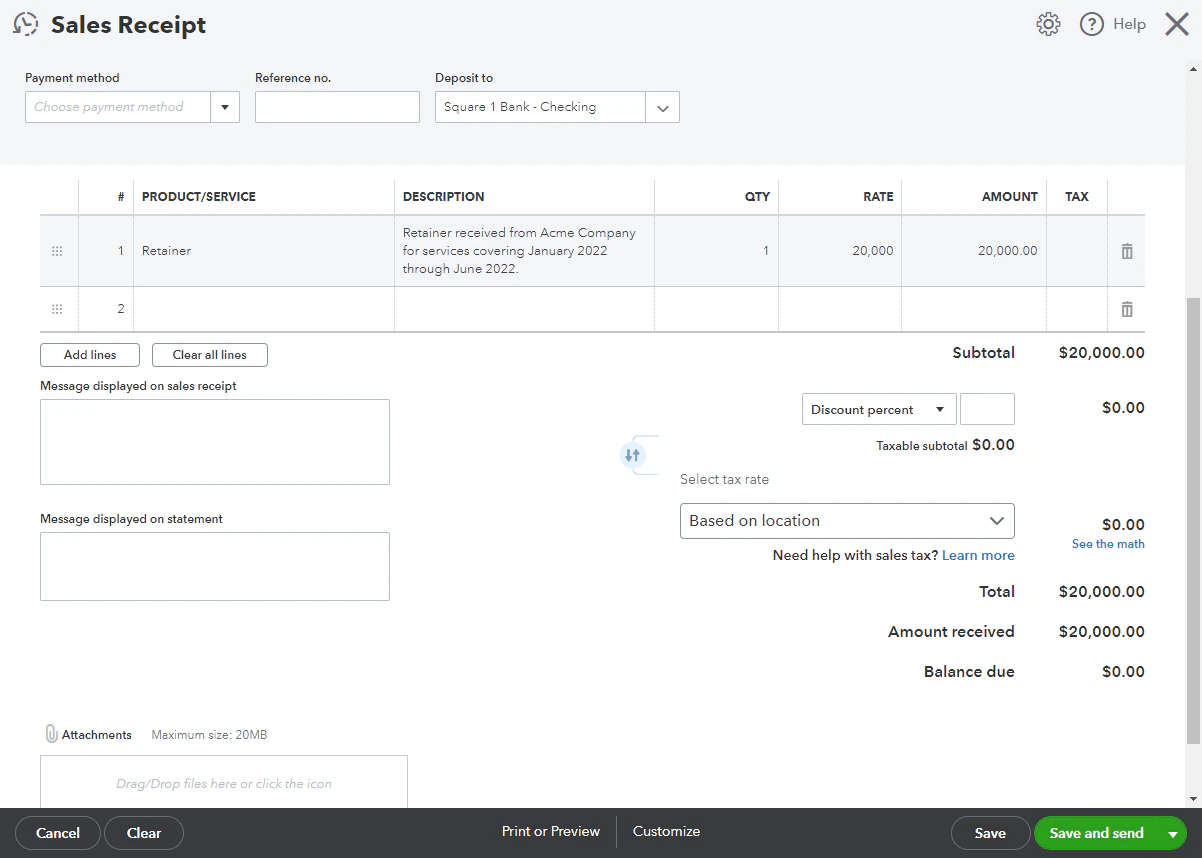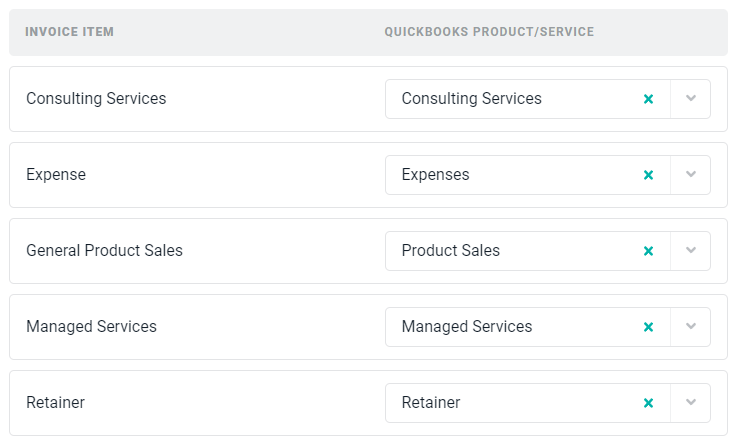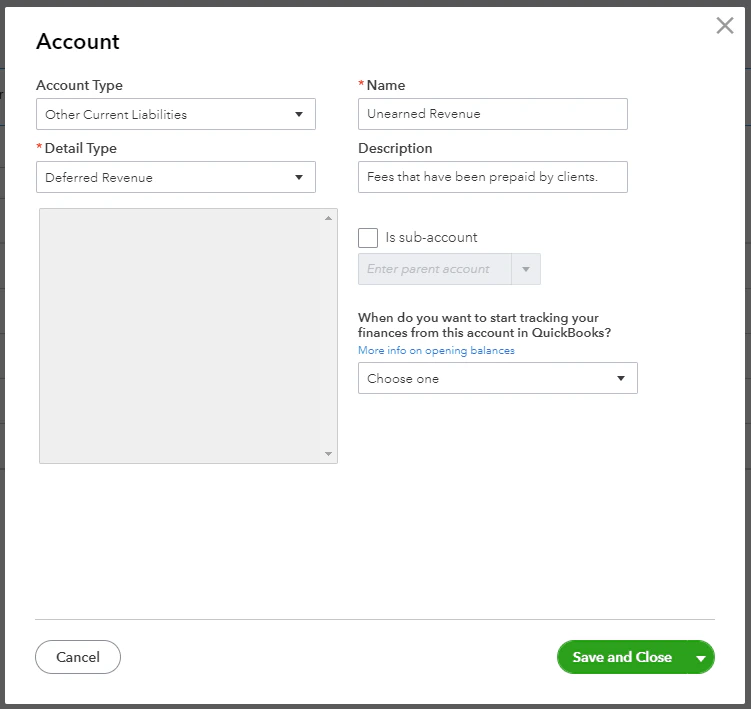
Step 2: Create a Product/Service Item called “Retainer”** Within QuickBooks, click on the Settings wheel and then select the Product and services menu option. Click the New button and choose Service as the type. Next, type in “Retainer” as the Name and in the Income account dropdown, select the Unearned Revenue account that you created in step one above. Step 3: Create a Sales Receipt to Record the Retainer Payment Within QuickBooks, click +New button and choose the Sales receipt option. For the Product/Service column on the sales receipt, select the Retainer item that you created in the previous set. Then, provide your description and type in the amount of the prepayment in the Rate column. Once this information is entered, just click the Save and close button. Step 4: Add a “Retainer” Invoice Item in Ruddr Within Ruddr, go to the Custom Data area within Workspace Settings. Select the Invoice Items custom data option and then click the + Add Invoice Item button at the bottom of the list. Add an invoice item named “Retainer” and set its type to Income. Step 5: Update the QuickBooks Integration in Ruddr to Map the new Retainer Invoice Item Within the Integrations area of Ruddr, click on the Settings of the QuickBooks integration. Then click the pencil icon on the Invoice Items row to edit the invoice item mappings. The new Retainer invoice item should be mapped to the QuickBooks Product/Service item called Retainer that you created in step two above.
Step 6: Create your Invoice in Ruddr and Publish it to QuickBooks
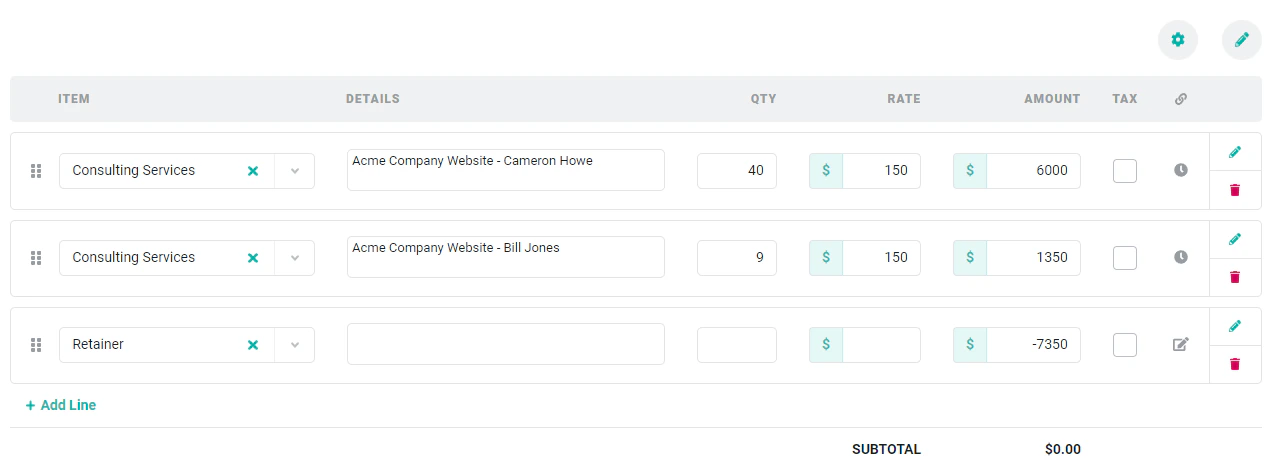
Once you have a Ruddr project set up with the appropriate billing type, you are ready to create an invoice in Ruddr and publish that invoice to QuickBooks. We won’t cover invoice creation in this article but you can see a separate help article on that topic.When your invoice is created, you need to add an ad-hoc line to the bottom of the invoice that uses the Retainer invoice item and offsets the entire amount of the invoice (assuming that you want to pay for the entire invoice from the retainer). This will result in a zero dollar invoice as shown below. Just click on the Publish button to push this invoice to QuickBooks. Step 7: Review the Income Statement and Balance Sheet in QuickBooks Now that the invoice is created, you can verify that the $7,350 (from our example above) shows as revenue on the Income Statement. Also, you can verify that the Unearned Revenue liability account is reduced by $7,350 and is now down to $12,650. You have successfully created a retainer and can pay invoice amounts using the retainer.