Integrating QuickBooks Online (or "QBO") with Ruddr provides numerous benefits as outlined in the QuickBooks Online Integration Overview article. To install the QuickBooks integration, simply follow the steps below. Note that you must be a Ruddr Workspace Admin to install integrations.
⚠️ An Important Note on Multicurrency Capabilities with QuickBooks
While Ruddr supports multicurrency at the project level (you can assign a currency to each project within a client), QuickBooks only supports a single currency per customer. Given this, you will need to create a separate client in Ruddr for each currency that you will use for that client.
For more on supporting currencies across projects and clients in Ruddr, please refer to the Multicurrency section of the Ruddr Help Center.
Step 1: Prepare your Data
Before you install the QuickBooks integration, you should prepare your data in QuickBooks and Ruddr, as follows:
- Client names - Your client names in Ruddr should use the exact same spelling as your customer names in QuickBooks. If the spelling is identical, the QuickBooks integration will automatically map Ruddr clients to QuickBooks customers during the integration setup process. If the spelling is not identical, you will need to manually map Ruddr clients to QuickBooks customers within the integration settings.
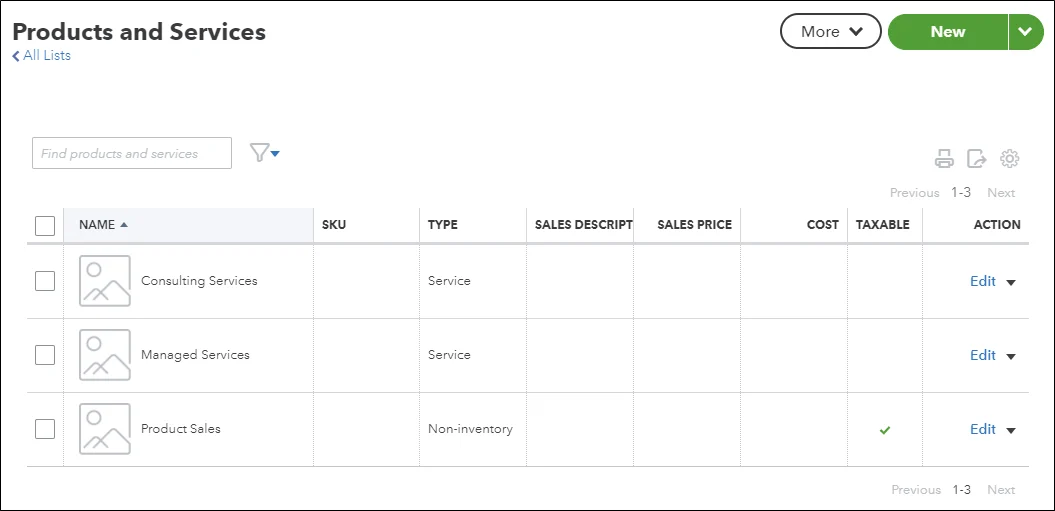
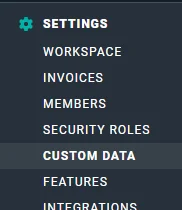
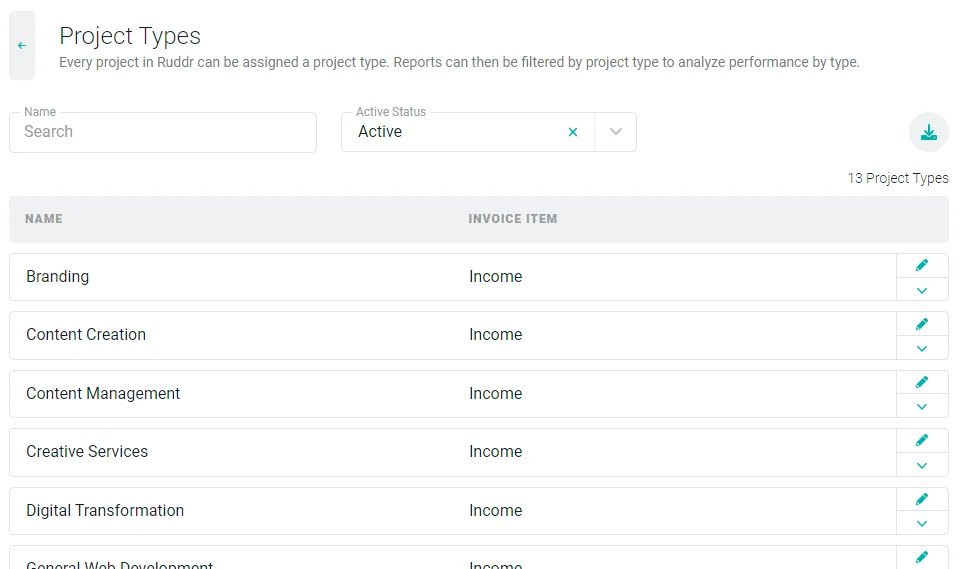
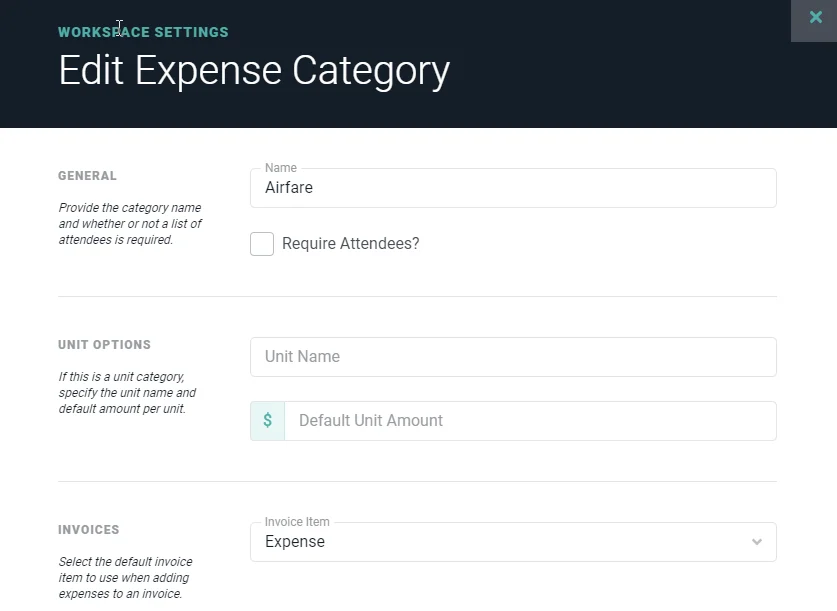
- Invoice items - Your Invoice Items in Ruddr should use the exact same spelling as your Product/Service types in QuickBooks. You can manage your Invoice Items in Ruddr by clicking on Settings in the main nav bar, selecting Custom Data in the sub-navigation, and choosing Invoice Items from the available items in Custom Data.
- Tax rates - Your Tax Rates in Ruddr should use the exact same spelling as your custom Tax Codes in QuickBooks. If you do not charge sales tax or do not use custom tax rates, then you do not need to configure this area. You can manage your Tax Rates in Ruddr by clicking on Settings in the main nav bar, selecting Custom Data in the sub-navigation, and choosing Tax Rates from the available items in Custom Data.
Step 2: Find the QuickBooks Integration
To get to the integrations area of Ruddr, simply click on the Settings main nav bar option and then select the Integrations tab (see Integrations for more information). The Integrations tab is separated into two sections which are Active Integrations and Available Integrations. If you haven't previously set up the QuickBooks integration, it will be listed in the Available Integrations section. Simply click on the Install button at the bottom of the integration widget (Figure 1).
Figure 1 - Click Install to Begin the QuickBooks Integration Process in Ruddr
Step 3: Connect the Integration
Once you click on the Install button, if you are already logged in to QuickBooks you will be taken to an authorization screen (Figure 2). If you aren't logged in to QuickBooks, you will be asked to login first. The authorization screen explains the type of information and actions that will be made available to Ruddr through the integration.
Figure 2 - Authorize QuickBooks and Ruddr Connection / Integration
Click on the Connect button to provide Ruddr the needed access.
Step 4: Map Clients, Invoice Items, and Tax Rates
Once you connect the integration to QuickBooks, Ruddr will automatically attempt to map the data entities shown below (Table 1).
| Ruddr Entity | QuickBooks Entity |
| Clients | Customers |
| Invoice Items | Product/Service |
| Tax Rate | Tax Code |
Table 1 - Entity Mapping between Ruddr and QuickBooks
In order for these items to automatically map, they must have the exact same name in both platforms. If they do not have the same name when the integration is setup, you can manually map the items, as detailed below.
If Ruddr is unable to automatically map some Clients, Invoice Items, or Tax Rates, this will be apparent in the Details column of the integration settings. In the example below (Figure 3), Ruddr has automatically mapped three of the five Invoice Items, which means two of the Invoice Items will need to be manually mapped.
Note that each Ruddr client can only be mapped to one QuickBooks customer. This is because payments that are created in Ruddr can only be applied to one Ruddr client.
Figure 3 - View the Status of Your Entity Mappings between Ruddr and QuickBooks
To manually map the remaining two Invoice Items (in the example above) to a QuickBooks Product/Service, simply click the Edit button on the Invoice Items row. This will open up the Invoice Item Mappings drawer (Figure 4) which will show the items that have been automatically mapped and those that need manual mapping.
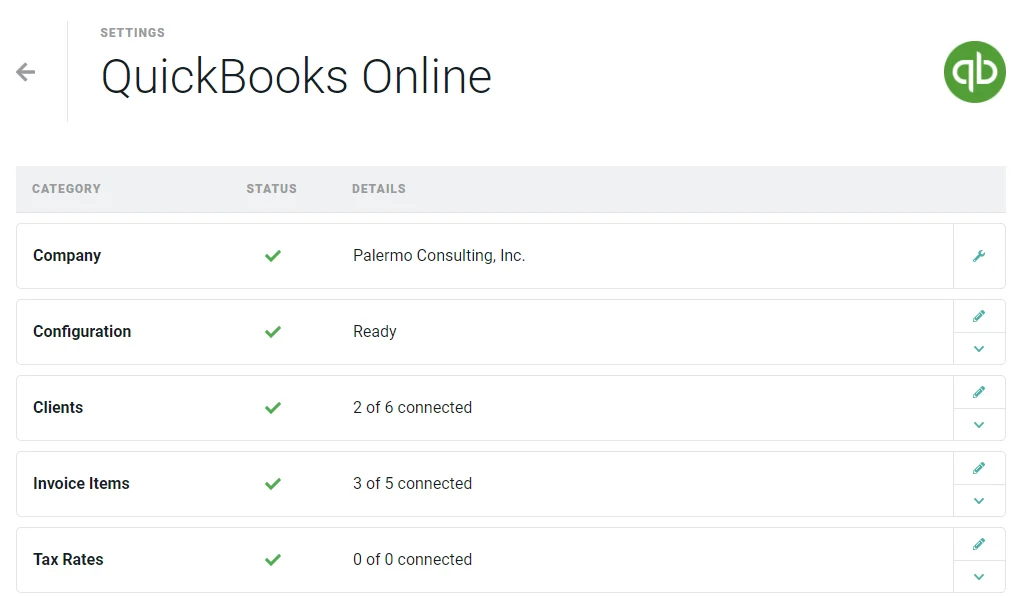
Figure 4 - Manage the Ruddr / QuickBooks Mappings for a Specific Entity
You can manually map Clients and Tax Rates in a similar manner.
Step 5: Set the Configuration Defaults
Next, you need to set several integration defaults. To do this, choose the Edit option on the Configuration row of the integration settings. This will bring up the Configuration drawer as shown below (Figure 5).
Figure 5 - Integration Configuration
For the QuickBooks integration to function properly, these configuration settings need to be set correctly. The settings are described below.
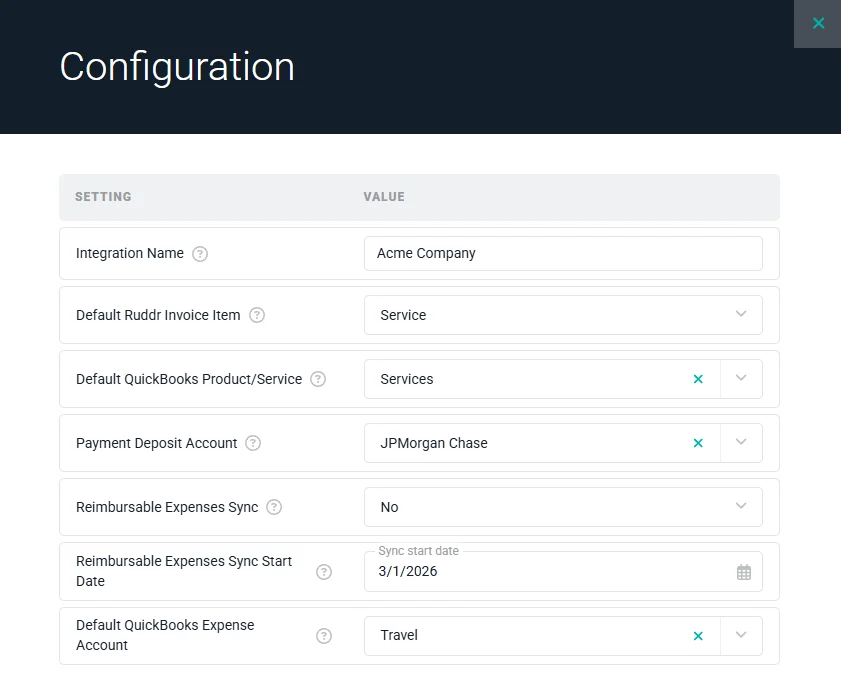
Integration Name - This is the name of the integration instance. If your company uses just one instance of QuickBooks, this can be set to your company name. If your company has multiple instances of QuickBooks, such as one per legal entity, this should refer to the specific legal entity associated with that QuickBooks instance.
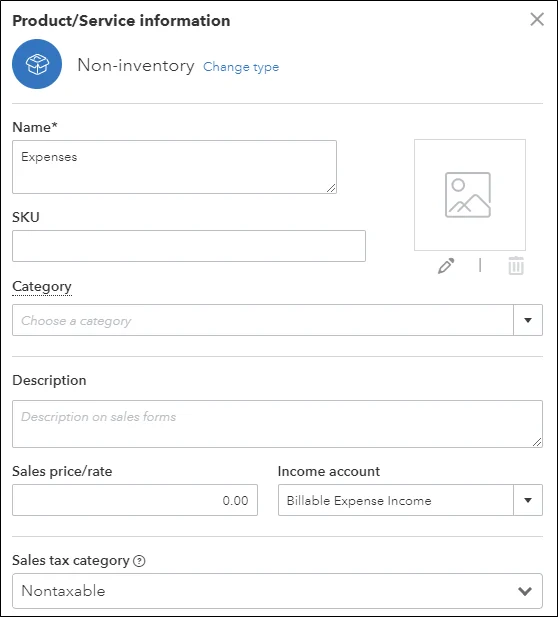
Default Ruddr Invoice Item - When an invoice has been published to QuickBooks from Ruddr, it is possible that the invoice could later get updated in QuickBooks. If the Product/Service is changed in QuickBooks and the new Product/Service is not mapped to an Invoice Item in Ruddr, the default Invoice Item will be used in Ruddr for that invoice line item.
Default QuickBooks Product/Service - Similar to the situation above, if an Invoice Item in Ruddr is not mapped to a Product/Service in QuickBooks, Ruddr will use this default QuickBooks Product/Service for that invoice line item when creating the invoice in QuickBooks.
Payment Deposit Account - When a payment is applied to an invoice within Ruddr, that payment will be synchronized to QuickBooks. When Ruddr creates the payment in QuickBooks, it will use the specified deposit account when saving the payment.
Reimbursable Expenses Sync - If this is set to Yes, Ruddr will create Vendor Bills in QuickBooks for approved reimbursable expenses for members in Ruddr. Once per hour, Ruddr will check for new approved reimbursable expenses. If a member has one or more approved reimbursable expenses, those will be added to a single vendor bill in QuickBooks for that member. If the member does not exist as a vendor in QuickBooks, Ruddr will automatically create the vendor and map it to the Ruddr member.
Reimbursable Expenses Sync Start Date - If the reimbursable expenses sync option is enabled, Ruddr will only evaluate expenses that occur on or after this sync start date.
Default QuickBooks Expense Account - When saving a reimbursable expense item to a vendor bill, Ruddr will use this QuickBooks expense account if the expense category for the item is not mapped to an expense account.
Step 6: Create a Product/Service in QuickBooks for Expenses
All items that Ruddr publishes to a QuickBooks invoice must have an Invoice Item in Ruddr that maps to a Product/Service in QuickBooks. Since you will likely be charging clients for expenses in addition to services, you will need to create a Product/Service in QuickBooks for those expenses.
To bring up the Product/Service screen (Figure 6) in QuickBooks, click on the Settings wheel at the top-right and choose the Products and Services option under Lists. This will bring up a screen that will show your current Products and Services (Figure 6). It is likely that this screen will include product and services items but not expense items.
Figure 6 - Products and Services in QuickBooks
To add a Product/Service for expenses, click the New button and choose the Non-Inventory option. This will show a drawer (Figure 7) that will allow you to name the Product/Service and select the associated income account from the QuickBooks chart of accounts. It is recommended to name this new Product/Service "Expenses" and select the Billable Expense Income option from the income account drop-down.
Figure 7 - Create a Product/Service for Expenses in QuickBooks
If the Billable Expenses Income account does not exist, simply create the account within the chart of accounts. Select Income as the Account Type and Other Primary Income as the Detail Type.
Step 8: Set the Invoice Item for each Project Type
Ruddr allows you to set an Invoice Item for each Project Type within your workspace. This allows you to group different types of revenue on your income statement in QuickBooks. For example, if your company has consulting revenue and managed services revenue, you can associate each project type in Ruddr to one of those two Invoice Items. Then, each Invoice Item can be mapped to a corresponding Product/Service in QuickBooks which will have an associated income account from the QuickBooks chart of accounts.
To set the Invoice Item for each Project Type, click on the Settings main nav bar option and select the Custom Data menu option (Figure 8). Select Project Types from the list of custom data in Ruddr (for more information, view the Custom Data help article). The current Invoice Item for each project type will be shown in the list (Figure 9). You can change the invoice item by clicking the Edit button on the given row.
Figure 8 - Custom Data in the Settings Area
Figure 9 - Managing Project Types and Associating to Invoice Items
Note that it is common to have multiple Project Types mapped to the same Invoice Item. If you only have one type of revenue (such as "Consulting"), you may choose to map all Project Types to that single Invoice Item.
Step 9: Set the Invoice Item for each Expense Category
You can also map an Invoice Item to each Expense Category. By default, each Expense Category is mapped to the built-in "Expenses" Invoice Item in Ruddr. This is likely sufficient, but if you need to break out billable expenses into separate income accounts on your income statement, you can map your Expense Categories in Ruddr to specific Invoice Items.
To map an Expense Category to an Invoice Item, click on the Settings main nav bar option and select the Custom Data menu option (Figure 8). From this screen, select Expense Categories from the list of custom data in Ruddr. This will bring up the list of expense categories within the workspace. To edit the Invoice Item associated with a given Expense Category, simply click the edit button on the category and set the Invoice Item drop-down (Figure 10).
Figure 10 - Associate an Invoice Item with a Ruddr Expense Category
Step 10: Map Projects
The Projects feature in QuickBooks is exclusively supported in the QuickBooks Online Plus, QuickBooks Online Advanced, and QuickBooks Online Accountant. Projects are not supported in lower versions such as QuickBooks Online Simple Start, QuickBooks Online Essentials or QuickBooks Self-Employed.
QuickBooks Projects lets you track revenue, costs, and profit for each project or client. This allows you to see income and expenses per project and calculate profit margin per project. Note that Ruddr provides this same functionality with more granular accuracy as each hour of labor cost is associated with the project in Ruddr. Thus, even if your version of QuickBooks supports Projects, you may prefer to use Ruddr for your project-based performance reporting and analysis.
If you intend to use QuickBooks Projects, you must manually map projects in Ruddr to projects in QuickBooks. This can be done by clicking the Edit button on the Projects row within the QuickBooks integration in Ruddr.
Step 11: Map Members
If you have enabled the Reimbursable Expenses Sync option within the Configuration area of the QuickBooks integration, you should map Ruddr members to QuickBooks vendors. This is done by clicking the Edit button on the Members row within the QuickBooks integration in Ruddr.
The first time Ruddr attempts to create a vendor bill for a member, if the member isn't mapped to an existing QuickBooks vendor, Ruddr will create a new vendor in QuickBooks. The new vendor name will be set to the member's name. After you initially map members to vendors when configuring the QuickBooks integration, you will not need to manually map members in the future.
Step 12: Map Expense Categories
Each line item in a QuickBooks vendor bill must have an associated expense account. Ruddr allows you to easily map Expense Categories in Ruddr to expense accounts in QuickBooks. This is done by clicking the Edit button on the Expense Categories row within the QuickBooks integration in Ruddr.
Need Some Help?
Properly configuring the QuickBooks integration can seem a bit daunting, but it is vital in order to have accurate financial statements. If you are having difficulty with any of the steps above, just reach out to us at help@ruddr.io and we'll help you get set up (at no cost).