> ## Documentation Index
> Fetch the complete documentation index at: https://help.ruddr.io/llms.txt
> Use this file to discover all available pages before exploring further.
# Project List
To view all of the projects in your workspace, click on **Portfolio** in the nav bar (Figure 1), or select the sub-menu item **Projects**.
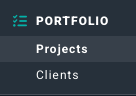 Figure 1 - Select **Portfolio** to View the Project List
This will bring up the project list screen (Figure 2). Depending on the [security role](/workspace-administration/security-roles) assigned to your member profile, you may see only projects where you are on the project team or only those projects that are assigned to your practice.
If you have the **Create project** permission, you will see an enabled **New Project** button (**+**) at the top-right of the screen. For more on creating projects in Ruddr, see the [Create a New Project](/projects/create-a-new-project) article.
The list of projects can be downloaded by clicking the download button to the left of the **New Project** (**+**) button at the top-right of the list.
Figure 1 - Select **Portfolio** to View the Project List
This will bring up the project list screen (Figure 2). Depending on the [security role](/workspace-administration/security-roles) assigned to your member profile, you may see only projects where you are on the project team or only those projects that are assigned to your practice.
If you have the **Create project** permission, you will see an enabled **New Project** button (**+**) at the top-right of the screen. For more on creating projects in Ruddr, see the [Create a New Project](/projects/create-a-new-project) article.
The list of projects can be downloaded by clicking the download button to the left of the **New Project** (**+**) button at the top-right of the list.
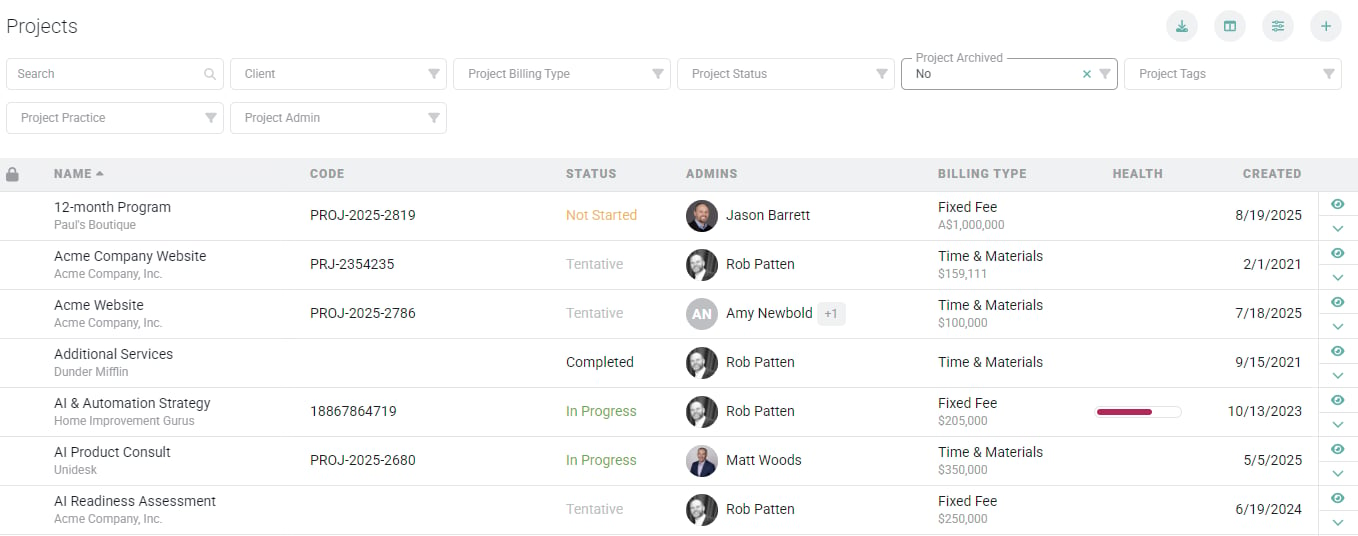 Figure 2 - Project List
From the project list screen, you have the following filters at the top of the list to help you narrow down the results:
* **Project Name, Client Name or PO#** - Type in a partial or full project or client name, or a PO Number.
* **Client** - Select a specific client to see just that client's projects.
* **Project Billing Type** - Select the billing type of the project, such as:
* Time & Materials
* Fixed Fee
* Fixed Monthly
* Non-Billable
* **Project Status** - Select the status of the project, such as:
* Not Started
* In Progress
* Paused
* Completed
* **Project Archived** - Select active projects or archived projects.
* **Project Tags** - Any custom project tags that you are using to categorize projects. Your workspace administrator can create a library of project tags.
* **Project Practice** - The practice that is assigned as the owner of the project. Practices are optional in Ruddr.
* **Project Admin** - Specify a Project Admin to list that the projects for which that member is the Project Admin.
When a project has had its **Lock time and expenses** setting applied, a lock indicator (Figure 3) will appear next to the project name in the list. For more on this setting, please refer to the Create a New Project article in the Ruddr Help Center.
Figure 2 - Project List
From the project list screen, you have the following filters at the top of the list to help you narrow down the results:
* **Project Name, Client Name or PO#** - Type in a partial or full project or client name, or a PO Number.
* **Client** - Select a specific client to see just that client's projects.
* **Project Billing Type** - Select the billing type of the project, such as:
* Time & Materials
* Fixed Fee
* Fixed Monthly
* Non-Billable
* **Project Status** - Select the status of the project, such as:
* Not Started
* In Progress
* Paused
* Completed
* **Project Archived** - Select active projects or archived projects.
* **Project Tags** - Any custom project tags that you are using to categorize projects. Your workspace administrator can create a library of project tags.
* **Project Practice** - The practice that is assigned as the owner of the project. Practices are optional in Ruddr.
* **Project Admin** - Specify a Project Admin to list that the projects for which that member is the Project Admin.
When a project has had its **Lock time and expenses** setting applied, a lock indicator (Figure 3) will appear next to the project name in the list. For more on this setting, please refer to the Create a New Project article in the Ruddr Help Center.
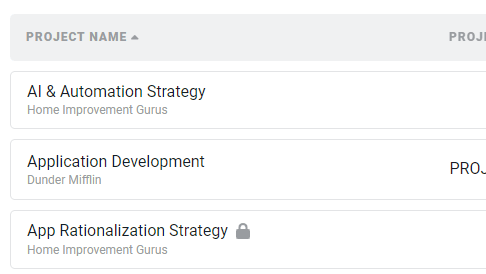 Figure 3 - A Lock Indicator will Appear if the Project has been Locked
For workspaces that have the Project Health Reporting feature enabled, an overall project health score (Figure 4) will be visible to those with **Edit project** permissions on their [security role](/workspace-administration/security-roles).
Figure 3 - A Lock Indicator will Appear if the Project has been Locked
For workspaces that have the Project Health Reporting feature enabled, an overall project health score (Figure 4) will be visible to those with **Edit project** permissions on their [security role](/workspace-administration/security-roles).
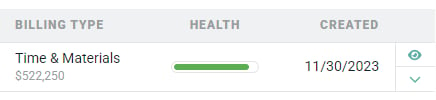 Figure 4 - Project Health Report Ratings
The health score shown on the project list is based on the ratings from the project's latest health report:
* Budget
* Schedule
* Client Satisfaction
* Team Satisfaction
The individual, color-coded ratings can be viewed on the [project dashboard](/projects/project-dashboard) and indicate the "health level" of each metric:
* **Green** - indicates an assigned value of **Excellent**
* **Yellow** - indicates an assigned value of **Fair**
* **Red** - indicates an assigned value of **Poor**
To view the [project dashboard](/projects/project-dashboard) for a particular project, simply click on the project name in the list. The project dashboard provides a comprehensive view of the project and its performance.
At the right end of each project row (Figure 5), you are provided with a menu of actions. These actions are **View**, [**Edit**](#edit-a-project), [**View Time Detail**](#view-time-detail)**,** [**Clone**](#clone-a-project), [**Archive**](#archive-a-project), [**Track Time**](#track-time-to-a-project), and [**Delete**](#delete-a-project). Depending on your permissions, some of these options may be disabled.
Figure 4 - Project Health Report Ratings
The health score shown on the project list is based on the ratings from the project's latest health report:
* Budget
* Schedule
* Client Satisfaction
* Team Satisfaction
The individual, color-coded ratings can be viewed on the [project dashboard](/projects/project-dashboard) and indicate the "health level" of each metric:
* **Green** - indicates an assigned value of **Excellent**
* **Yellow** - indicates an assigned value of **Fair**
* **Red** - indicates an assigned value of **Poor**
To view the [project dashboard](/projects/project-dashboard) for a particular project, simply click on the project name in the list. The project dashboard provides a comprehensive view of the project and its performance.
At the right end of each project row (Figure 5), you are provided with a menu of actions. These actions are **View**, [**Edit**](#edit-a-project), [**View Time Detail**](#view-time-detail)**,** [**Clone**](#clone-a-project), [**Archive**](#archive-a-project), [**Track Time**](#track-time-to-a-project), and [**Delete**](#delete-a-project). Depending on your permissions, some of these options may be disabled.
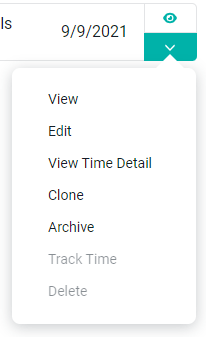 Figure 5- Project List Action Menu
### Edit a Project
To edit a project, you must have **Edit project** permissions. Simply click on the **Edit** menu option (Figure 5) on the row that you want to edit. This will open up the same project drawer that was used to [create the project](/projects/create-a-new-project). Alternatively, you can click on the edit button at the top-right of the project dashboard.
### View Time Detail
From the Projects list, you can navigate directly to the Time Detail report, which will automatically have the Project filter applied for the project for which you wish to view time details. Click on the **View Time Detail** menu option (Figure 5) to access the report.
### Clone a Project
Cloning a project allows you to create an entirely new project based on a similar, existing project. This can save a lot of time in project setup. To clone a project, you must have the **Create project** permission. Simply click on the **Clone** menu option (Figure 5) on the row that you want to clone. This will bring up a window (Figure 6) that will allow you to give the new project a name and select the items that you would like to copy into the new project.
Figure 5- Project List Action Menu
### Edit a Project
To edit a project, you must have **Edit project** permissions. Simply click on the **Edit** menu option (Figure 5) on the row that you want to edit. This will open up the same project drawer that was used to [create the project](/projects/create-a-new-project). Alternatively, you can click on the edit button at the top-right of the project dashboard.
### View Time Detail
From the Projects list, you can navigate directly to the Time Detail report, which will automatically have the Project filter applied for the project for which you wish to view time details. Click on the **View Time Detail** menu option (Figure 5) to access the report.
### Clone a Project
Cloning a project allows you to create an entirely new project based on a similar, existing project. This can save a lot of time in project setup. To clone a project, you must have the **Create project** permission. Simply click on the **Clone** menu option (Figure 5) on the row that you want to clone. This will bring up a window (Figure 6) that will allow you to give the new project a name and select the items that you would like to copy into the new project.
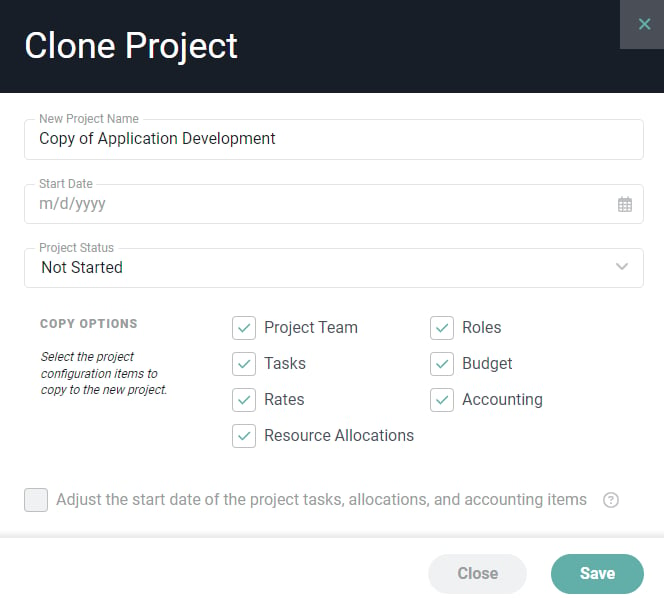 Figure 6 - Specify the New Project's Name and Select the Entities you Wish to Copy as Part of this Clone
If a cloned project will be for a different client, you can change its client from the **Edit Project** drawer.
When creating a cloned project, you will have the opportunity to provide a Start Date for the project. If you choose to do so, and are cloning project tasks, allocations, or accounting items, you can also choose to "shift" those items out, relative to the new start date you provide on the cloning window.
The member that is creating the new project via cloning will be set as the Project Admin on the new project.
**Tip**: If you have a project setup that will need to be cloned on a regular basis, set up a "template" project that serves as the master template for that project setup. You can then clone from that template whenever you need to create a new project with the same setup.
### Archive a Project
To archive a project, you must have the **Delete or archive project** permission. Simply click on the **Archive** menu option on the row that you want to archive. This will bring up a confirmation window (Figure 7). When you archive a project you will not delete any of the project information and will be able to continue reporting on the project.
Figure 6 - Specify the New Project's Name and Select the Entities you Wish to Copy as Part of this Clone
If a cloned project will be for a different client, you can change its client from the **Edit Project** drawer.
When creating a cloned project, you will have the opportunity to provide a Start Date for the project. If you choose to do so, and are cloning project tasks, allocations, or accounting items, you can also choose to "shift" those items out, relative to the new start date you provide on the cloning window.
The member that is creating the new project via cloning will be set as the Project Admin on the new project.
**Tip**: If you have a project setup that will need to be cloned on a regular basis, set up a "template" project that serves as the master template for that project setup. You can then clone from that template whenever you need to create a new project with the same setup.
### Archive a Project
To archive a project, you must have the **Delete or archive project** permission. Simply click on the **Archive** menu option on the row that you want to archive. This will bring up a confirmation window (Figure 7). When you archive a project you will not delete any of the project information and will be able to continue reporting on the project.
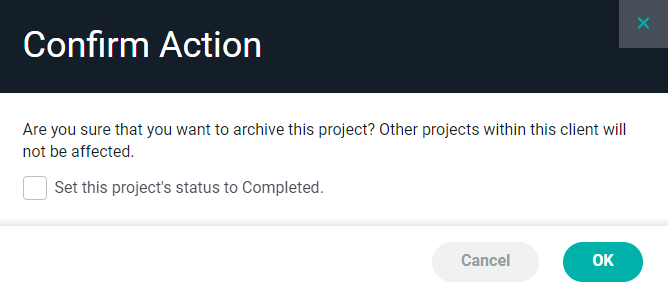 Figure 7 - Confirm your Action to Archive a Project
For more about archiving a project, see the [Archive or Delete a Project](/projects/archive-or-delete-a-project) article.
### Track Time to a Project
For members that are part of the project team, they can opt to Track Time to a project directly from the Project list. To do this, members can simply click on the **Track Time** menu option (Figure 5) on that project's row. This will open up the New Time Entry drawer (Figure 8), with the project pre-selected for time entry.
Figure 7 - Confirm your Action to Archive a Project
For more about archiving a project, see the [Archive or Delete a Project](/projects/archive-or-delete-a-project) article.
### Track Time to a Project
For members that are part of the project team, they can opt to Track Time to a project directly from the Project list. To do this, members can simply click on the **Track Time** menu option (Figure 5) on that project's row. This will open up the New Time Entry drawer (Figure 8), with the project pre-selected for time entry.
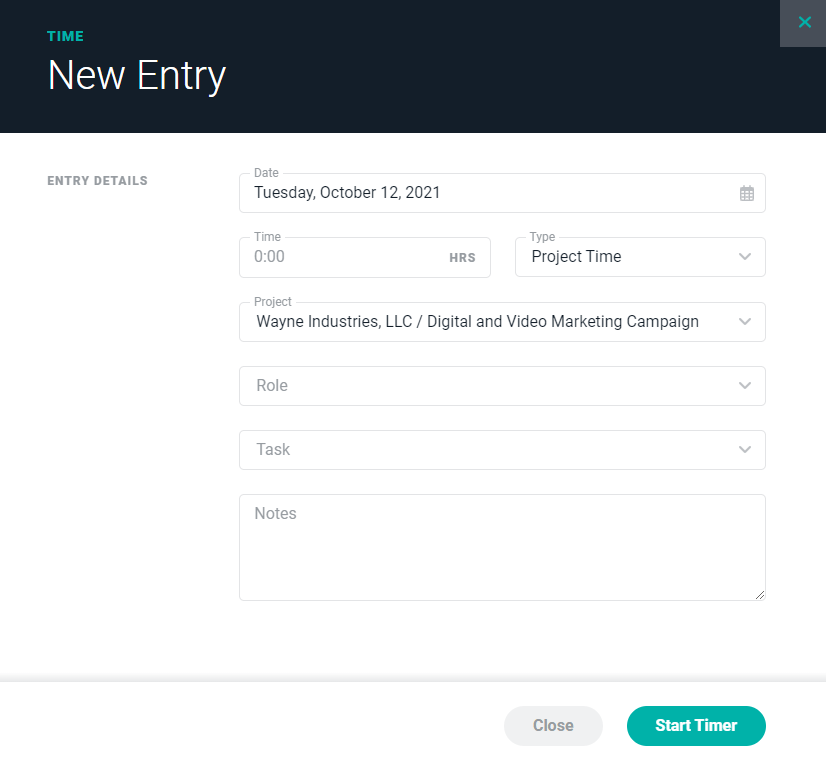 Figure 8 - Time Entry Detail Available from the Project List
### Delete a Project
To delete a project, you must have the **Delete or archive project** permission. Simply click on the **Delete** menu option (Figure 5) on the row that you want to delete. This will bring up a confirmation window (Figure 9).
Figure 8 - Time Entry Detail Available from the Project List
### Delete a Project
To delete a project, you must have the **Delete or archive project** permission. Simply click on the **Delete** menu option (Figure 5) on the row that you want to delete. This will bring up a confirmation window (Figure 9).
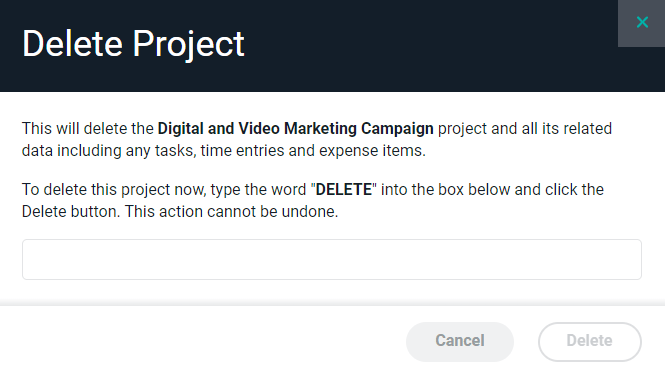 Figure 9 - Confirm your Action to Permanently Delete a Project and all Associated Data in Ruddr
Deleting a project is not recommended if the project has time or expenses associated with it. For a project with time or expenses, you will have to manually confirm the delete action by typing the word "DELETE" into the confirmation window.
**Once you delete a project, you cannot reverse this action, and all associated data (including time entries, expense items, invoices, and payments) will be gone forever!**
Note that if the project has one or more associated invoices, the **Delete** menu option will be disabled. For more about deleting a project, see the [Archive or Delete a Project](/projects/archive-or-delete-a-project) article.
Figure 9 - Confirm your Action to Permanently Delete a Project and all Associated Data in Ruddr
Deleting a project is not recommended if the project has time or expenses associated with it. For a project with time or expenses, you will have to manually confirm the delete action by typing the word "DELETE" into the confirmation window.
**Once you delete a project, you cannot reverse this action, and all associated data (including time entries, expense items, invoices, and payments) will be gone forever!**
Note that if the project has one or more associated invoices, the **Delete** menu option will be disabled. For more about deleting a project, see the [Archive or Delete a Project](/projects/archive-or-delete-a-project) article.