> ## Documentation Index
> Fetch the complete documentation index at: https://help.ruddr.io/llms.txt
> Use this file to discover all available pages before exploring further.
# Managing Multi-Step Approval Workflows
For an introduction to multi-step approval workflows, please view the [Multi-Step Approval Workflow Overview](/workspace-administration/multi-step-approval-workflow-overview) in the Workspace Administration section of Ruddr Help Center.
There are two places in Ruddr where multi-step approval workflows can be managed:
1. **Workspace settings**: here, you can set the default workflow for the entire workspace (Figure 1).
2. **Edit Project drawer**: when editing [project details](/projects/create-a-new-project), you can modify the approval workflow for both time and expenses for that specific project. This is located in the Approval Options section (Figure 2) of the Overview tab of the drawer.
In workspace settings, you will see a **Set Default Workflow** button (Figure 1). Conversely, in the Edit project drawer, you will see a **Edit Workflow** button (Figure 2). Note that for these buttons to be visible, the approval option in either location must be set to Manual.
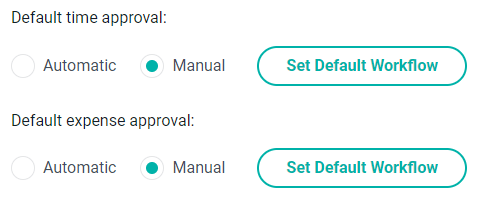 Figure 1 - Set Default Workflow Appears in the Workspace Settings
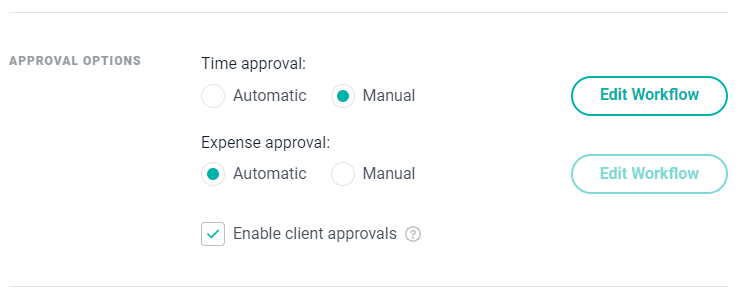 Figure 2 - Editing the Approval Workflows for a Project
Clicking either of these buttons will display an **Edit Workflow** screen (Figure 3) that displays the details of the workflow being edited.
Note that if you are editing the project workflow for the first time, you will be presented with the workspace's default approval workflow for time or expense.
Figure 2 - Editing the Approval Workflows for a Project
Clicking either of these buttons will display an **Edit Workflow** screen (Figure 3) that displays the details of the workflow being edited.
Note that if you are editing the project workflow for the first time, you will be presented with the workspace's default approval workflow for time or expense.
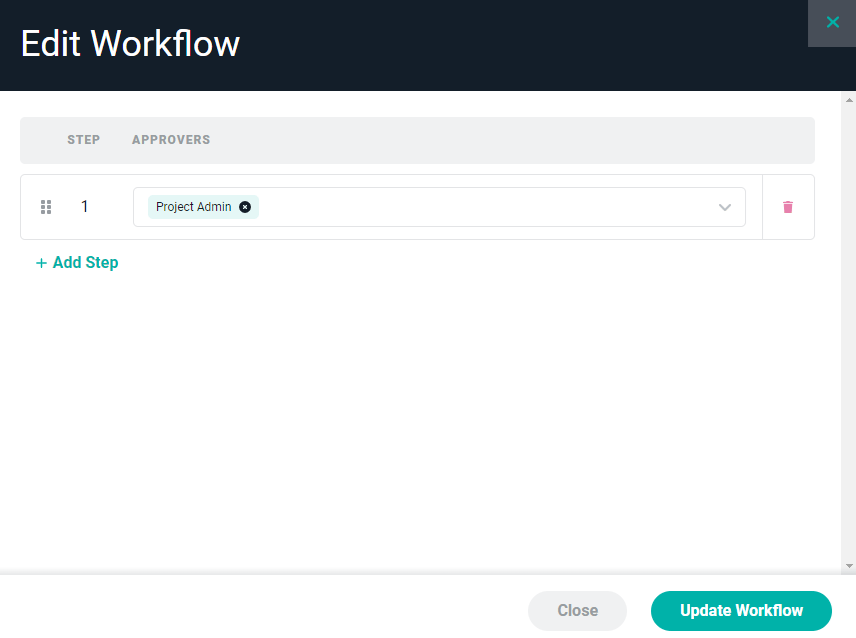 Figure 3 - Approval Workflow to be Edited
Each step in the workflow can be assigned 1 to N number of approvers. And, those approvers can either be specific members or a default role within Ruddr (Figure 4).
**NOTE**: When multiple approvers have been assigned to the same step, the approval of a time or expense item by any *one* of those approvers will advance the workflow to the next step.
Figure 3 - Approval Workflow to be Edited
Each step in the workflow can be assigned 1 to N number of approvers. And, those approvers can either be specific members or a default role within Ruddr (Figure 4).
**NOTE**: When multiple approvers have been assigned to the same step, the approval of a time or expense item by any *one* of those approvers will advance the workflow to the next step.
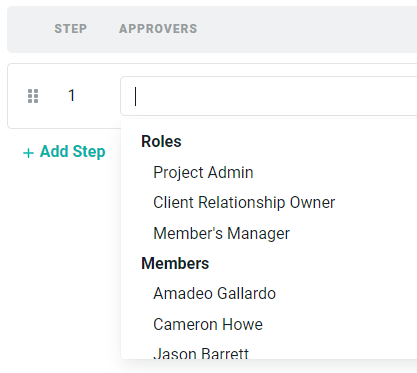 Figure 4 - Select Ruddr Roles or Members as Approvers for any Step Created for the Approval Workflow
To create additional steps, simply click **+ Add Step** (Figure 3) and supply an approver(s) for that step in the workflow. To remove a step from the workflow, click on the trash button on the right of the step's row (Figure 6). If you wish to change the order of execution for the steps, you can click the handle on a specific step (Figure 5) and drag the step to any place before/after any other step in the workflow (Figure 6).
Figure 4 - Select Ruddr Roles or Members as Approvers for any Step Created for the Approval Workflow
To create additional steps, simply click **+ Add Step** (Figure 3) and supply an approver(s) for that step in the workflow. To remove a step from the workflow, click on the trash button on the right of the step's row (Figure 6). If you wish to change the order of execution for the steps, you can click the handle on a specific step (Figure 5) and drag the step to any place before/after any other step in the workflow (Figure 6).
 Figure 5 - Handle for Rearranging Order of Workflow Steps
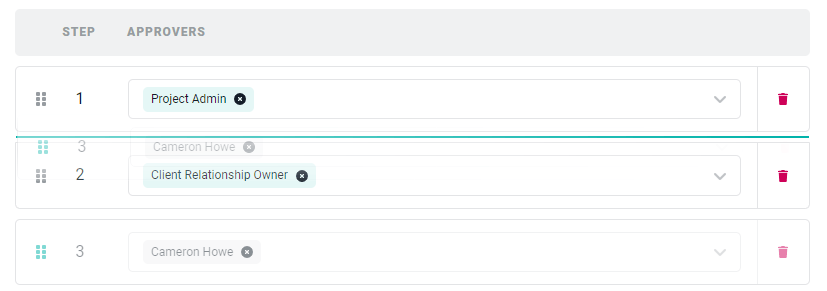 Figure 6 - Moving Step Number 3 up in the Order to Number 2
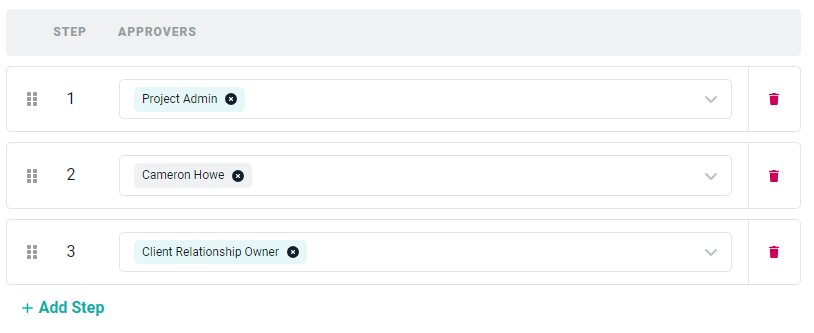 Figure 7 - Our Finalized Workflow
Once the workflow has been setup according to your organizational or project requirements, click the **Update Workflow** button (Figure 3) to save the default workspace approval workflow.
In our example (Figure 7), when a time entry item or expense item is submitted with this workflow in place, the item would first be routed to the Project Admin for approval. Once the Project Admin approved the item, approval would be routed to the member Cameron Howe. Upon approval by that member, the Client Relationship Owner (as defined on the [Client](/clients/create-a-new-client) in Ruddr) would then have the item routed to them as the final step in the approval workflow.
Figure 7 - Our Finalized Workflow
Once the workflow has been setup according to your organizational or project requirements, click the **Update Workflow** button (Figure 3) to save the default workspace approval workflow.
In our example (Figure 7), when a time entry item or expense item is submitted with this workflow in place, the item would first be routed to the Project Admin for approval. Once the Project Admin approved the item, approval would be routed to the member Cameron Howe. Upon approval by that member, the Client Relationship Owner (as defined on the [Client](/clients/create-a-new-client) in Ruddr) would then have the item routed to them as the final step in the approval workflow.