> ## Documentation Index
> Fetch the complete documentation index at: https://help.ruddr.io/llms.txt
> Use this file to discover all available pages before exploring further.
# Client Approvals
Every time and expense item in Ruddr goes through an internal approval process. [Time approval](/time/time-approval) and [expense approval](/expenses/expense-approval) for a given project can be set up for automatic approval or manual approval. This ensures that items are internally approved before they are invoiced to the client.
On some projects, however, there may also be a need for the client to approve time and expenses before those entries can be invoiced. For these situations, Ruddr provides an optional client approval [feature](/workspace-administration/features).
There are two ways to manage client approvals in Ruddr:
* [Single-Batch](#single-batch-client-approval)
* [Scheduled](#scheduled-client-approvals)
With either approach, the client will receive an email with a link to view the approvals. From there, the [client will be able to take action](#what-your-client-will-see) on the time / expense entries that have been submitted to them for approval.
### Single-Batch Client Approval
Single-batch client approvals in Ruddr allow you to submit a batch of time and expenses for a specific project and timeframe to a client for approval. This submission would typically be done on a periodic basis, such as weekly or monthly, prior to invoicing.
As most clients do not require this extra level of approval workflow, the client approval feature is off by default in Ruddr. To turn it on, simply click the pencil icon on the project dashboard to open the **Edit Project** drawer. From the drawer, just check the **Enable client approvals** checkbox within the **Approval Options** section (Figure 1). To edit a project in Ruddr, your [security role](/workspace-administration/security-roles) must give you access to the project and must also have the **Edit project** permission.
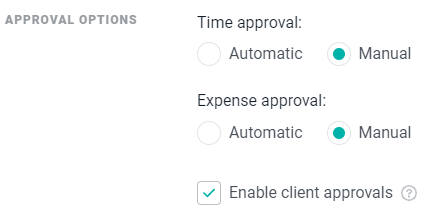 Figure 1 - Approval Options in Project Settings
Checking the **Enable client approvals** checkbox will add a new **Client Approvals** tab to the project dashboard (Figure 2). Note that this tab will only be shown to workspace members who have the **Administer project team time and expenses** permission for the project. The client approvals list that displays on the Client Approvals tab can be filtered by client approval status and by member, such that only client approvals containing time and expense items for a particular member are displayed.
Figure 1 - Approval Options in Project Settings
Checking the **Enable client approvals** checkbox will add a new **Client Approvals** tab to the project dashboard (Figure 2). Note that this tab will only be shown to workspace members who have the **Administer project team time and expenses** permission for the project. The client approvals list that displays on the Client Approvals tab can be filtered by client approval status and by member, such that only client approvals containing time and expense items for a particular member are displayed.
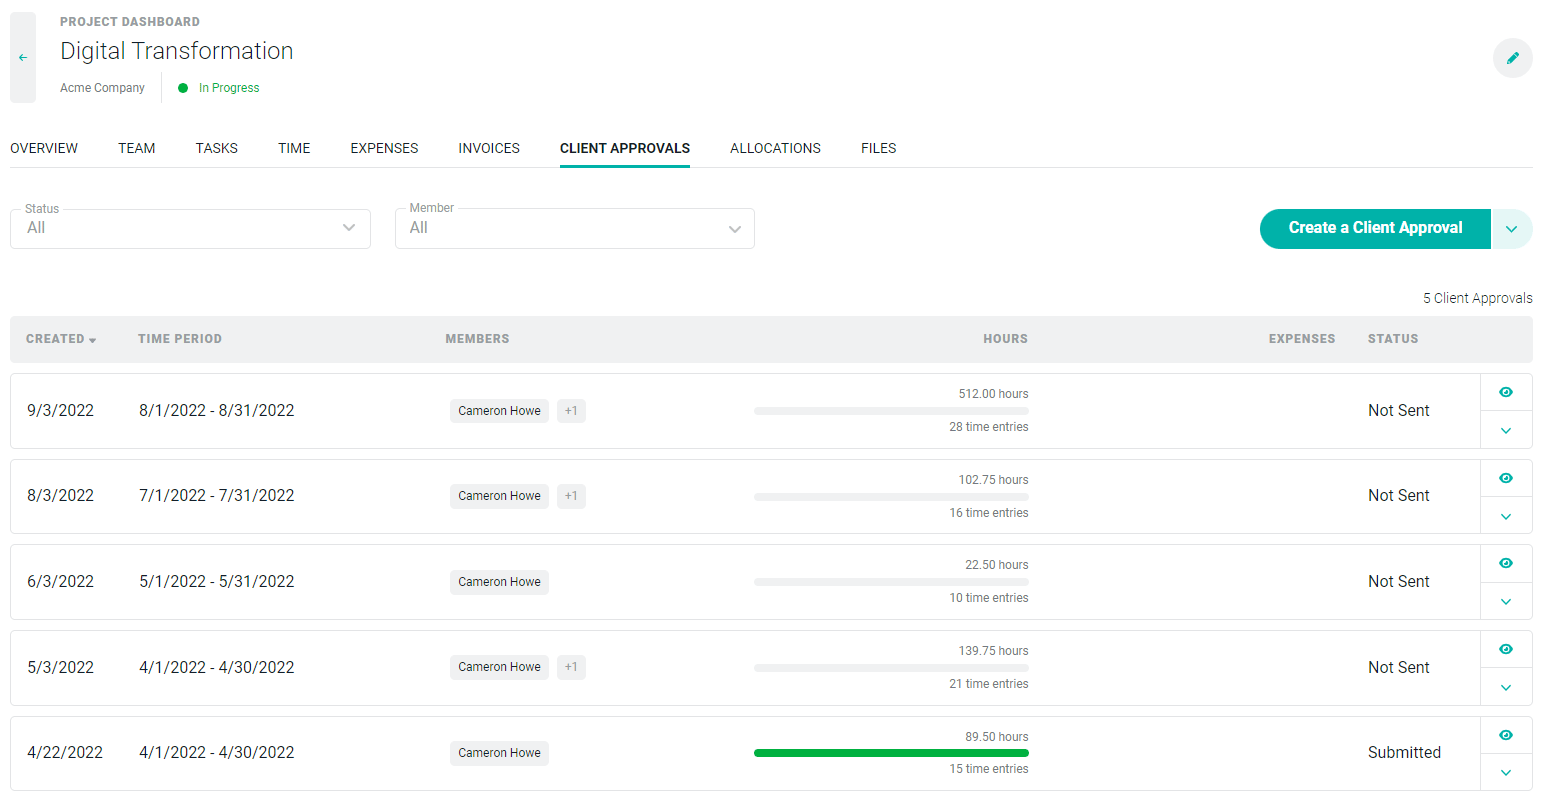 Figure 2 - A New Tab Appears when Client Approvals are Enabled
To create a new client approval, simply click the **Create a Client Approval** button at the top-right of the **Client Approvals** tab (Figure 2). This will bring up a window (Figure 3) that will allow you to set the parameters for the new client approval.
You can specify the date range and choose the types of items that you would like to have approved (hours and/or expenses). Additionally, you can opt to send reminders to the client and/or to auto-approve items if the client is non-responsive. Once these options are set, just click the **Save** button to create the new client approval.
Figure 2 - A New Tab Appears when Client Approvals are Enabled
To create a new client approval, simply click the **Create a Client Approval** button at the top-right of the **Client Approvals** tab (Figure 2). This will bring up a window (Figure 3) that will allow you to set the parameters for the new client approval.
You can specify the date range and choose the types of items that you would like to have approved (hours and/or expenses). Additionally, you can opt to send reminders to the client and/or to auto-approve items if the client is non-responsive. Once these options are set, just click the **Save** button to create the new client approval.
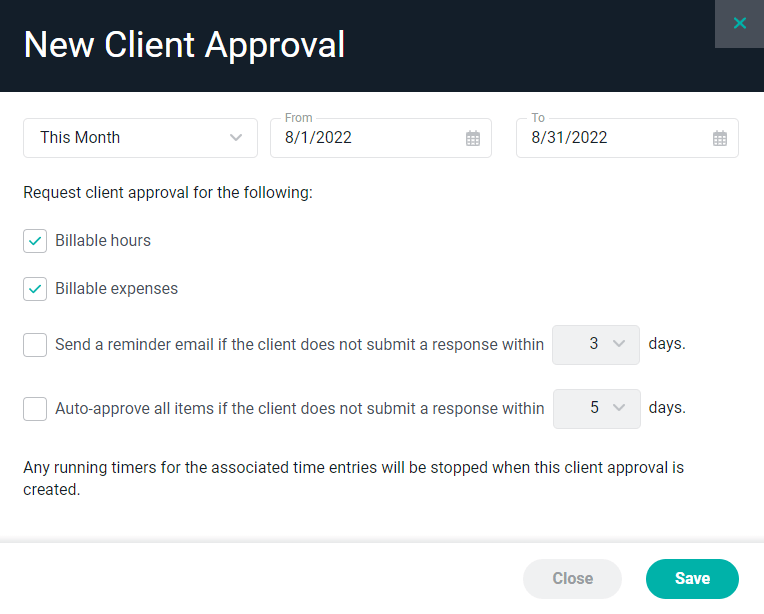 Figure 3 - Create a new Client Approval
Note that if there are any running timers within the selected date range for the project, those timers will be stopped when the client approval is created. Also, once a time entry is associated with a client approval, it can no longer have its timer started.
After the client approval has been created, the summary of that approval will be shown (Figure 2). The approval status of the time and expenses will be summarized by team member. To view the detailed time and expense items for a given team member (Figure 4), simply click on that client approval row in the list (Figure 2) to bring up the list of members and the time being submitted.
Figure 3 - Create a new Client Approval
Note that if there are any running timers within the selected date range for the project, those timers will be stopped when the client approval is created. Also, once a time entry is associated with a client approval, it can no longer have its timer started.
After the client approval has been created, the summary of that approval will be shown (Figure 2). The approval status of the time and expenses will be summarized by team member. To view the detailed time and expense items for a given team member (Figure 4), simply click on that client approval row in the list (Figure 2) to bring up the list of members and the time being submitted.
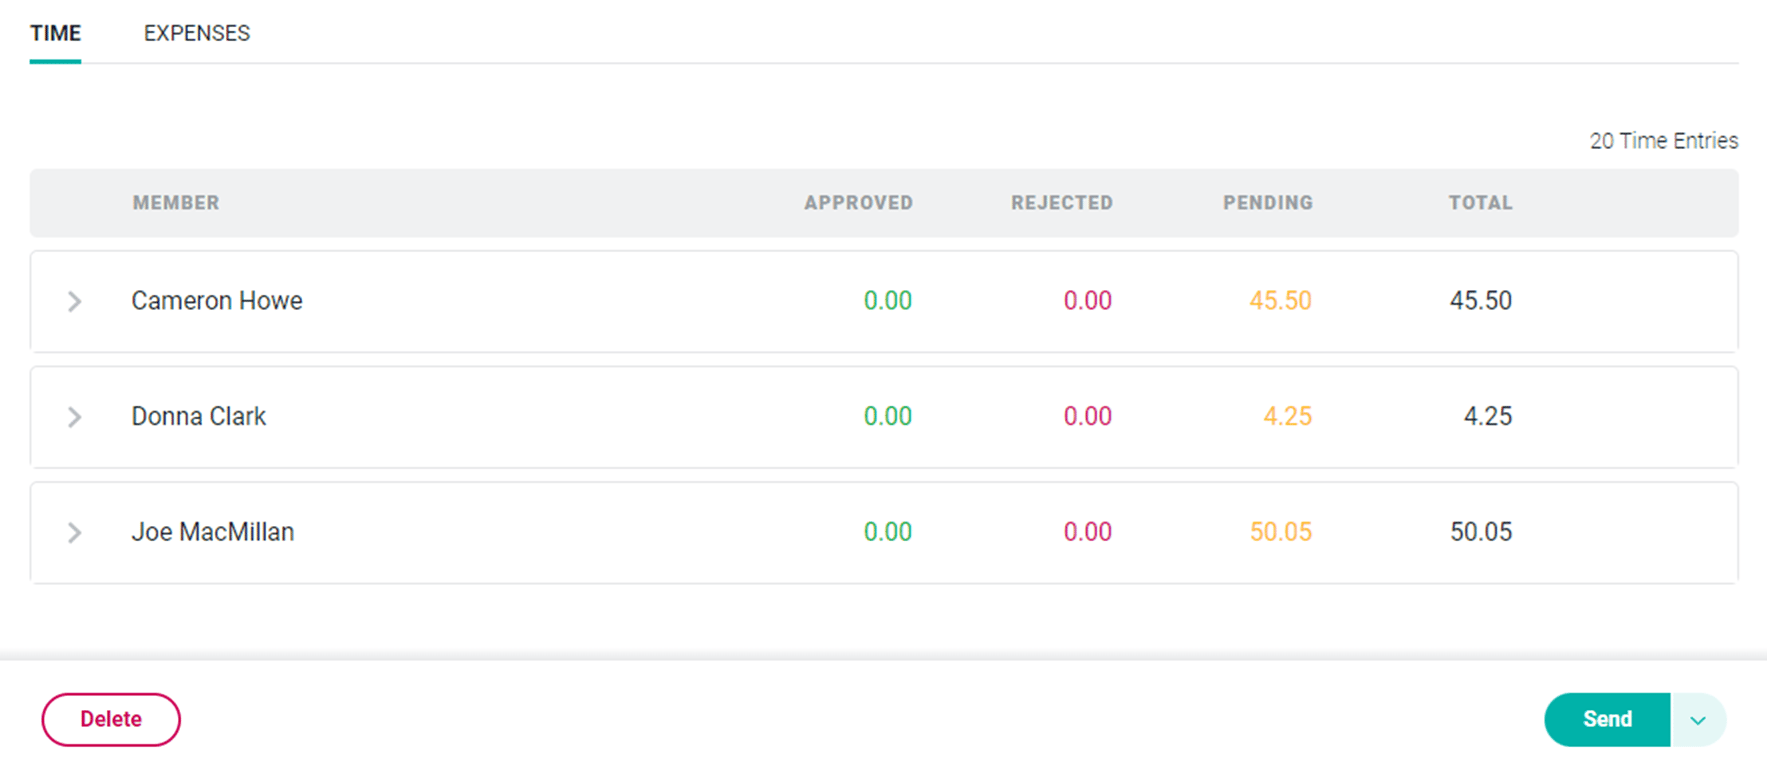 Figure 4 - Time Details Submitted for Client Approval
Note that since the new client approval hasn't been sent to the client yet, all of the items items under each member will be in a pending state. Although the items may be fully approved internally, they have not yet been approved by the client.
If items need to be added or removed from a client approval, this can be done via the **Select Items** menu option which is available by clicking the down arrow (Figure 5) on the main action button at the bottom-right of the screen (Figure 4).
Figure 4 - Time Details Submitted for Client Approval
Note that since the new client approval hasn't been sent to the client yet, all of the items items under each member will be in a pending state. Although the items may be fully approved internally, they have not yet been approved by the client.
If items need to be added or removed from a client approval, this can be done via the **Select Items** menu option which is available by clicking the down arrow (Figure 5) on the main action button at the bottom-right of the screen (Figure 4).
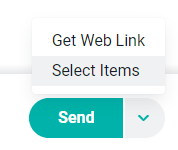 Figure 5 - Select Items to Add or Remove from Client Approval
Clicking this option will bring up the **Select Items** drawer (Figure 6) which will allow you to include or exclude specific items for the client approval. To remove an item from the approval, simply uncheck it and click the **Apply** button.
Figure 5 - Select Items to Add or Remove from Client Approval
Clicking this option will bring up the **Select Items** drawer (Figure 6) which will allow you to include or exclude specific items for the client approval. To remove an item from the approval, simply uncheck it and click the **Apply** button.
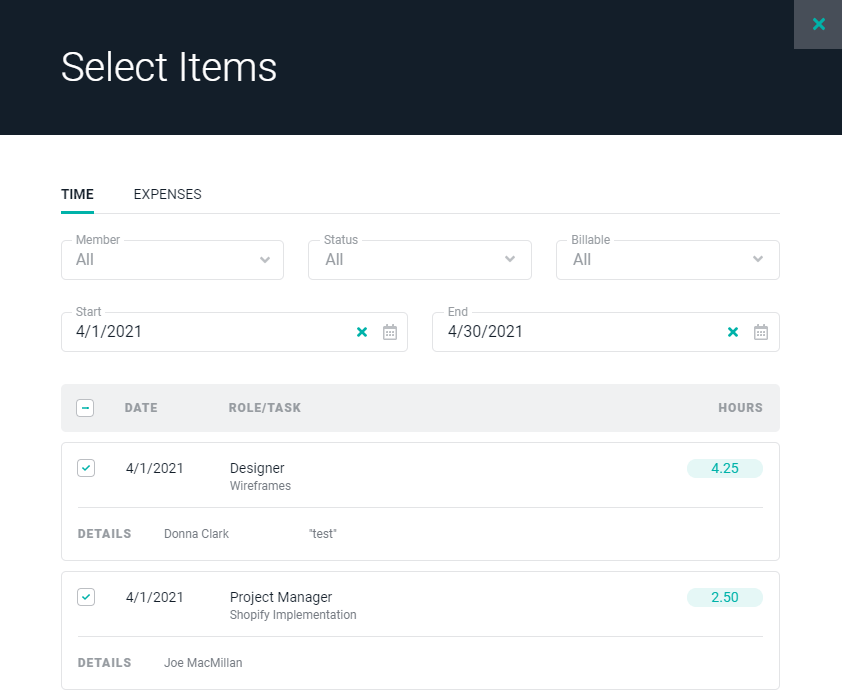 Figure 6 - Select the Time and/or Expense Items to be Included for Client Approval
Once the items on the client approval have been validated, the approval is ready to be sent to the client. This is done by clicking on the **Send** button at the bottom-right of the screen (Figure 4). This will bring up a drawer (Figure 7) that will allow you to customize the email message that the client will receive. You can send the approval to more than one client contact by separating the email addresses by a comma, semi-colon, or space, or by utilizing the Cc: field in a similar manner.
Note that if the client approval has already been submitted by the client, you will be prompted to confirm that you want to resend the client approval. Resending a client approval once the client has approved items will cause all time entries and / or expense items to have their approval status reset.
The **Send Test to Me** button on the drawer (Figure 7) allows a test email to be sent such that you can validate the email and the client approval contents. After validating the email, and/or when ready, simply click the **Send** button on the drawer to send the approval email to the client contact.
Figure 6 - Select the Time and/or Expense Items to be Included for Client Approval
Once the items on the client approval have been validated, the approval is ready to be sent to the client. This is done by clicking on the **Send** button at the bottom-right of the screen (Figure 4). This will bring up a drawer (Figure 7) that will allow you to customize the email message that the client will receive. You can send the approval to more than one client contact by separating the email addresses by a comma, semi-colon, or space, or by utilizing the Cc: field in a similar manner.
Note that if the client approval has already been submitted by the client, you will be prompted to confirm that you want to resend the client approval. Resending a client approval once the client has approved items will cause all time entries and / or expense items to have their approval status reset.
The **Send Test to Me** button on the drawer (Figure 7) allows a test email to be sent such that you can validate the email and the client approval contents. After validating the email, and/or when ready, simply click the **Send** button on the drawer to send the approval email to the client contact.
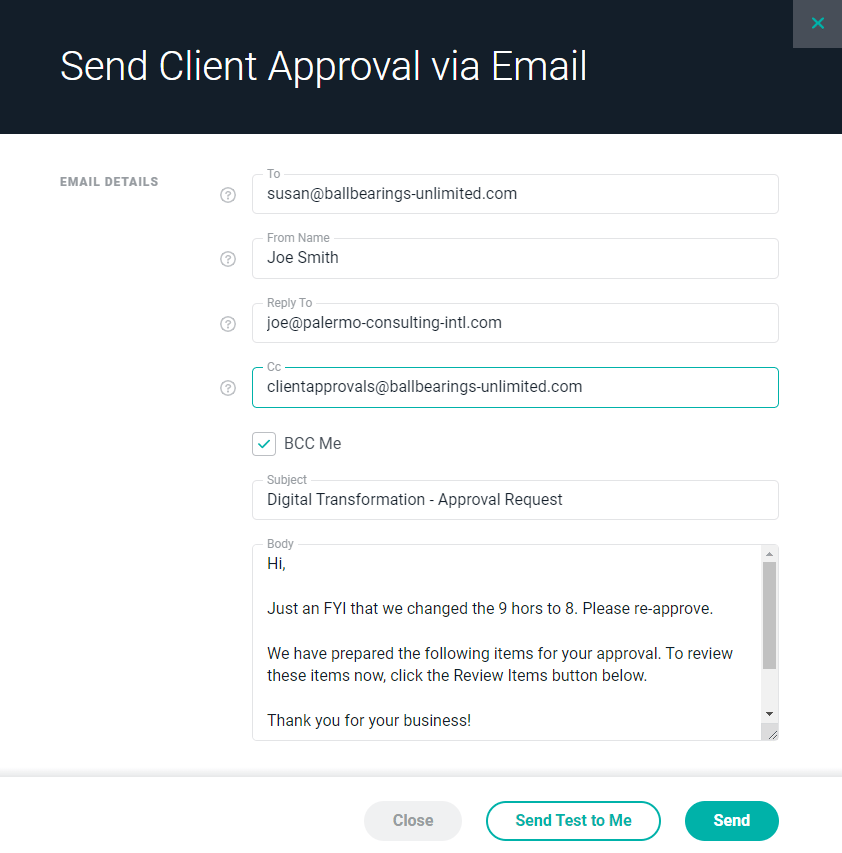 Figure 7 - Email Settings for Client Approval
#### What Your Client will See
The client email will include a **Review Items** button that will take the contact to a screen (Figure 8) where the review and approval process can be completed. This screen is similar to the internal view of the approval except that it includes actions and notifications related to the review process.
Additionally, the client will have the ability to view any prior client approvals. For those client approvals that remain outstanding, they will have the ability to take action on those as well. This can be accomplished by selecting from a list of client approvals that are available via a dropdown menu at the top of the screen.
Figure 7 - Email Settings for Client Approval
#### What Your Client will See
The client email will include a **Review Items** button that will take the contact to a screen (Figure 8) where the review and approval process can be completed. This screen is similar to the internal view of the approval except that it includes actions and notifications related to the review process.
Additionally, the client will have the ability to view any prior client approvals. For those client approvals that remain outstanding, they will have the ability to take action on those as well. This can be accomplished by selecting from a list of client approvals that are available via a dropdown menu at the top of the screen.
 Figure 8 - Client Approval Screen
The client can approve or reject all of the items by clicking the checkbox in the header bar and then selecting appropriate action in button menu (Figure 9) at the bottom of the screen.
Figure 8 - Client Approval Screen
The client can approve or reject all of the items by clicking the checkbox in the header bar and then selecting appropriate action in button menu (Figure 9) at the bottom of the screen.
 Figure 9 - Approval Button / Action Menu
Individual time and expense items may be approved or rejected by using the "thumbs up" or "thumbs down" icons (Figure 10) on the right side of the screen.
Figure 9 - Approval Button / Action Menu
Individual time and expense items may be approved or rejected by using the "thumbs up" or "thumbs down" icons (Figure 10) on the right side of the screen.
 Figure 10 - Item-by-Item Approval is Available by Using the Approve / Reject Buttons on the Item Row
As the client contact approves or rejects items, the bar (Figure 11) at the bottom-left of the screen (Figure 8) will show the progress. All of the items in the client approval must have their approval status set to either approved or rejected before the **Submit** button at the bottom-right of the screen will be enabled. *The client contact cannot submit a partial set of approvals.* When the approvals are done and the submit button is clicked, the client approval can no longer be edited by the client.
Figure 10 - Item-by-Item Approval is Available by Using the Approve / Reject Buttons on the Item Row
As the client contact approves or rejects items, the bar (Figure 11) at the bottom-left of the screen (Figure 8) will show the progress. All of the items in the client approval must have their approval status set to either approved or rejected before the **Submit** button at the bottom-right of the screen will be enabled. *The client contact cannot submit a partial set of approvals.* When the approvals are done and the submit button is clicked, the client approval can no longer be edited by the client.
 Figure 11 - The Progress Bar Displays the Number of Items Pending Approval / Approved
When the client submits the approval, the client contact will be required to type in his or her name such that Ruddr has a record of the person who completed the approval. The workspace member who created the client approval will be notified upon submission, as will the Project Admin for the project.
Once the client submits the approval, all associated time and expense items will be locked unless the workspace member has **Administer time and expenses** permission for the given project.
### Scheduled Client Approvals
For many projects, you may want to schedule client approvals such that they are automatically created and sent to the client on a periodic basis. Ruddr provides a mechanism for you to set up these client approval schedules.
To manage your client approval schedules, open the **Client Approval Schedules** drawer (Figure 13) by clicking the action menu on the **Create a Client Approval** button (Figure 12) that is found on the Client Approval tab (Figure 2) on the Project Dashboard.
Figure 11 - The Progress Bar Displays the Number of Items Pending Approval / Approved
When the client submits the approval, the client contact will be required to type in his or her name such that Ruddr has a record of the person who completed the approval. The workspace member who created the client approval will be notified upon submission, as will the Project Admin for the project.
Once the client submits the approval, all associated time and expense items will be locked unless the workspace member has **Administer time and expenses** permission for the given project.
### Scheduled Client Approvals
For many projects, you may want to schedule client approvals such that they are automatically created and sent to the client on a periodic basis. Ruddr provides a mechanism for you to set up these client approval schedules.
To manage your client approval schedules, open the **Client Approval Schedules** drawer (Figure 13) by clicking the action menu on the **Create a Client Approval** button (Figure 12) that is found on the Client Approval tab (Figure 2) on the Project Dashboard.
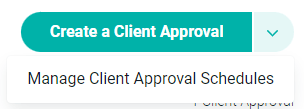 Figure 12 - Manage Client Approval Schedules from the Action Menu on the Client Approvals Tab
**Manage Client Approval Schedules**
The **Client Approval Schedule** drawer (Figure 13) allows you to manage the one or more schedules that you have created.
Figure 12 - Manage Client Approval Schedules from the Action Menu on the Client Approvals Tab
**Manage Client Approval Schedules**
The **Client Approval Schedule** drawer (Figure 13) allows you to manage the one or more schedules that you have created.
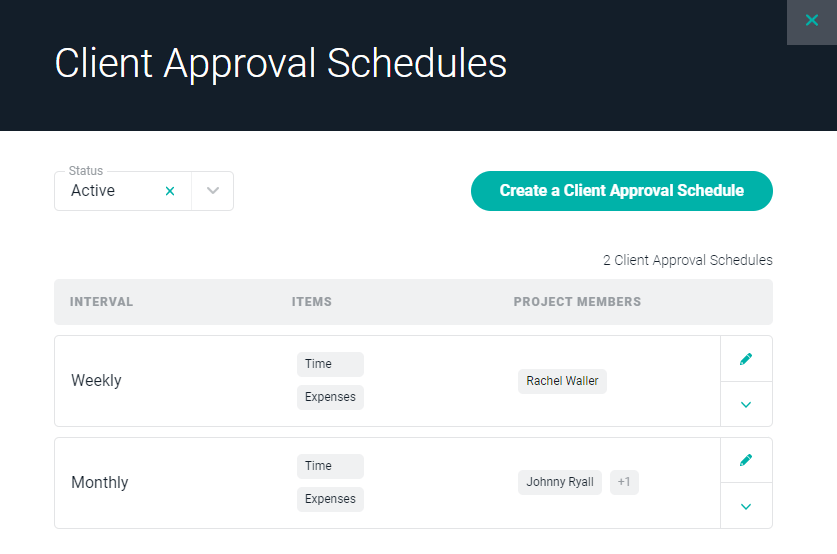 Figure 13 - Manage your Client Approval Schedules
To edit an existing schedule, click on the **Edit** pencil icon on the right side of the schedule row. Clicking to open the action menu (Figure 14) will allow you to deactivate the client approval schedule, to manually run the schedule, or to delete the schedule for the project.
Figure 13 - Manage your Client Approval Schedules
To edit an existing schedule, click on the **Edit** pencil icon on the right side of the schedule row. Clicking to open the action menu (Figure 14) will allow you to deactivate the client approval schedule, to manually run the schedule, or to delete the schedule for the project.
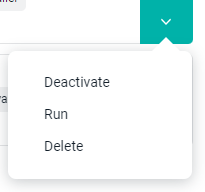 Figure 14 - Client Approval Schedule Action Menu
**Create a New Client Approval Schedule**
To create a new client approval schedule, click the **Create a Client Approval Schedule** button on the drawer. This will bring up the **Add Client Approval Schedule** drawer (Figure 15), where you can specify the schedule, email and auto-approval settings, project members, time and expense settings, and email details. This experience is very similar to the one you will encounter creating a [single-batch client approval](#single-batch-client-approval), but with additional information related to the schedule itself.
First, specify schedule you want to create, whether that is Monthly, Semi-Monthly, or Weekly.
Then, specify how many days after the close of the period you want to wait before creating the approval. As part of this, you can set the time zone for when the client approval will be created by Ruddr. If a time zone is not provided, the approval will be created at 9 am in the workspace time zone as defined in [Workspace Settings](/workspace-administration/general-workspace-settings).
Next, specify the Project team members that you want to include in this approval schedule, and whether or not time and / or expenses should be included. If you wish to include time and / or expense, specify whether they must be internally approved prior to be included on the client approval request.
Figure 14 - Client Approval Schedule Action Menu
**Create a New Client Approval Schedule**
To create a new client approval schedule, click the **Create a Client Approval Schedule** button on the drawer. This will bring up the **Add Client Approval Schedule** drawer (Figure 15), where you can specify the schedule, email and auto-approval settings, project members, time and expense settings, and email details. This experience is very similar to the one you will encounter creating a [single-batch client approval](#single-batch-client-approval), but with additional information related to the schedule itself.
First, specify schedule you want to create, whether that is Monthly, Semi-Monthly, or Weekly.
Then, specify how many days after the close of the period you want to wait before creating the approval. As part of this, you can set the time zone for when the client approval will be created by Ruddr. If a time zone is not provided, the approval will be created at 9 am in the workspace time zone as defined in [Workspace Settings](/workspace-administration/general-workspace-settings).
Next, specify the Project team members that you want to include in this approval schedule, and whether or not time and / or expenses should be included. If you wish to include time and / or expense, specify whether they must be internally approved prior to be included on the client approval request.
 Figure 15 - Create a new Client Approval Schedule
Note that Ruddr will not create a client approval if the project has been archived or if the project's status is anything other than "In Progress".
Figure 15 - Create a new Client Approval Schedule
Note that Ruddr will not create a client approval if the project has been archived or if the project's status is anything other than "In Progress".