> ## Documentation Index
> Fetch the complete documentation index at: https://help.ruddr.io/llms.txt
> Use this file to discover all available pages before exploring further.
# Xero Invoice Export Integration Overview
The Xero Invoice Export Integration is an alternative to the full [Xero integration](/integrations/xero-integration-overview). While the full integration supports the bidirectional synchronization of invoices, payments, and credit notes, the Xero Invoice Export Integration allows for a manual unidirectional exporting of invoices from Ruddr into Xero. Invoices are exported from Ruddr in a standard CSV (comma separated values) format defined by Xero.
### Enabling the Xero Invoice Export Integration
The Xero Invoice Export Integration can be enabled from within the [Integrations](/workspace-administration/integrations) section of [Workspace Settings](/workspace-administration/managing-your-workspace). A member must have the Workspace Admin security role to access and enable this integration.
From within the Integrations section, there will be a Xero Invoice Export tile (Figure 1). Click **Install** to enable and configure the integration.
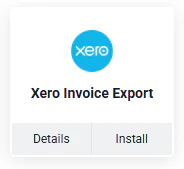 Figure 1 - Click **Install** to enable the Xero Invoice Export Integration in your Workspace
#### Integration Settings
Upon clicking **Install**, you will be prompted (Figure 2) to configure the integration settings. The settings are as outlined below.
Figure 1 - Click **Install** to enable the Xero Invoice Export Integration in your Workspace
#### Integration Settings
Upon clicking **Install**, you will be prompted (Figure 2) to configure the integration settings. The settings are as outlined below.
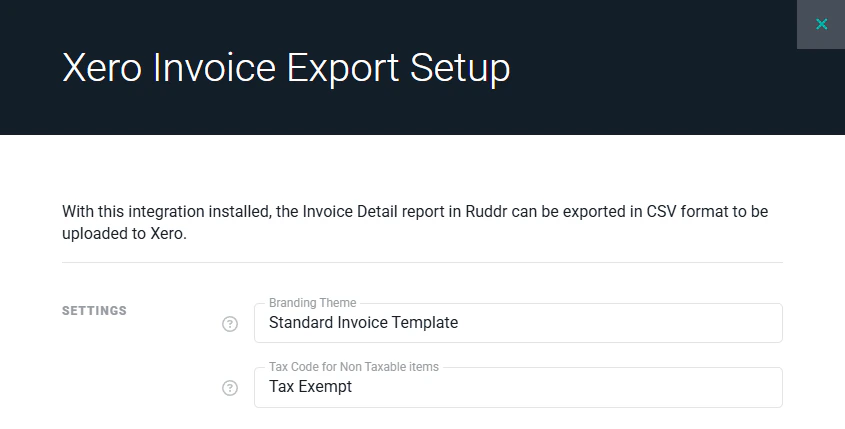 Figure 2 - Specify the settings for the Xero Invoice Export Integration
The following fields can be configured for the integration:
* **Branding Theme** - Xero supports the concept of Branding Themes which allow you to customize an invoice. For example, you could use a separate branding theme for each country in which your business operates and each theme could have its own street address. If no Branding Theme is provided, Xero will use the default Branding Theme.
* **Tax Code for Non-Taxable Items** - For items that will not have tax, you must supply the name of a tax code for non-taxable items. The default tax code for non-taxable items in Xero is "Tax Expense (0%)".
### Generating the Export File
Once the Xero Invoice Export Integration has been installed and configured, you are ready to export invoices out of Ruddr and import them into Xero. With the integration installed, the Invoice Detail report will have a new export option labeled "Export to Xero CSV", as shown below.
Figure 2 - Specify the settings for the Xero Invoice Export Integration
The following fields can be configured for the integration:
* **Branding Theme** - Xero supports the concept of Branding Themes which allow you to customize an invoice. For example, you could use a separate branding theme for each country in which your business operates and each theme could have its own street address. If no Branding Theme is provided, Xero will use the default Branding Theme.
* **Tax Code for Non-Taxable Items** - For items that will not have tax, you must supply the name of a tax code for non-taxable items. The default tax code for non-taxable items in Xero is "Tax Expense (0%)".
### Generating the Export File
Once the Xero Invoice Export Integration has been installed and configured, you are ready to export invoices out of Ruddr and import them into Xero. With the integration installed, the Invoice Detail report will have a new export option labeled "Export to Xero CSV", as shown below.
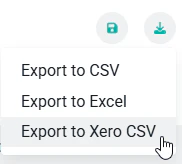 Figure 3 - The **Export to Xero CSV** option on the Invoice Detail Report export menu will create the CSV file
Prior to downloading the CSV file, Ruddr will prompt the user with a list of recommendations (Figure 4) to consider prior to importing the file into Xero. These recommendations include:
* Ensure that the client names in Ruddr match the corresponding contact names in Xero. These must match exactly on a character-by-character basis.
* Ensure that the Ruddr invoice item names match the corresponding Xero item names. Also, ensure that the General Ledger Code on each Ruddr Invoice Item (in the [Custom Data](/workspace-administration/custom-data) are of [Workspace Settings](/workspace-administration/general-workspace-settings)) matches the chart of accounts code in Xero.
* Ensure that the tax rate names in Ruddr match the corresponding tax rate names in Xero.
Figure 3 - The **Export to Xero CSV** option on the Invoice Detail Report export menu will create the CSV file
Prior to downloading the CSV file, Ruddr will prompt the user with a list of recommendations (Figure 4) to consider prior to importing the file into Xero. These recommendations include:
* Ensure that the client names in Ruddr match the corresponding contact names in Xero. These must match exactly on a character-by-character basis.
* Ensure that the Ruddr invoice item names match the corresponding Xero item names. Also, ensure that the General Ledger Code on each Ruddr Invoice Item (in the [Custom Data](/workspace-administration/custom-data) are of [Workspace Settings](/workspace-administration/general-workspace-settings)) matches the chart of accounts code in Xero.
* Ensure that the tax rate names in Ruddr match the corresponding tax rate names in Xero.
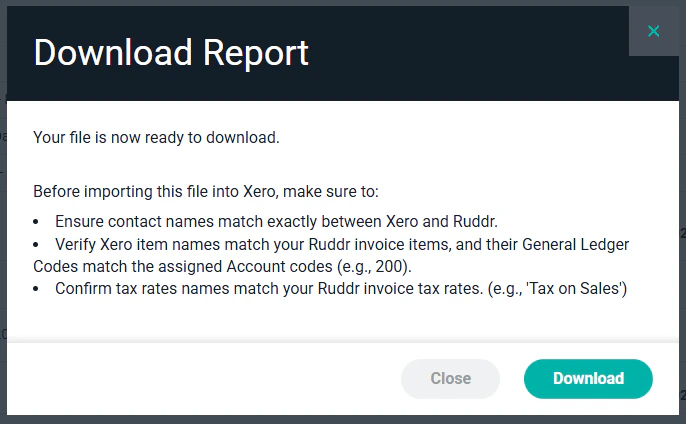 Figure 4 - Recommendations Prior to Importing the CSV File into Xero
### Importing the Invoices into Xero
To import the invoice CSV file that was generated in the previous step, log in to Xero and choose the **Business** main menu option and the **Invoices** secondary menu option. This will bring up the Invoices screen. At the top of this screen, click on the Import button to begin the import process.
Figure 4 - Recommendations Prior to Importing the CSV File into Xero
### Importing the Invoices into Xero
To import the invoice CSV file that was generated in the previous step, log in to Xero and choose the **Business** main menu option and the **Invoices** secondary menu option. This will bring up the Invoices screen. At the top of this screen, click on the Import button to begin the import process.
 Figure 5 - Click on the **Import** button to initiate the import process
The Import button will bring up the **Import your invoices** screen. This screen includes additional information as well as a **Browse** button for selecting the import file. Once you select the file, simply click the **Import** button to begin the import process.
Figure 5 - Click on the **Import** button to initiate the import process
The Import button will bring up the **Import your invoices** screen. This screen includes additional information as well as a **Browse** button for selecting the import file. Once you select the file, simply click the **Import** button to begin the import process.
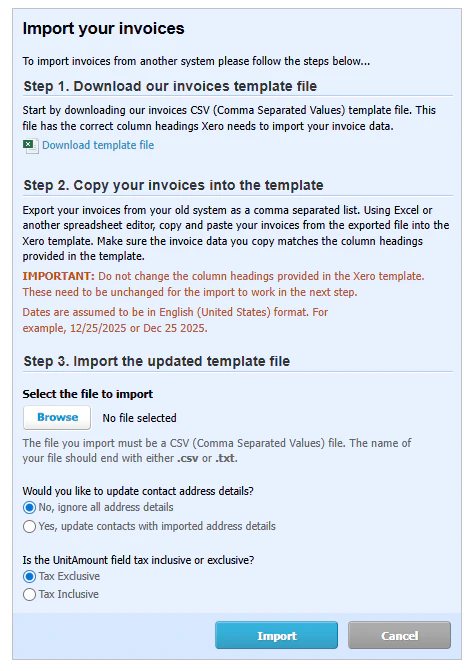 Figure 6 - Click the **Browse** button to select your import file and initiate the import process
If the import process encounters any problems with the import file, you will be presented with specifics related to the error. In the example below, the import file contained an invoice number that already existed in Xero.
Figure 6 - Click the **Browse** button to select your import file and initiate the import process
If the import process encounters any problems with the import file, you will be presented with specifics related to the error. In the example below, the import file contained an invoice number that already existed in Xero.
 Figure 7 - A failed import message indicating that a duplicate invoice number was encountered
If the import completes without errors, you will be shown a confirmation message and will just need to click on the **Complete Import** button to finalize the import process.
Figure 7 - A failed import message indicating that a duplicate invoice number was encountered
If the import completes without errors, you will be shown a confirmation message and will just need to click on the **Complete Import** button to finalize the import process.
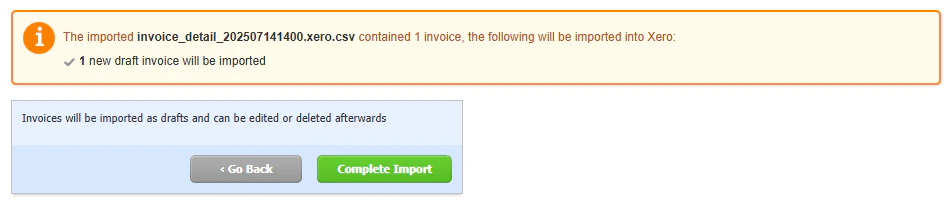 Figure 8 - Click the **Complete Import** button to finalize a successful invoice import